Worldgen Docker Demo
I’ve had a few requests about how to get my star system generator WorldGen working, and the answer is normally that it probably requires a lot of technical knowledge to do so. It’s a server application which requires a database (MySQL) and web server (SparkJava). It’s mostly managed by command line, but has a web interface for viewing the generated content. If you’re a developer, it should be quite easy to get going. If you’re not, then it’s a huge hurdle to get over.
If you want some information on exactly what WorldGen is and does, I’d suggest checking out the wiki pages.
So I’ve tried to simplify things by providing a docker container. Okay, that only simplifies things a little bit, but it at least cuts it down to a few commands in a single environment, and I’ve tried to automate as much as I can. Remember though that WorldGen is very much Alpha software, and is far from being complete or stable.
What is docker? It’s a container framework that allows you to run lightweight virtual machines on your desktop. Rather than having to setup and install a database, you download and run a docker container that already contains a database already installed and setup for you.
It’s probably even easier if you use Docker Desktop, which is a GUI front end for what I’m about to talk about. It’s free for personal use, but has the disadvantage of not running on Linux. Since you’re probably not on Linux, this won’t be an issue – except I am and therefore can’t use it. I haven’t even seen it running, so can’t provide any help or advice on how to use it.
One thing to know about Docker, is that generally each container runs a single thing. What we need are a database and the web server, so we need two docker containers. We’ll call these ‘database‘ and ‘worldgen‘.
Setting up the environment
If you’re on Linux, I assume you can figure out how to install Docker. If you’re not, then try the Docker Desktop link above and download that. Once that is done, you need an environment file to define databases, users and passwords. Create a file called env which contains something like the following:
MYSQL_DATABASE=worldgen
MYSQL_USER=worldgen
MYSQL_PASSWORD=worldgen
MYSQL_ROOT_PASSWORD=worldgenroot

MYSQL_HOST=database
MYSQL_PORT=3306
I’d really recommend using something more secure than the above passwords. Once you have that, you need to create a network so that both docker containers can talk to each other:
docker network create worldgenNow we need an empty database. The simplest command to get this working is as follows:
docker run -d --name database --network worldgen \
    --network-alias db --env-file env mysql:latest
This is fine for simple testing, but when you shutdown the container you’ll lose all your data. So what you probably want to do is to create a volume mount so that the database files are kept outside of the docker container. You might also want to expose a port so you can connect to the database directly. How to do this is explained over in the GitLab project. For now though, we’ll keep it simple.
Next, we need to download and run the web server. This is WorldGen itself, and consists of a container with Java and the WorldGen code in it, as well as some scripts and data for getting things running. To run all this, run:
docker run -d --name worldgen --network worldgen --network-alias worldgen \
    --env-file env -p 4567:4567 notasnark/worldgen:2.8
This downloads the worldgen container, runs it, configures the database and sets up some basic data. Once it’s all done, if everything has gone to plan, then you should then be able to point your browser at http://localhost:4567/ and see something like this:
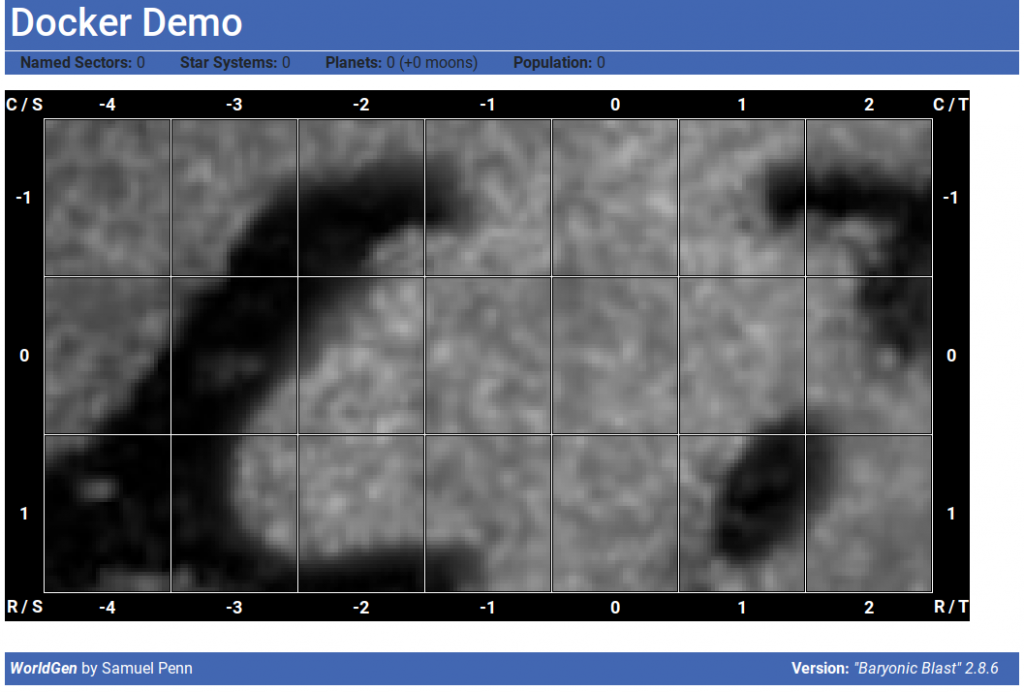
This is an empty ‘density map’ of Chartered Space for Traveller. You can upload your own map if you want, and change the coordinates displayed, by going to http://localhost:4567/config. Each grid is a sector, though none of them are currently named, or even defined. What we want to do next, is probably start defining things.
Building Worlds
First of all, we can confirm that there is no sector data in the system:
docker exec -it worldgen run.sh sectorsThis will return nothing, because we haven’t defined anything. What it’s actually doing here is going onto the worldgen docker container and running run.sh with a parameter of sectors.
To create a couple of sectors from the Traveller universe, we can do this:
docker exec -it worldgen run.sh sector -4,0 Trojan Reach
docker exec -it worldgen run.sh sector -3,0 Reft
docker exec -it worldgen run.sh sectors
Running this from the Linux command line will look something like this:
$ docker exec -it worldgen run.sh sector -4,0 Trojan Reach
Created sector [1] [Trojan Reach]
$ docker exec -it worldgen run.sh sector -3,0 Reft
Created sector [2] [Reft] $
$ docker exec -it worldgen run.sh sectors
1 -4,0 Trojan Reach
2 -3,0 Reft
$
So we now have two sectors created, but still no star systems. So the next step is to create star systems. There are two options. The first is that we specify each individual system. Or a simpler approach is to just use the density map to let WorldGen decide where to put them:
docker exec -it worldgen run.sh populate -3,0 JThis will create a number of star systems in the middle of Reft sector. J is the sub-sector coordinate, which go from A to P, top left to bottom right. Reft/J is relatively now density, so it shouldn’t take too long to generate some star systems here. Once it is finished, you can reload the page and you should have some systems (maybe about a dozen) showing on your map.
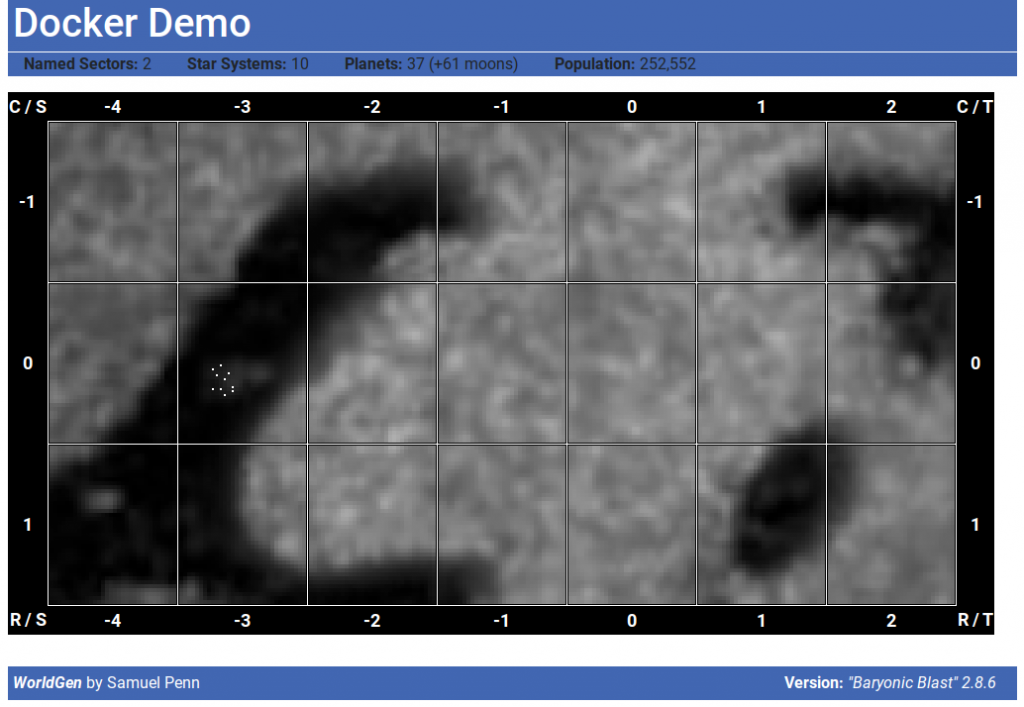
Notice that the statistics at the top have changed to reflect the new totals. We have 10 star systems, 37 planets, 61 moons and a total galactic population of 252,552. Click on the Reft sector, and you’ll see a list of the randomly generated star systems. Click on those to see the details of each one.
The other way to generate a system is to specify the position and type exactly. For example:
docker exec -it worldgen run.sh system -4,0 1036 YellowStar RockyWorldsThis creates a system in sector -4,0, at coordinates 1036, using the system generator YellowStar/RockyWorlds. There are a number of different generators, you’ll need to look through the code to find them all.
After a system is created, it’ll print out the ID for the system. You can then run other commands to pull out information directly. For example, if the system just generated had ID 16, you can print out details on the planets in the system, get their IDs, and use them to grab the world map.
$ docker exec -it worldgen run.sh print 16
Etus I [99] Hermian
T: 744K R: 2,386km D: 53,409,428km
Etus I/a [100] Metallic – T: 424K R: 6km D: 9,544km
Etus I/b [101] Silicaceous – T: 434K R: 8km D: 15,083km
Etus II [102] Hermian
T: 604K R: 2,359km D: 83,169,717km
Etus III * [103] MesoGaian
T: 306K R: 6,640km D: 132,040,433km
Etus III/a [104] Selenian – T: 260K R: 1,115km D: 244,352km
Etus IV [105] MesoArean
T: 276K R: 3,360km D: 200,524,053km
Etus IV/a [106] Silicaceous – T: 228K R: 7km D: 20,160km
Etus IV/b [107] Carbonaceous – T: 229K R: 5km D: 27,086km
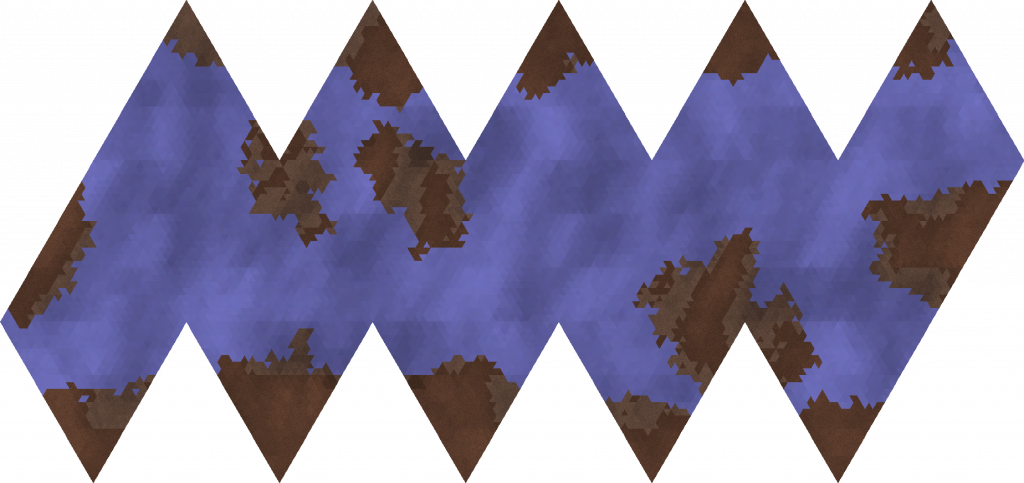
$ docker exec -it worldgen run.sh map 103 main
Written map to 103-main.png
Unfortunately, since the command is being run inside the docker container, the map gets written inside the docker container. You can fix this by mounting the internal file system, or the quick workaround is to copy the file out of the container onto the local file system.
docker cp worldgen:/root/103-main.png .This will copy the file locally, allowing you to view it. Alternatively, you can just view them in the web UI and download directly from there.
There will be several maps for most worlds – normally the main map, height map and possibly some cloud maps. If you run the map command without the map name, it will give you a list. Appending “-stretch” to a map will give you a stretched version of the map, which is a continuous map that can be used to created textures. You can also modify a map and upload it back to the server, by specifying the filename to upload.
To see the full list of commands, just use run.sh without any arguments.
$ docker exec -it worldgen run.sh
WorldGen (“Baryonic Blast” 2.8.6)
<command> <options>
status – Get status on configured universe.
server – Start a web application server running.
sectors – List all known sectors.
sector – Create one or more new sectors.
<x,y> <name> …
system – Create one or more new systems.
<sector> <xxyy> [<name>]
populate – Populate a sector.
<sector>
print – Print out data on a star system
<systemid>
time Display or set the current time
<datetime>
map Display or set a planet’s maps
<planetid> [<map> [<filename>]
text Write (or read) description of planet to file
<planetid> [<filename>]
galaxy – Upload a PNG as galaxy map
<filename>
version – Print out the current version
So there we have it – a reasonably quick way to get WorldGen working. As long as you can figure out the Docker side of things. I’d definitely recommend taking a look at the README file in the project for some more details on setting up a more permanent solution. The above details will mean you’ll lose all your data when things are restarted.
- https://hub.docker.com/repository/docker/notasnark/worldgen – The docker image for WorldGen.
- https://gitlab.com/samuelpenn/worldgen/-/tree/master/WorldGen – The Git project where you can find the source files for these things, as well as some extra documentation.
- https://www.notasnark.net/worldgen/index – The wiki which describes everything.