Battle of Soggy Marsh
Our second game of Saga: Age of Chivalry once again pitted the English against the French. This time we used the later French army list, the Compagnie d’Ordonnance. Once again we went for a random game selected from the book of battles, which ended up putting us in a different marsh.
We kept on drawing the same options as last time, so redrew to get something different. It was different, but similar in that we ended up with very little terrain and both started quite close to each other.
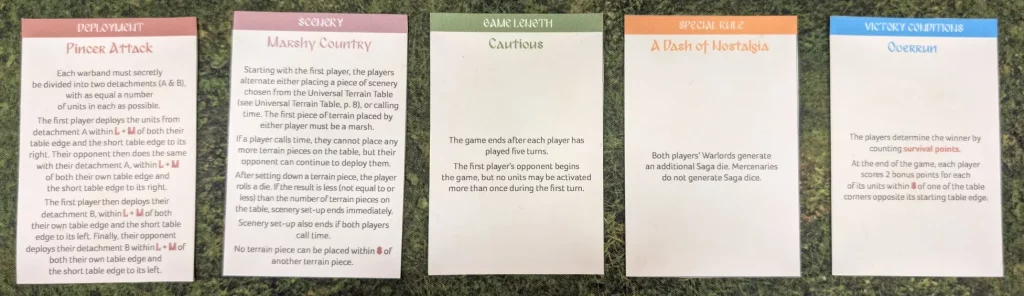
Cautious meant that we could only activate each unit once during our first turn. We would also be counting Survival Points, plus a bonus for getting into the opposing corners.
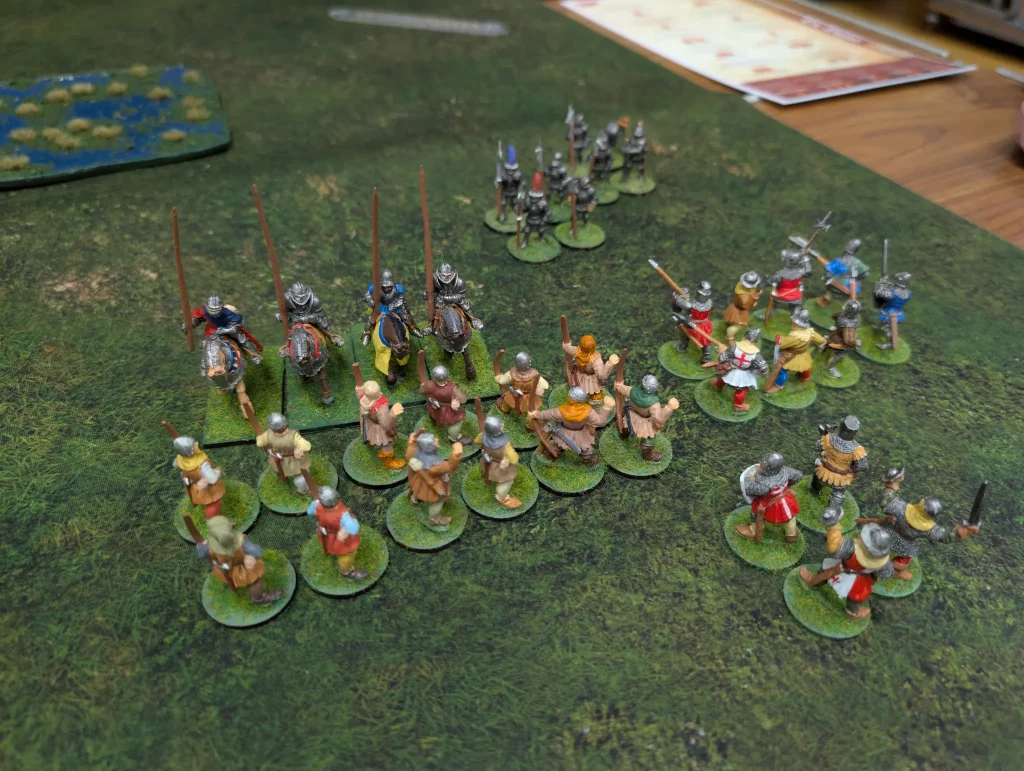
The English army were the same troops, except I merged the three units of archers into two units. These gave me 12 warriors in each unit, making them a bit more deadly. Only getting four attack dice for shooting previously hadn’t felt effective enough.
The French Compagnie d’Ordonnance went for barding on all their horses, but only having four points of mounted Hearthguard (rather than six) this time. The other two points they spent on Hearthguard infantry. This would at least allow them to move into uneven terrain. They also combined their units, putting 3 points into two units of 6 Hearthguard for some extra hitting power.
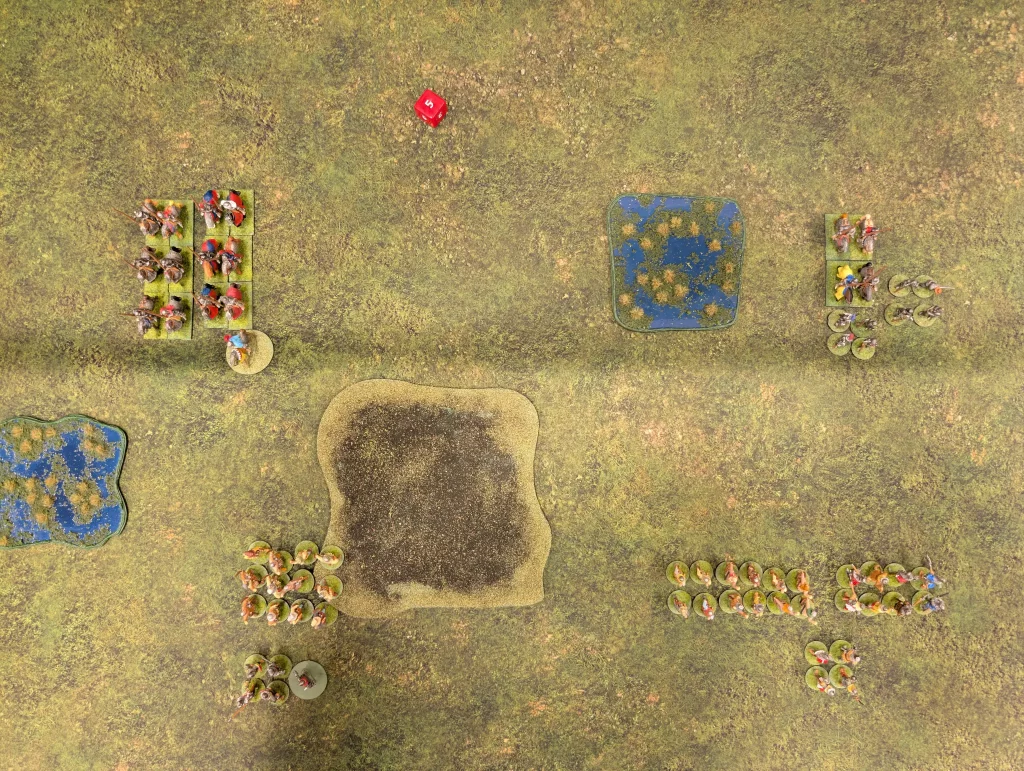
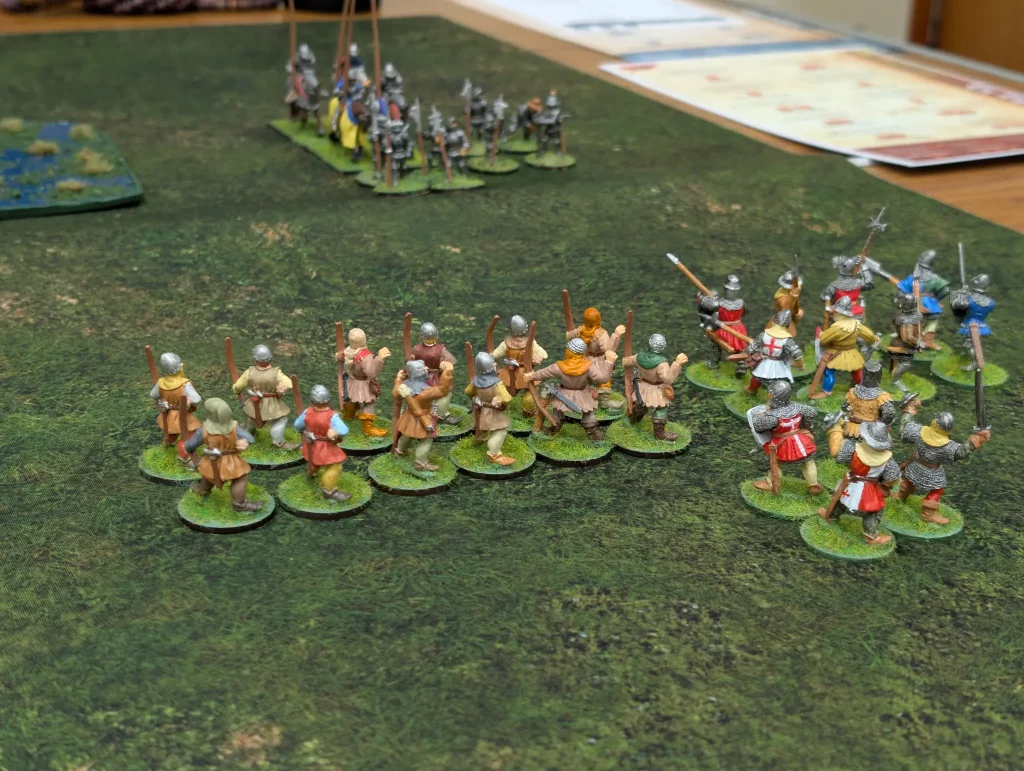
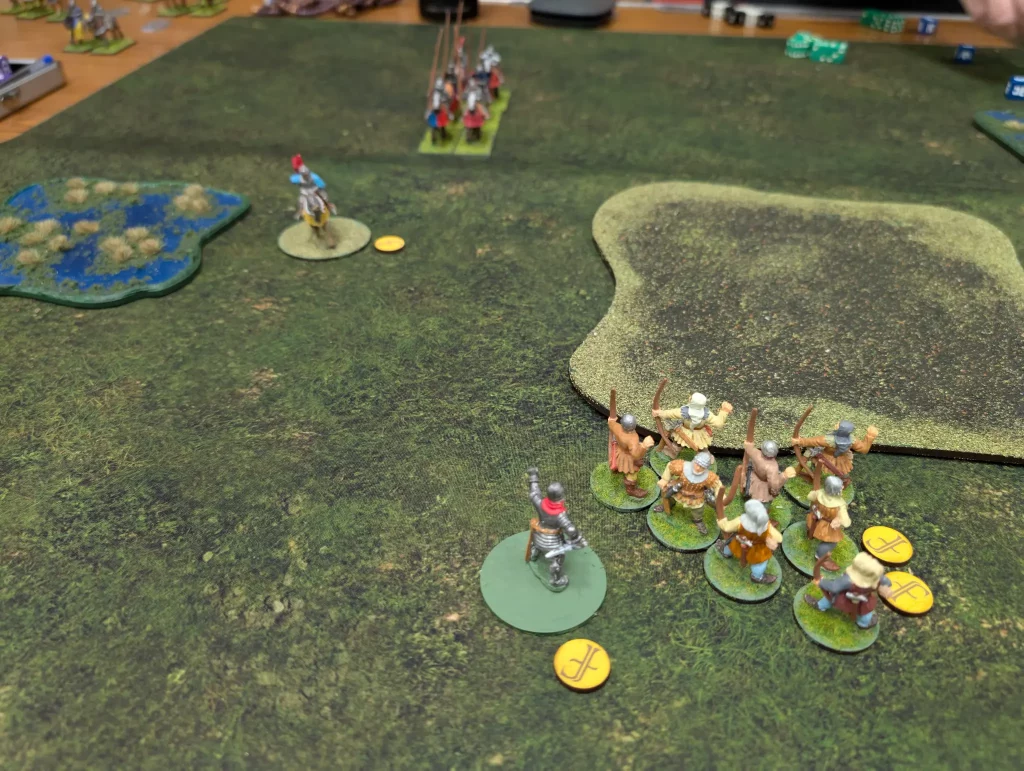
I tried to use the terrain to give myself some cover, and used some rough ground rather than woods. Since the French had no shooting units, there was no point trying to block line of sight. I just wanted to block cavalry.
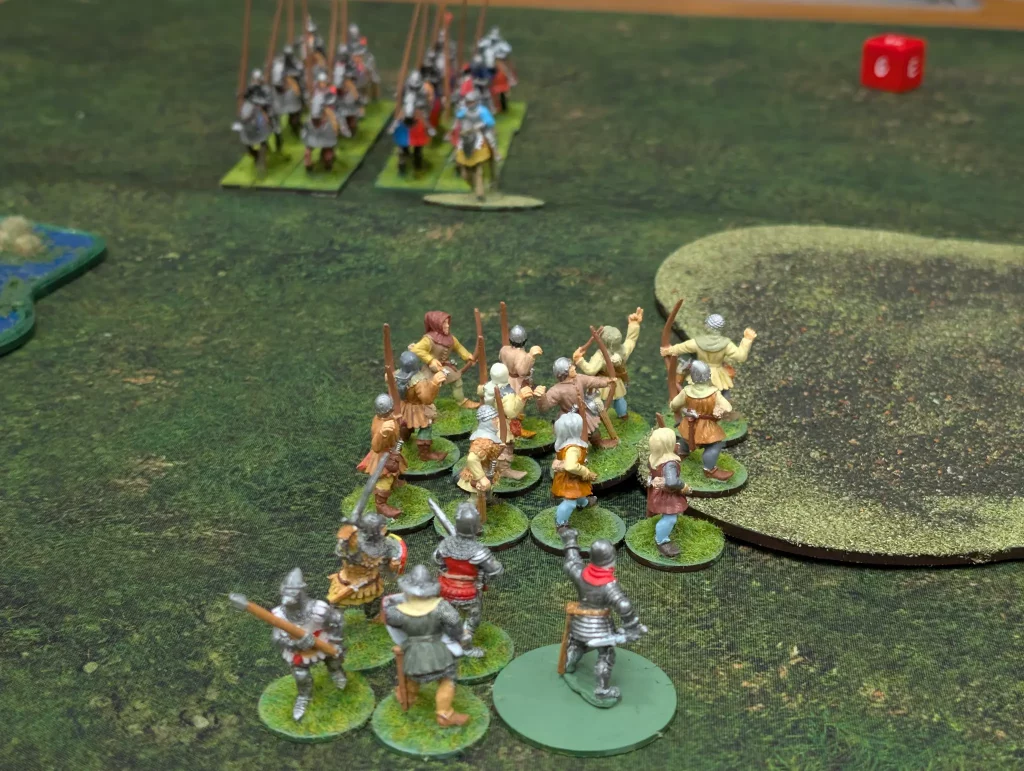
With deployment being within L+M of the corners, it allowed the French to once again deploy their forces a lot further forward than the English would have liked. I placed one unit of longbowmen next to the rough ground, to give them a chance to get into there. Cavalry do not play nicely with rough ground, so it would give them some measure of protection.
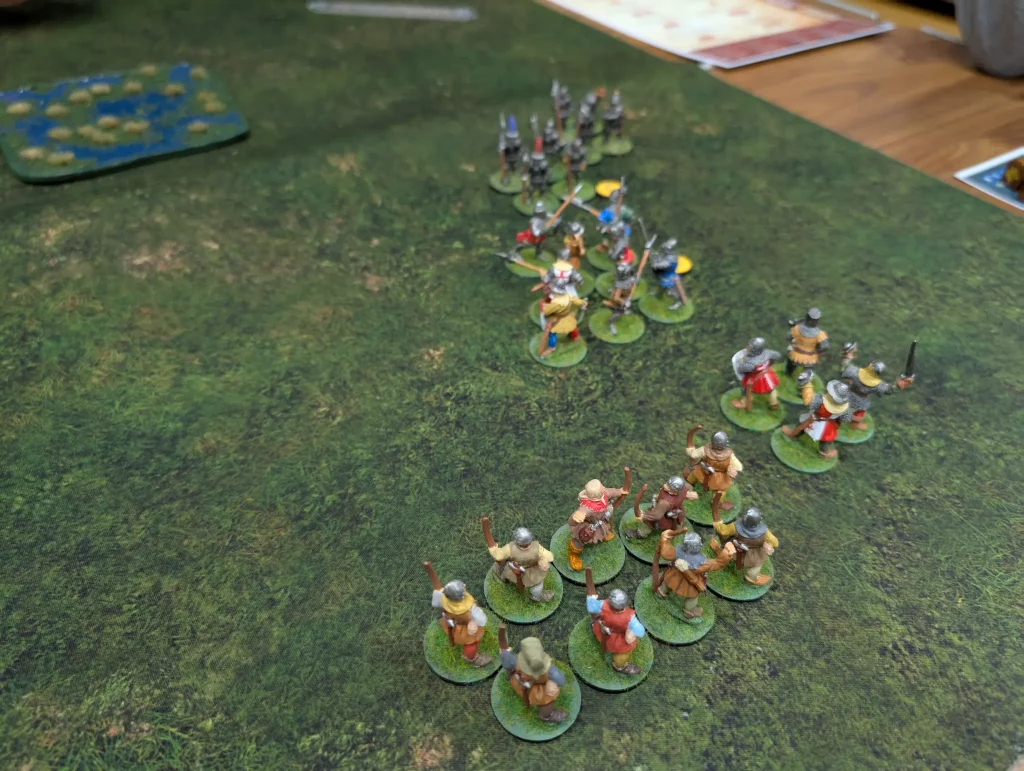
As a side note, the mid-table ridge is clearly visible in the above photo. The hall where we play has standard ‘long/thin’ foldable tables, so you need two to fit a game on. They are never quite the same height, plus have a small ridge around the edges. This makes it difficult to place terrain over the table centre without it wobbling every time anything moves.
Turn 1
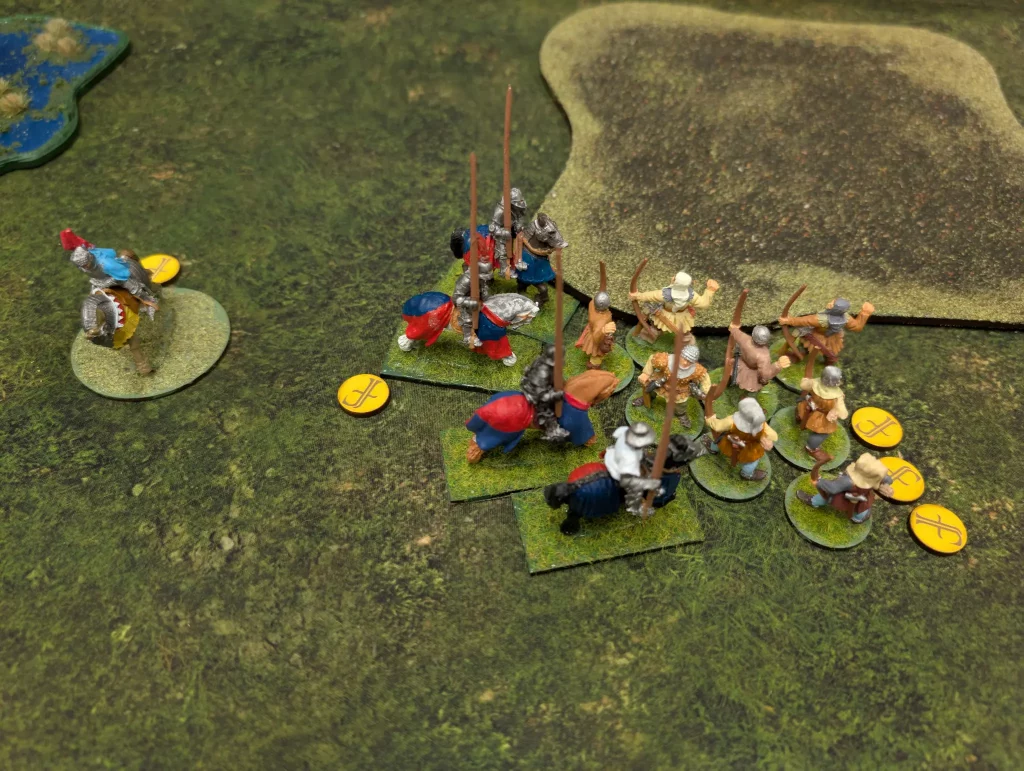
The French. Once again they were within very short range of the English. They moved their left flank towards the English, and charged on their Right flank, a unit of 6 hearthguard slamming into the unit of 12 English longbowmen.
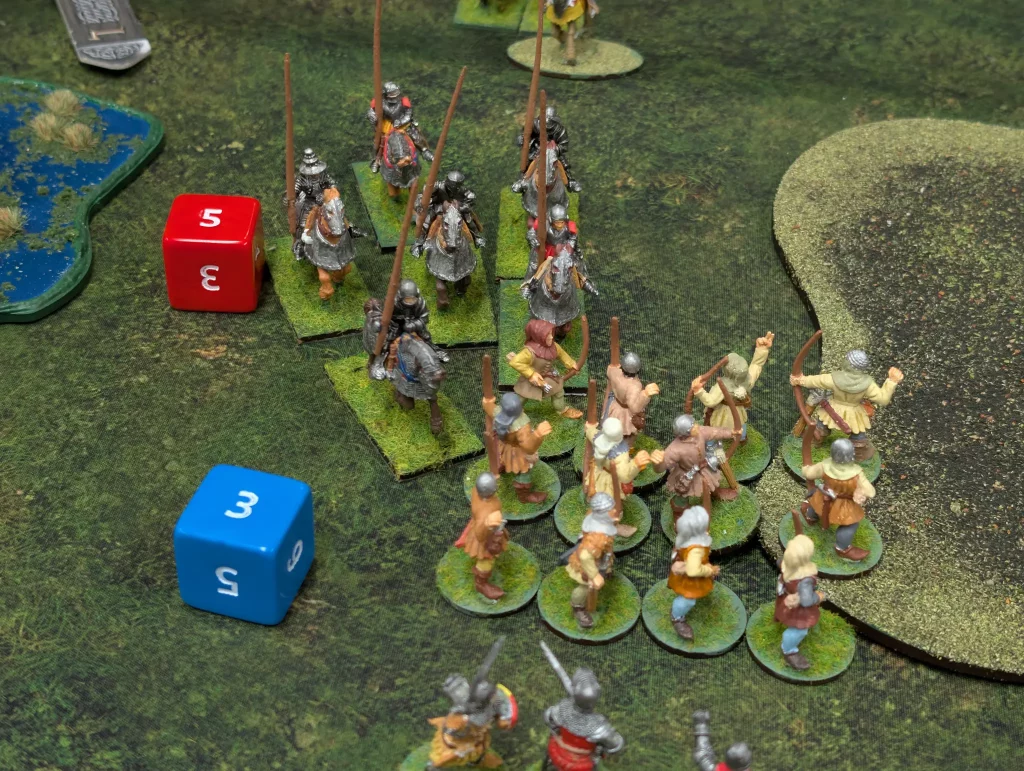
We each had 12 attack dice, and despite the armour difference the English killed three of the French Hearthguard, whilst taking four casualties themselves. The English fell back.
The French thought about charging in their Warlord against the English Hearthguard unit, but decided against it. Which was a shame, because I would have put everything into killing their leader on the English turn.
The French finally charged the Longbowmen on their left flank, kill three of them, but taking two casualties themselves. This unit of Hearthguard only had four cavalry, so it was halved in size.
The English. I took a lot of effort to come up with a cunning plan, then failed to implement it. I knew exactly what I wanted each of my units to do, and I had the dice to do it.
The longbowmen on my right flank opened up with a shooting attack and Rain of Arrows, getting a single hit and no kills.
Then, my left flank Hearthguards used Saint George! to activate, charging the 3 mounted French Hearthguard. I had 13 attack dice to their 6, and wiped them out. Unfortunately, they also wiped me out, leaving my Warlord without bodyguards.
My next plan was to use Maul! to charge in my longbowmen – the ones that had already shot. Since we could only activate each unit once in the first turn, this scuppered my plans. I realised I’d used the wrong unit to shoot.
My melee warriors then charged the remaining Hearthguard cavalry, of which there were only two. Eight dice against four dice, I was hoping to wipe them out. I did, but lost two men myself.
I also should have rested my warlord and moved (or possibly rested) my Longbowmen into the rough ground, but I forgot.
Turn 2
The French. They were down units, but they were still on the offensive. Using Prowess and Flying Wedge, they first sent Hearthguard cavalry into the English Warlord.
Though my Warlord slew two of the French, he himself was slain. So we’d barely started the second turn, and already I’d lost my Warlord. This gave my Longbowmen another fatigue, leaving them exhausted.

Then the French foot knights charged my own foot soldiers, killing 3 of them, but taking two casualties themselves. I considered this a reasonable trade.
Then it was back to the other flank, and the French cavalry activated again to charge my exhausted Longbowmen. Spending all my fatigue, the Longbowmen’s armour was dropped to 2, and the French armour was raised to 6. Since I was Exhausted, I had -1 to my attack rolls, so was unable to hit (we couldn’t remember if a 6 was always a hit, but could find no mention of that in the rules. Anyway, I didn’t roll anything higher than a 5). I lost four Longbowmen, and fell back.
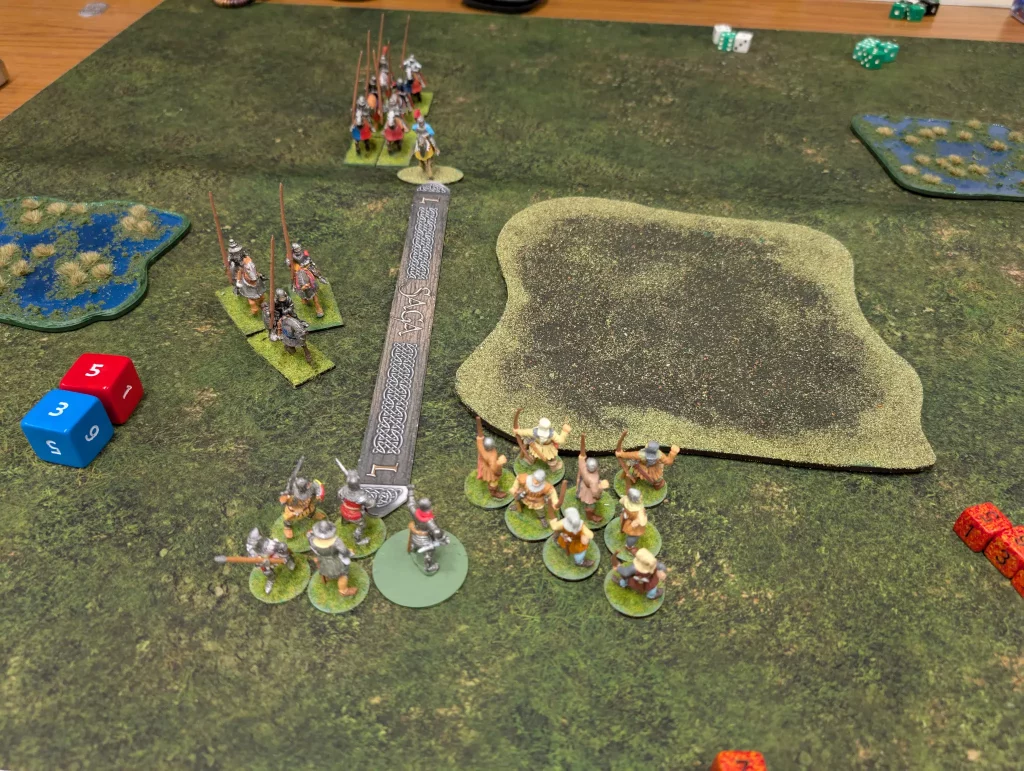
The English. I was down to 3 dice, so did some resting. Then I used Mauls! to activate a unit of archers and charge back at the cavalry that had recently attacked me. They had 2 fatigue, so though I only had 4 attack dice, I spent their fatigue and got four further attack dice, plus four bonus defence dice.
I killed three cavalry, leaving one to fall back. The French got no kills.
Then it was time for some more Hearthguard on Hearthguard action. Using Herces, I got 3 bonus attack dice, giving my four Hearthguard 11 attack dice, and the two French Hearthguard only had 4. It should have been an easy win. I destroyed the unit, but lost three men myself.

Counting up the survival points at this point, I was ahead by two points (7 to 5). However, we were on my side of the table, and it wouldn’t be too hard for the French to make it to the corners for some extra points.
I might be able to take out one of their units, but would also take casualties myself.
Turn 3

The French. The French offered peace, and a chance for me to give my Warlord a proper Christian burial. I think I had a chance of winning, but the chances probably weren’t in my favour, and it would mean a lot more dead. So the English accepted.
Once again, it was a very close game. Given that I normally do very badly, either I’ve got better or the English aren’t as bad a faction as seems to be suggested. Once again, we also started within close range, and the game was over in three turns. This was a scenario that favoured the French.
With their Longbowmen, I think the English would get a better advantage at long range. But both games have allowed a relatively short distance between the two war bands, and the French had taken what advantage they could of that.
Next time we do Age of Chivalry, I think we should try to aim for a more typical game where we start further apart, with more terrain on the table. We might also take a look at some of the other factions. That requires sorting out some more figures. Currently almost all my Age of Chivalry cavalry is barded. When we’re playing all barded, or all unbarded, that’s fine. We just designate it as barded or unbarded. If we want more mixed armies, it would be useful to have figures which are obviously unbarded.
I’d also like to add some standard bearers to my Warlord bases (which is why my English warlord still has a plain base), but that requires sourcing some decent figures.