Stargrunt
Our first wargame of 2023 was a return to another old favourite – Stargrunt II. This is a 25mm SciFi wargame from Ground Zero Games, which is now available for free download. It works just as well with 15mm miniatures, and indeed GZG have pretty much switched to producing mainly 15mm for the game. Most of my figures date back to the early 2000s though when 25mm was the norm, and I see no reason to buy a whole new set of armies just to change the scale.
For this game I actually put together a scenario. It was a simple unbalanced VIP retrieval mission. Three small units of French special forces had to rescue some downed diplomats who had crashed in enemy territory.
Meanwhile, a group of local militia were trying to capture the crashed spies and take them in for questioning. The militia had three main infantry squads, plus three individual sniper units. Equipment and capability of the two forces were radically different.
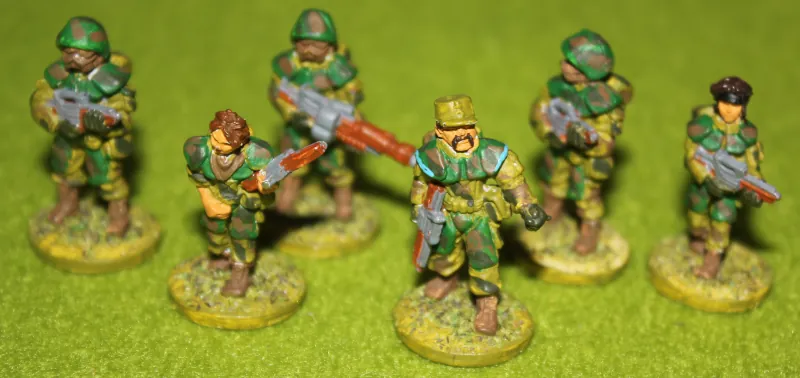
Special Forces (Federal Stats Europa)
The French (FSE) special forces consisted of three units of six men, plus a VTOL. They randomly selected from the following activation markers:


In Stargrunt, each unit gets an activation marker to represent their quality. Red is elite, orange veteran, blue regular, green is green and yellow is untrained. Leadership values range from 1 (good) to 3 (bad). So the French were pretty much guaranteed to be good quality troops.
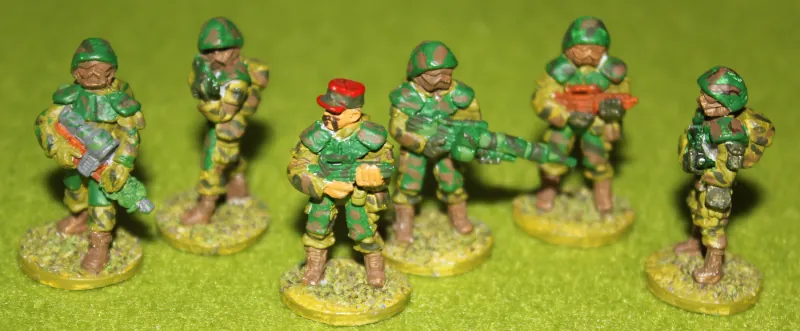
As it turned out, they chose poorly, getting one elite, one veteran and two regular units.
They were equipped with full suit of light armour (D8 Armour, Move 6″), advanced assault rifles with grenade launchers (Firepower 3, Impact D10), and each unit had a Special Weapons operator with a Gauss Machine Gun (Firepower D10, Impact D12).
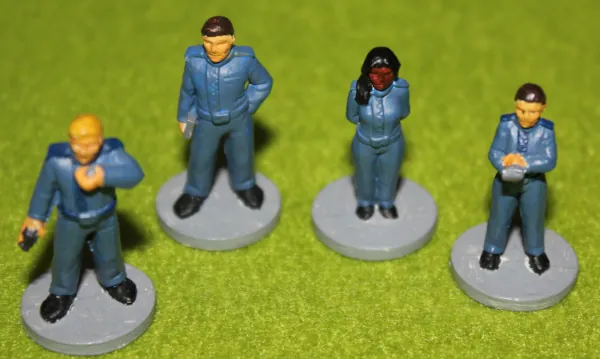
The VIP diplomats they were in to rescue were Green troops, though with leadership of 1. They had basic battle dress (D4 armour, but move 8″), and SMGs for close defence (firepower 3, Impact D8, but could only be used at close range).
One squad also had a sniper, who was equipped with a laser rifle.
Squads also have a second marker which represents their confidence. CO is confident, ST is steady. To represent their rushed arrival, the special forces had a mix of CO and ST confidence markers. There is also SH for shaken (which the VIPs started with), BR for broken and RO for routed.
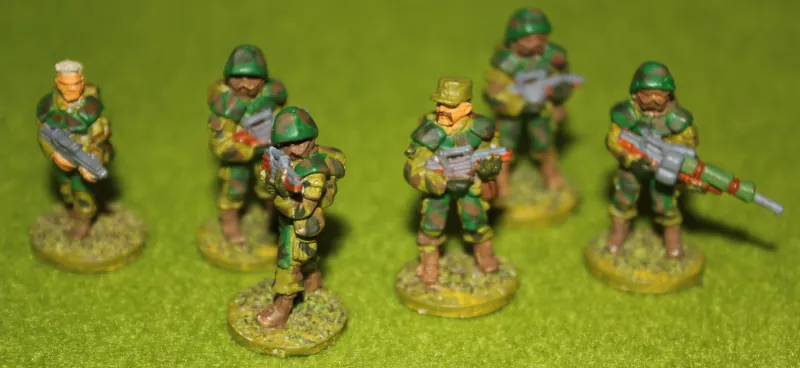
Local Militia
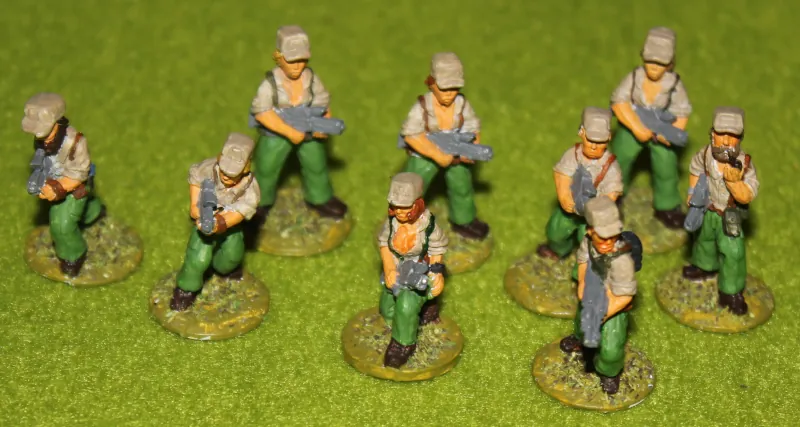
The local forces consisted of three infantry squads of 10 men each. There were also three individual snipers. Far more men, and a lot more flexibility, however the quality and equipment was a lot lower. They got to randomly select from the following unit activation markers:


The militia actually got an above average selection, though still had a couple of green units.
They were equipped with basic battle dress (D4 armour, Move 8″), low tech assault rifles (Firepower 2, Impact D8) and had a Machine gun as a squad support weapon (Support Firepower D8, Impact D10). One of the squads had a GMS/P for air defence.
The snipers were equipped with a conventional sniping rifle (firepower D10, Impact D10).
Deployment

The VIPs started holed up in one of the ruined buildings, and the French special forces began at the far (south) end of the table. The militia were more dispersed, with some units potentially south of the river, though the majority were on the north side.
In Stargrunt, units can begin unidentified, so only have tokens on the map. Once they get activated then the actual figures get placed. This allows for dummy units to be placed, so the enemy doesn’t know exactly where the enemy is located.
Point scoring for the French forces were as follows:
- +3 points for rescuing a VIP
- +1 points for each enemy unit identified
- -1 points for each team member killed or left behind
- -6 points if rescue VTOL was lost
Point scoring for the Militia were:
- +3 points for each VIP captured
- -1 points for every 3 team members lost
So neither side directly got points for killing the enemy. The French had an option of bringing in some air support for the rescue, though there was a big point loss if it was shot down. In the end it was called in, so the risk wasn’t taken.

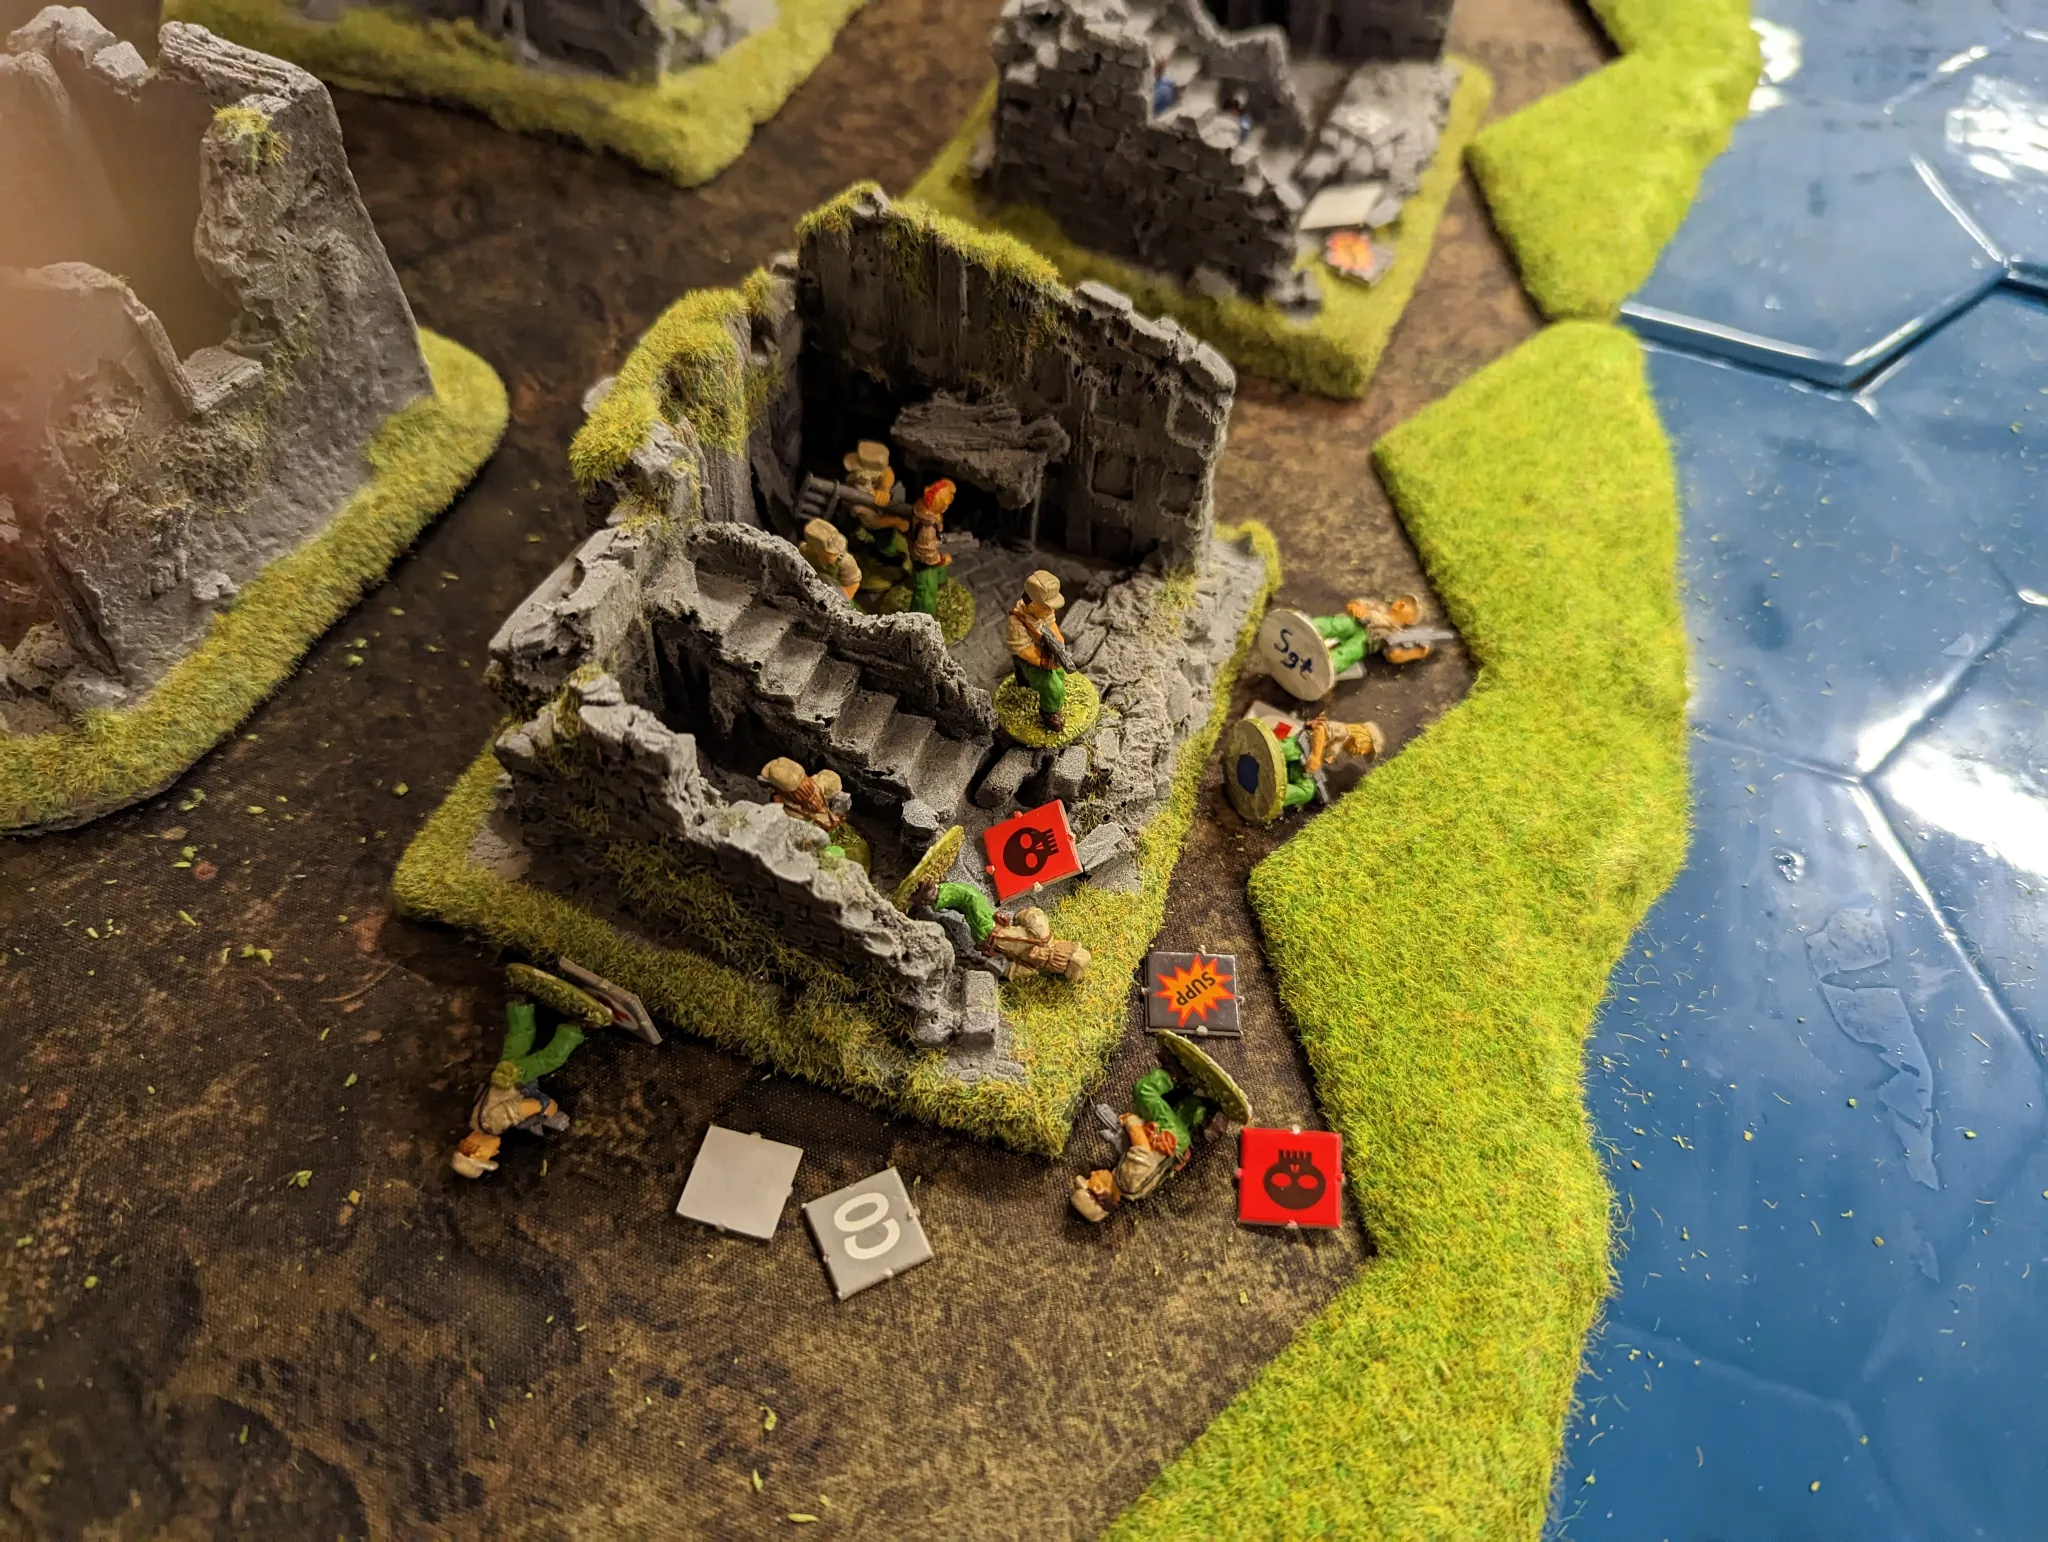
The militia began by moving out of the woods into the streets between the ruins. I have a large set of these buildings which I picked up relatively cheaply from a local games shop. I basically bought everything they had so I can put together a reasonable 25mm urban environment. They are of a sort of hardened polystyrene and are as they came. I could paint them, but that would require work and they look fine as they are.
I realised that I don’t have many photos of the French forces, but they were making their way quickly up towards the river. The militia plan was to try to suppress the VIPs and capture them as quickly as possible, whilst using their snipers to try and pin down the French.
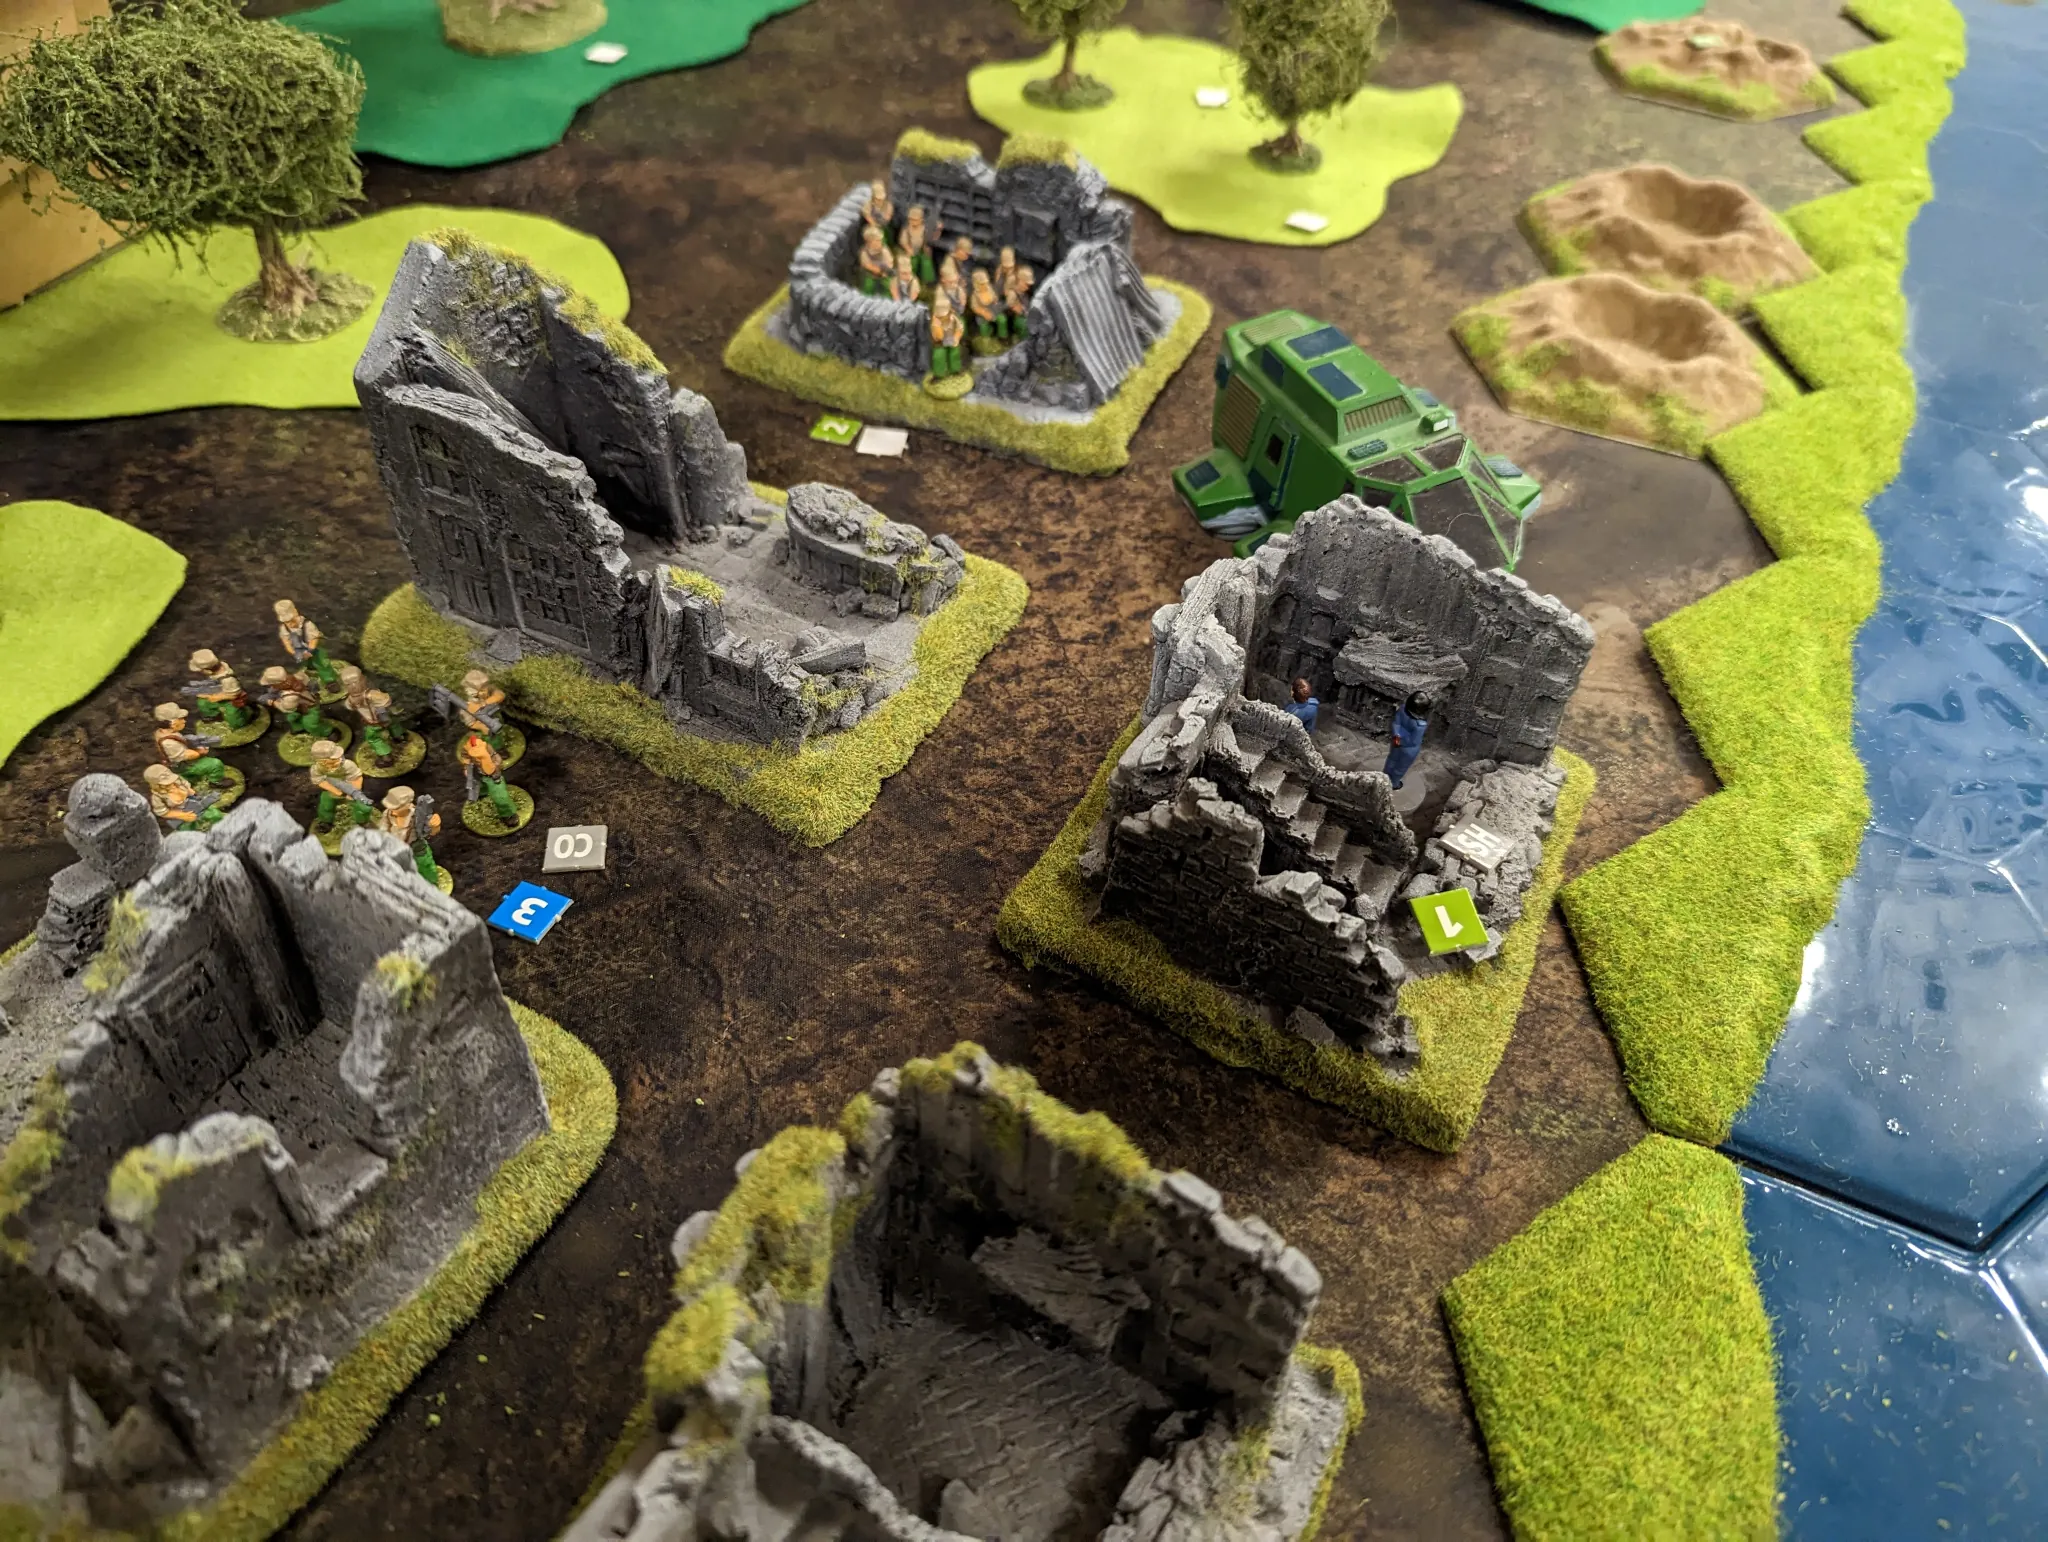
After they’d moved themselves into the cover of another building, the first militia unit opened up on the VIPs. Stargrunt uses different dice types to represent things like firepower and unit quality.
This was a Green unit, so got a D6 for unit quality (untrained get D4, regular get D8 and upwards to elite at D12). Each of their members had an assault rifle that gives 2 firepower – there were nine of them giving a total of 18. This would be a D18, but since it maxes out at D12, it means they get a D12 for firepower.
Finally they also had a GMS/P, which they could use in an infantry support role, giving a further D10.
So they role a D6, a D12 and a D10 for the attack.
The defence is based on the range to the target, which starts at D4. Green units have a range band of 6″, and the VIPs were just outside this, so the range die shifts up to D6. They were also in hard cover, so this shifted it another two dice to a D10.
The target rolls their range die, and the success of the attack is the number of attack dice which is greater than the range die roll. One success gives a suppression, two or more gives fully effective fire which can cause casualties.
The militia were fully effective, so they then add the total of all their dice together, and divide by the dice type of the range die (so 10 in this case). Their total attack roll was 22, so two hits plus a 2 in 10 chance of a third hit – which failed.
Damage is then rolled for each hit – the impact of the weapon (D8) against the armour of the target (D4). An impact roll higher than the armour roll is a wound, higher than twice the armour roll is a kill. Two of the VIPs were killed outright.
This was a far more successful result than I’d been expecting – I’d been wanting to suppress the VIPs, not kill them, so this wasn’t actually what I’d wanted. There don’t seem to be rules for just aiming to suppress, so we decided to allow just attacking to suppress in future.
The militia snipers against the French special forces were far less successful. Green snipers with a range band of 6″ (doubled to 12″ for being snipers) meant that the French were rolling high on their range die. Equipped with only conventional rifles, they were less effective than I’d imagined. I’d actually worried that they’d be a bit too effective, and totally pin down the attacking troops.
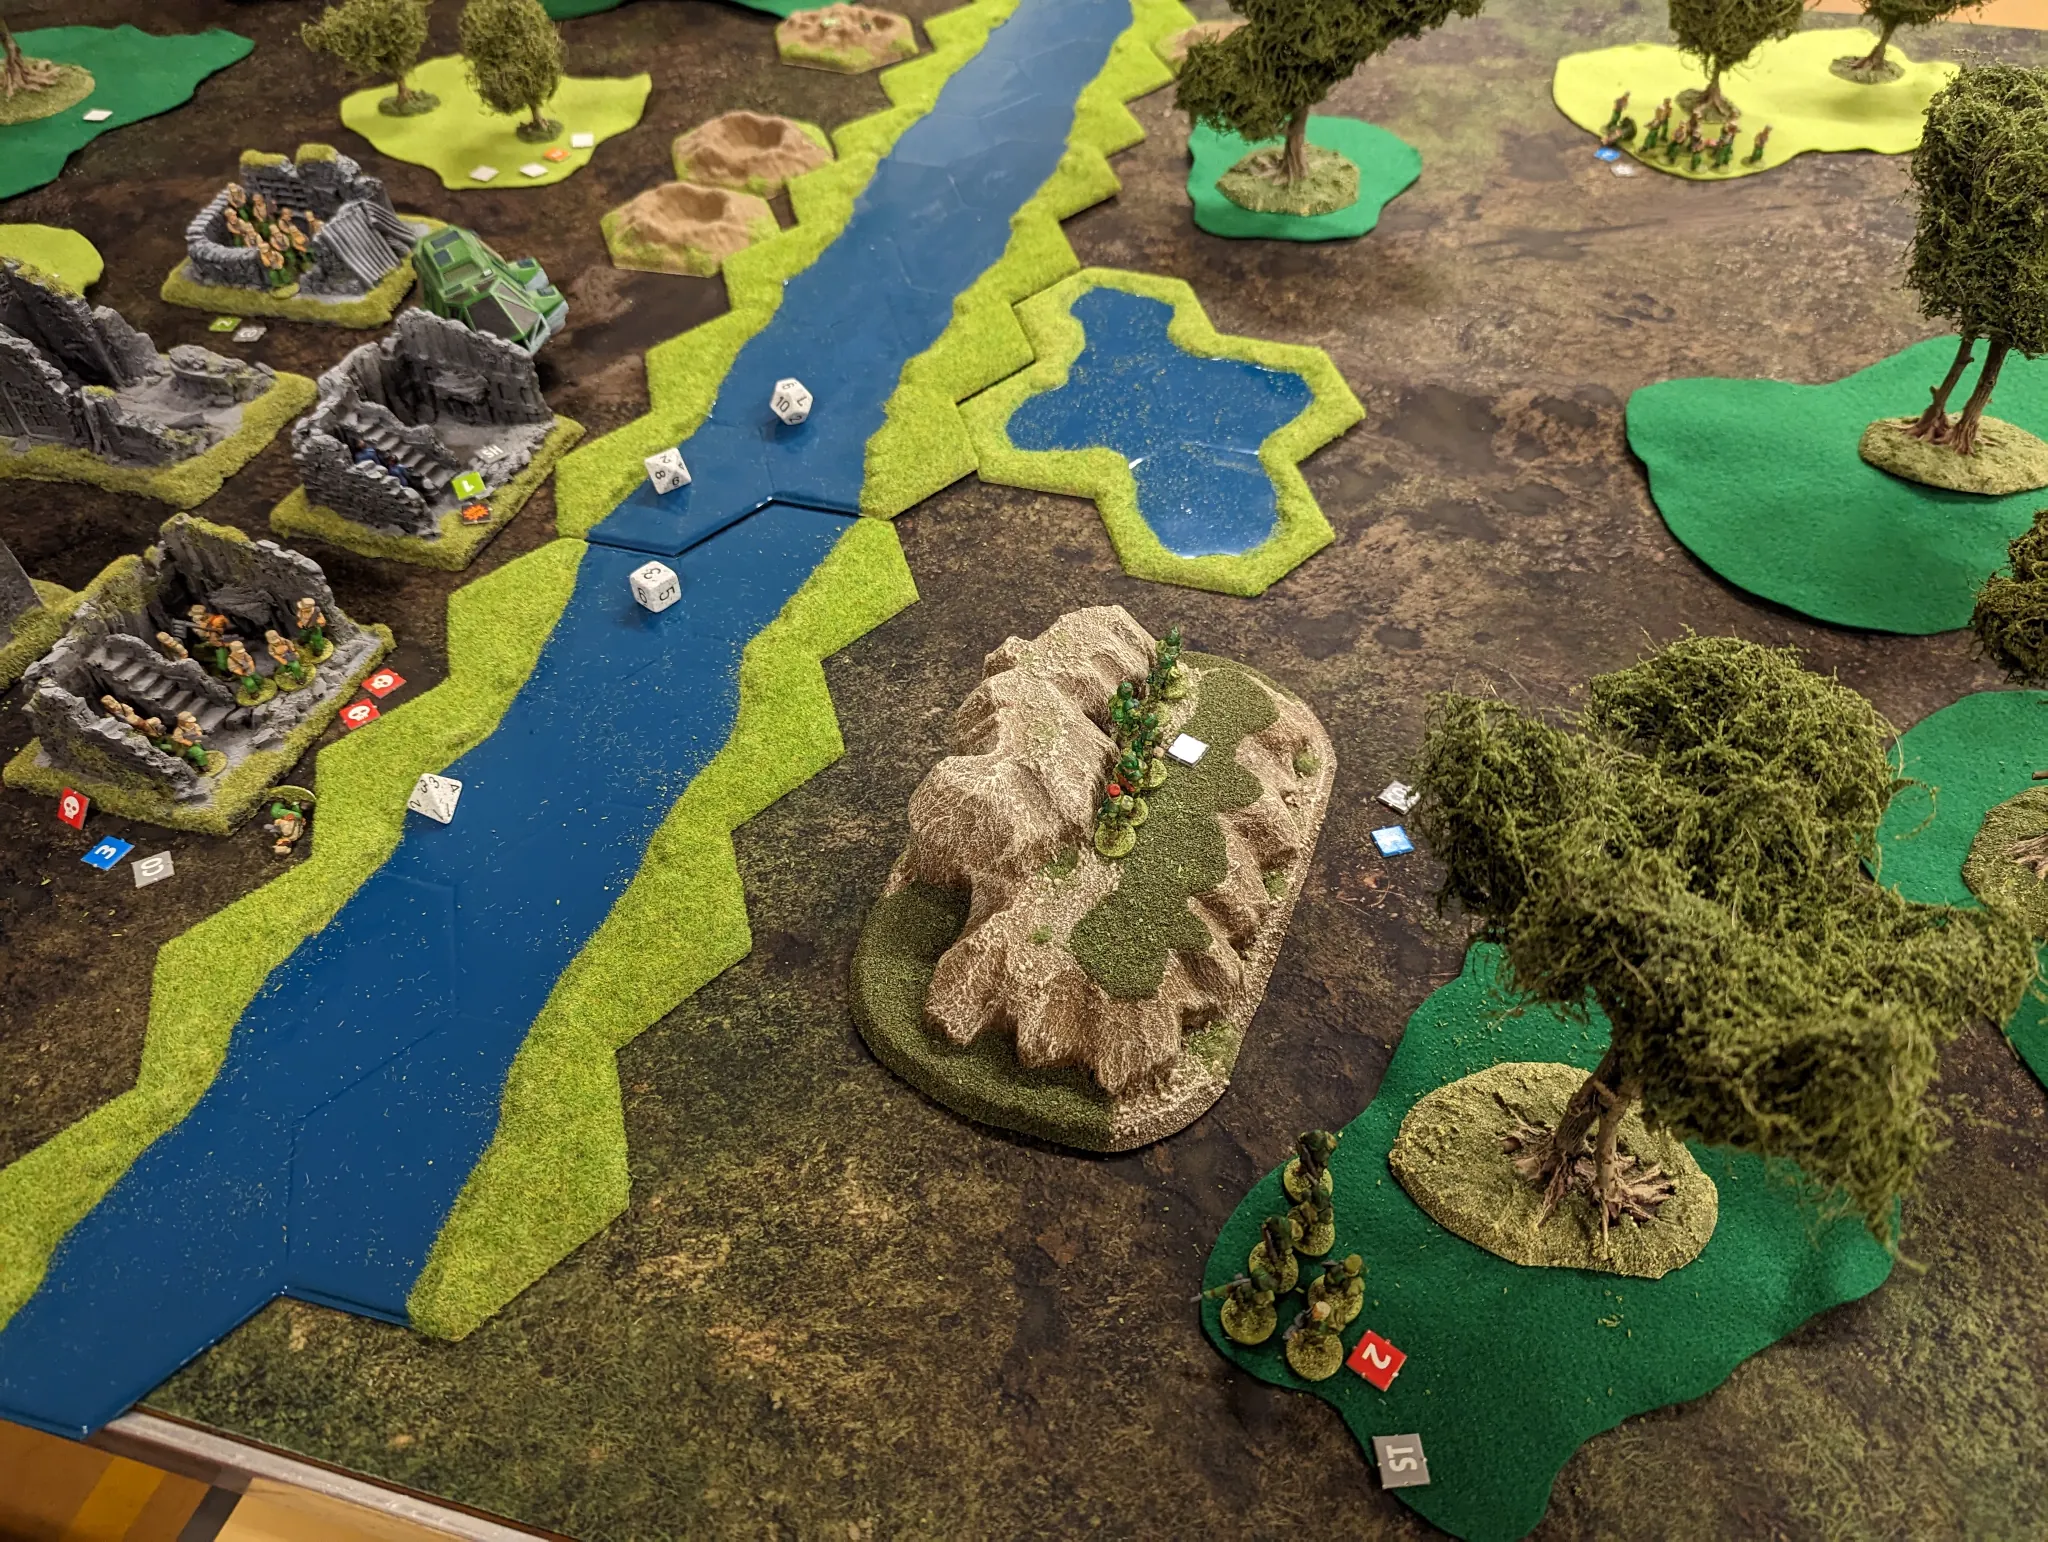
The river was easily fordable, just counting as half movement. It turned into a fire fight between the special forces units on the south bank, and the militia amongst the ruins. The special forces, as I’d expected, were far more effective, and the militia started dropping like flies.
The militia snipers were also unable to get into cover after shooting (they kept on failing their checks), but at least didn’t take any casualties.
In Stargrunt it is often quite hard to actually kill troops. Suppression is the normal result, followed by wounding troops. A wounded troop rolls a D6 – on a 1 or 2 they die, on a 6 they recover, on any other result they are stabilised. Having a medic in the unit helps with a +1 bonus. Our first exchange of gunfire had been quite unusual. It also hadn’t helped that both sides didn’t have any body armour – rolling only D4 for armour had been part of the problem.
Fortunately the militia unit did lose it’s leader (given their leadership level of 3, we named him Dyke). He was replaced by a leadership 2 squad leader, who we named Speirs.
It didn’t help though, and eventually their morale crumbled and the only ones left were the wounded.
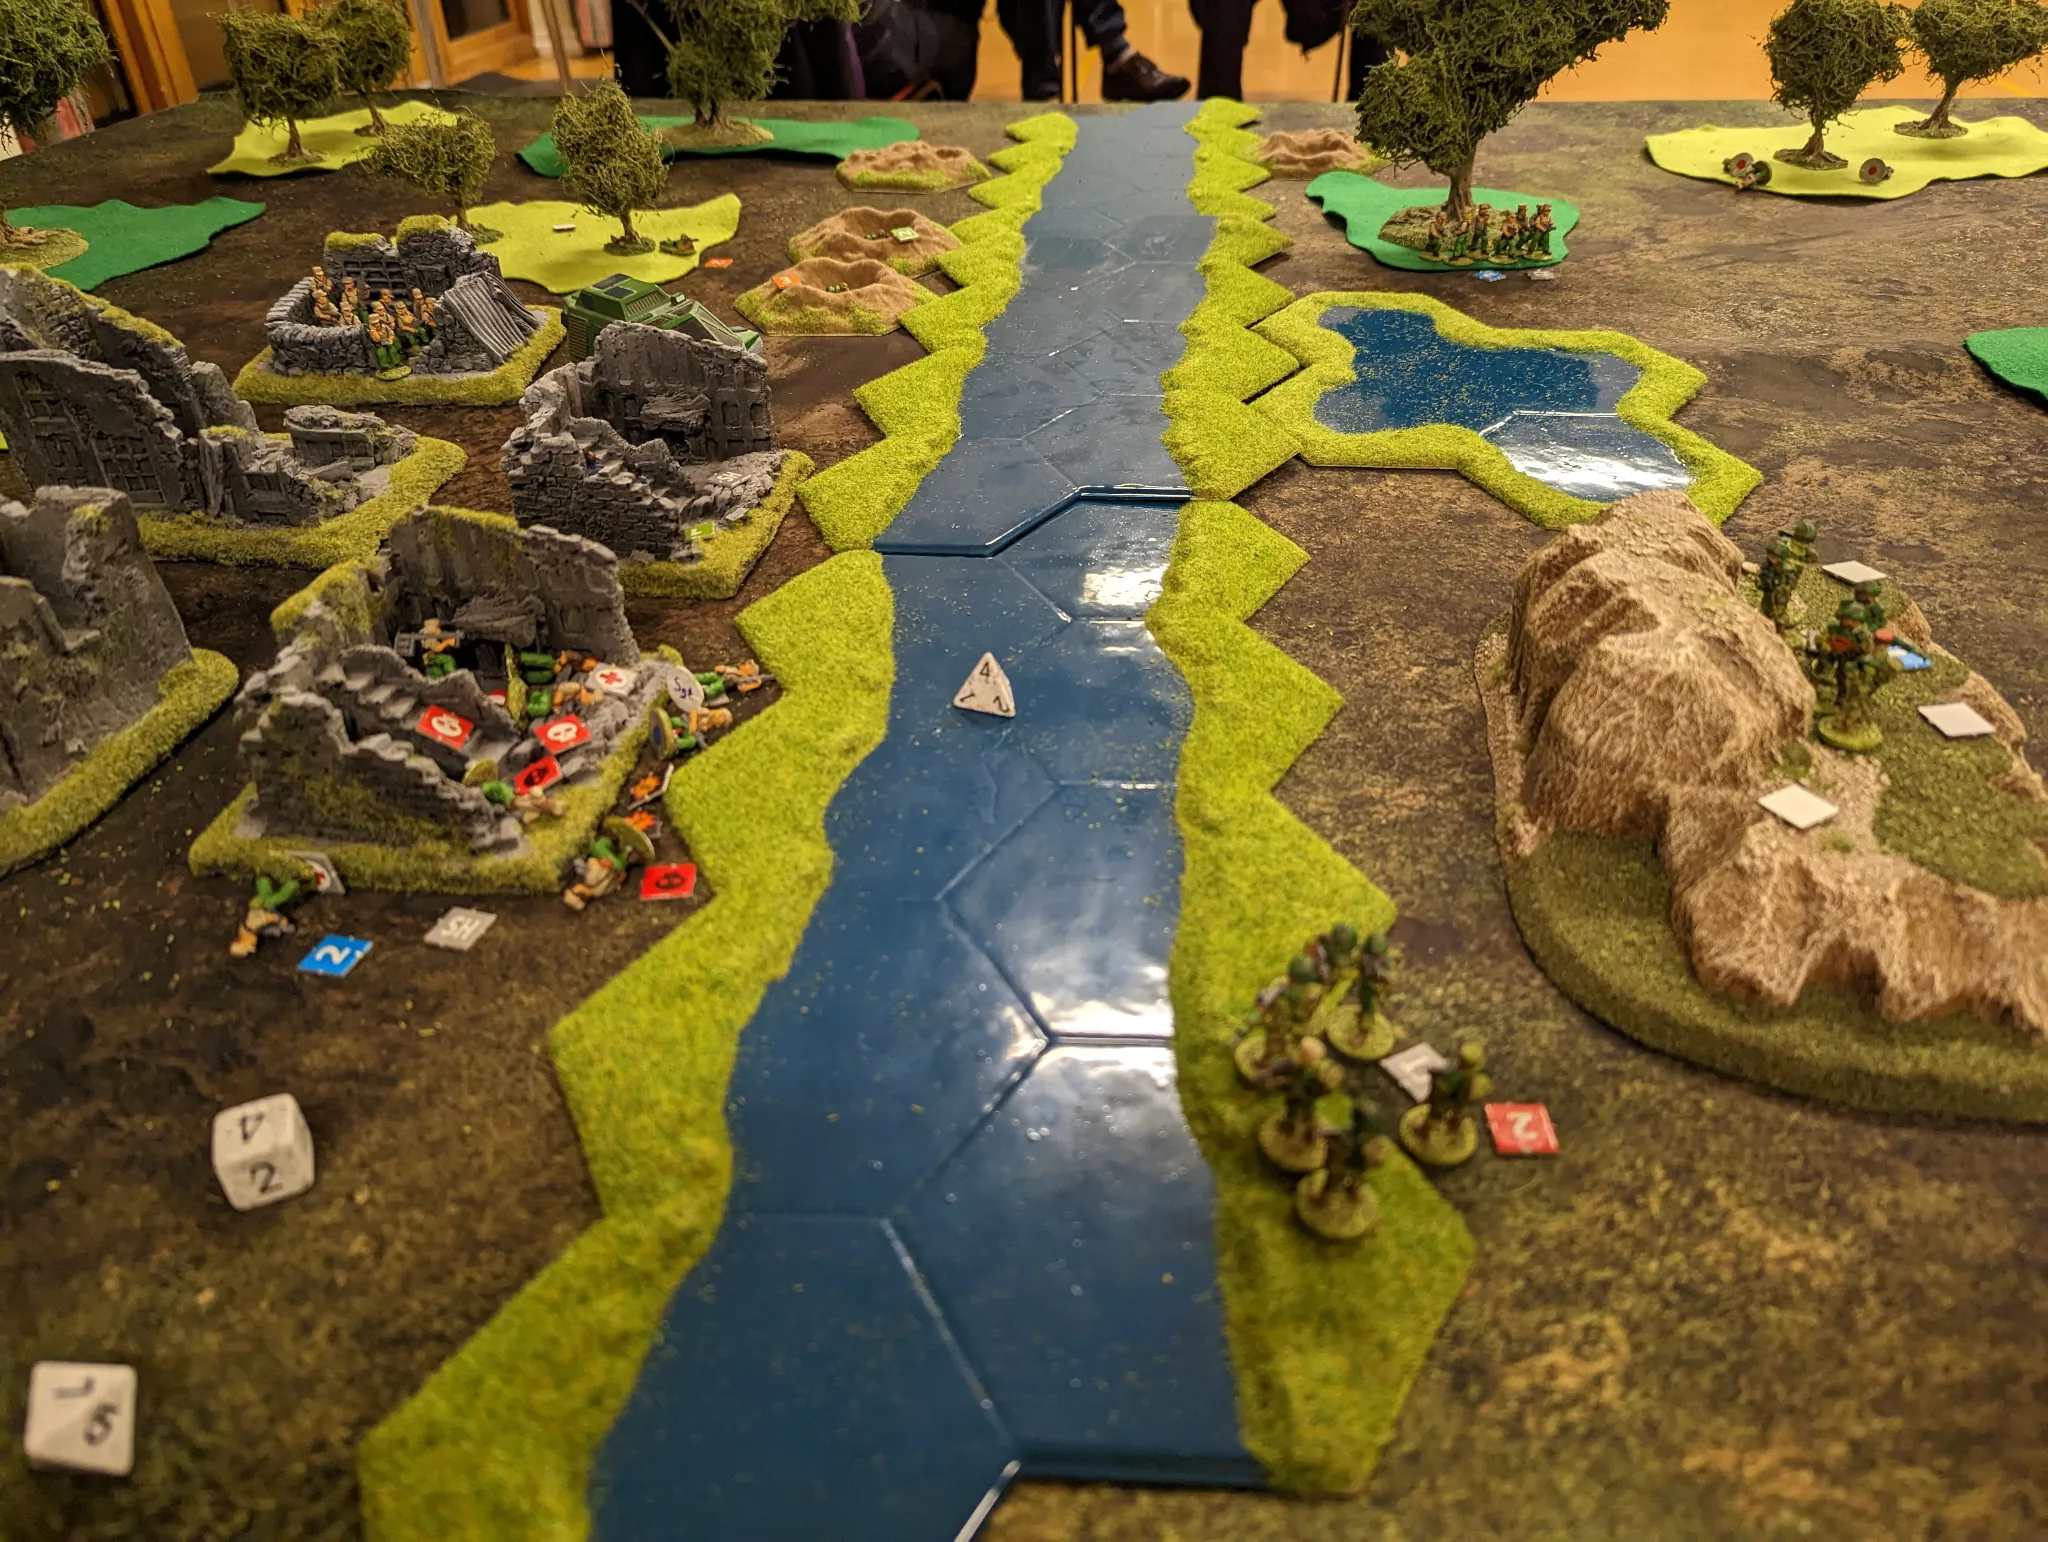
This allowed the French to get across the river and rescue the VIPs. The rule was that the VIPs could only move if they weren’t suppressed and a friendly unit was within 6″ of them. Other units suppressed the snipers, allowing a quick escape to be made with the survivors.
In the end it was a crushing victory for the special forces. They had lost two VIPs, but only one team member (a shot to the head from a sniper). I had expected it to be a win for the French, though had expected it to be a bit closer.
A few things we learned from the game:
- There are an awful lot of chits. Putting them away at the end of the game is actually the hardest bit. Tracking individual dead, stabilised and wounded figures can get complicated.
- The rules do seem to be badly laid out. Looking things up was difficult, and related topics were spread out within the rules rather than together.
- We definitely got some things wrong, especially around reaction tests and confidence.
However, it was an enjoyable game, and though there are quite a few rules, once you know them they’re not that hard. The combat system is more complex than for a lot of games, but it works quite well. We also didn’t make much use of the command rules, which is an interesting part of the game which we only used once or twice in a minor capacity.
Despite the extra complexity of the combat, I quite like it. You can get a lot of wounded results rather than clean kills, which feels more real. Especially if you then have to get your wounded back to safety.
Towards the end, the militia should have just tried to kill the VIPs, but I didn’t think of that until afterwards.
If there is a next time for this scenario, I’d probably give the militia some body armour, or fiddle with the rules on how they capture and get the VIPs back for interrogation. Given that it was the crux of the scenario, I hadn’t really thought it through enough when designing it.
The other issue with Stargrunt is the figure scale. All the original figures were true 25mm, and all the newer figures are being done in 15mm. Though the game can be played with any figures, it does mean that more modern 28mm figures from other companies really look out of place next to the 25mm ones (it’s an obvious difference). The old figures are still available, but as far as I’m aware, the range isn’t being expanded.
I have a whole company of NSL (including heavy and light infantry, vehicles, powered armour etc), so it feels wrong just to get rid of them and replace them with something else.
It is a game that I want to get back to though, and maybe next time we’ll have a better understanding of the rules.
Nice scenario. Looked like fun. You could explain the 25mm/28mm differences being the result of gravity and other environmental conditions. The taller figures are from a lower gravity with a less dense muscle and bone structure. They may look bigger and stronger, but appearances can be deceiving. I other miniatures with my GZG 15mm and there is quite a difference between one manufacturers 15mm and another’s 15mm. I’m now planning to do 25mm as well and will probably mix selected 28mm in the same way.