Animated World Tokens
One thing I’ve recently figured out how to do is to make animated planet tokens. This allows spinning globes to be inserted into player handouts or as tokens in Foundry or other VTTs. Or just used on a website.
There are three basic steps:
- Create a suitable textured sphere in Blender for the planet you want to animate
- Create animation frames for the planet
- Create the final gif, webp or webm token file
I’ll go over the first two steps at very high level. They require the use of Blender, which is a non-trivial tool to use. I don’t have the time (nor the ability) to give a detailed description of how to do this, but there are some good guides out there on Youtube.
Create the planet
If you know Blender, this is quite easy. If you don’t, then this isn’t going to be a tutorial on doing this. Basically, you want to create a UV Sphere, and add a material to it which has a texture map (i.e., a rectangular map of the planet in question). You can use Shade Smooth on the object and add a subdivision modifier to make it look ’rounder’.
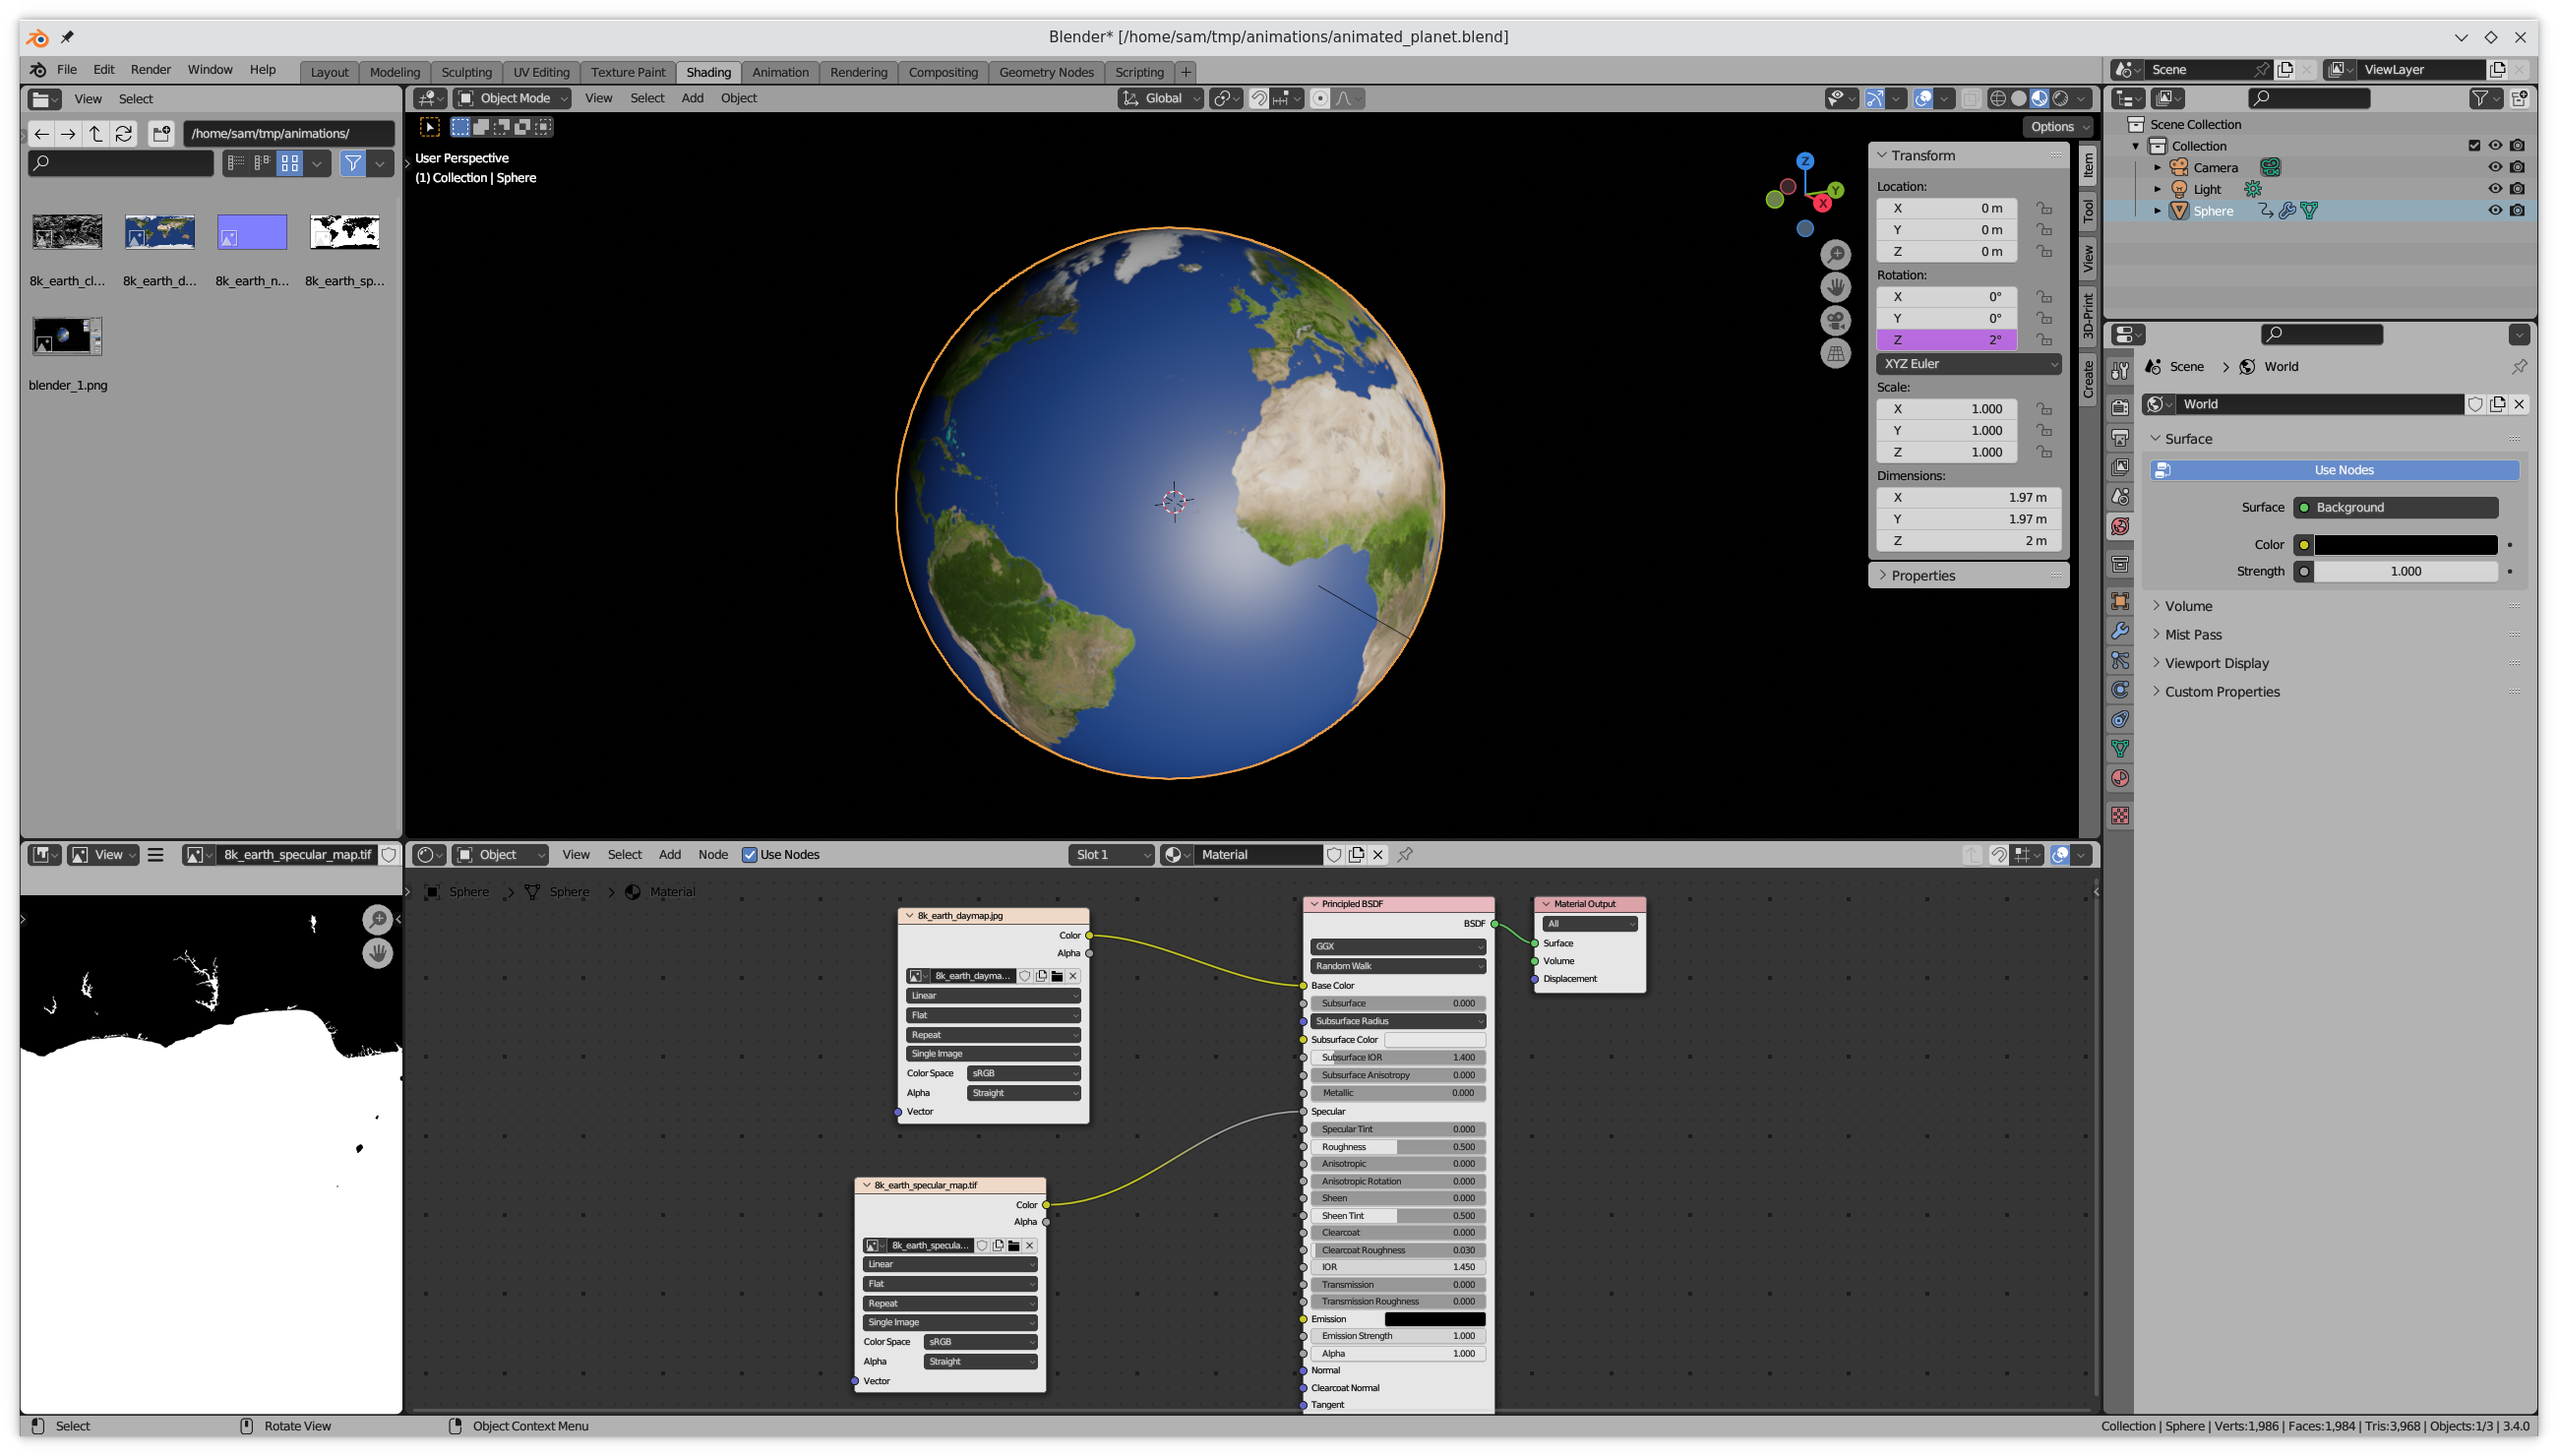
For basic results, you can just use a single texture. In the above example, I’ve also added a speculer map which I downloaded from the web. Bump maps and other complexities will improve the image. You will also want to add a light source as the sun, and set the world background to black if you want a dark night side. Textures of planets are available from NASA and other sites, or you can create your own world maps using whatever tools you want.
There are better guides out there than I can give, here’s one example on Youtube:
Note that the above just gives you a planet. You may want to add a cloud layer or other complexities. These can be done in a similar way. You will also need to animate these as per the next step. However, I leave that as an exercise for the reader.
Animate the planet
Now you need to animate the planet. The simplest way to do this is to set the number of animation frames to some divisor of 360°. The tokens can get quite large, especially if you want a high resolution token, so using 90 or 180 frames can greatly reduce token size. In the below example, we set the total number of frames to 180 down at the bottom in the “End” field.

Then you select the planet object, and set the Z rotation to be radians(frame*2). This basically tells blender to set the rotation of the object based on the current frame number.
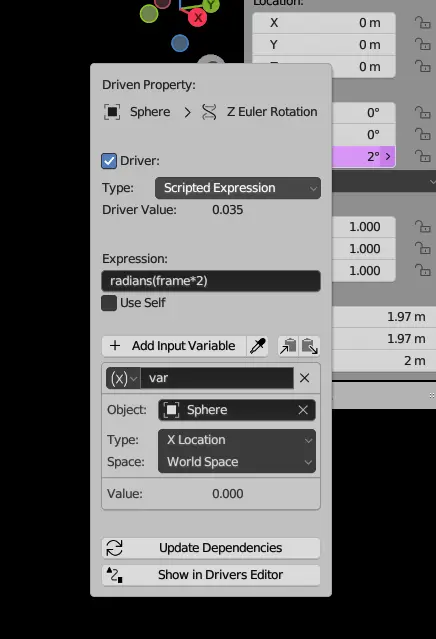
You might get an error about a driver when you do this. If so, right click on the Z field and select Add Driver. You will need to make sure you select your sphere object in the Object field.
Once you’ve done that, you should be able to grab the frame slider at the bottom of the Layout window and drag it around. When you do, the planet should rotate.
The multiplier on the frame number is determined by the number of frames. You need the planet to rotate a whole 360° in the animation. If you have 180 frames, then you need to multiply by 2. If you have 90 frames, then you multiply by 4. For a smooth 360 frame animation, you don’t need any multiplier (but your files will be larger).
Finally:
- Under Render Properties, set the render engine to Cycles and get it to use your graphics card.
- Also on Render Properties, tick Film -> Transparent for a transparent background
- Under Output Properties set the resolution to 400×400. Other values can be used, but you should use a square output size. You can always shrink your tokens when they are generated, and you might want multiple tokens at different resolutions, so the render resolution should be the largest token size you want to use.
- Still in Output Properties, set the Output directory to be the desired location of your animation frames.
- Move your camera into position to give you the desired point of view. You can do a Render -> Render Image to see what it looks like.
Once you’re happy with all that, select Render -> Render Animations. Then wait for however long it takes to create all your animation frames. You should get a number of png files in your output directory numbered 0001.png up to however many frames you set.
Create the Token
Now you want to generate the tokens. There are three output options – gif, webp and webm. Actually, there’s a lot more options than that, but that’s what I’ll concentrate on.
I use Linux, so I assume you do to. If you don’t, you can probably get these tools on the Mac or even on Windows. There may also be other tools to use on those platforms that don’t require as much typing. The Linux commands are pretty easy though once you know the tools to use.
Animated GIF
The simplest option is an animated GIF, which just requires the convert tool (which is part of the imagemagick package on Ubuntu and most other distributions). Assuming your animation frames are in the out directory, run the following command:
$ convert -scale 100x100 -delay 5 -loop 0 out/*.png animation.gifThis creates a 100×100 GIF image, running at 20 frames/second. You can change the scale if you want, but even a 100×100 image at 180 frames is 786KB, at 400×400 it jumps to 7.3MB.
Animated GIFs are easy to produce, but their image size is huge. They also have a limited number of colours, but they still produce quite decent results for small tokens.
Animated WEBP
WEBP seems to be the latest and greatest image format. It’s designed for static images, but like GIF can have multiple animation frames. To create these, you can use the img2webp command, which may need you to install the webp package on Ubuntu.
Other than that though, the command is not that different from creating an animated GIF:
$ img2webp -d 50 -lossy -o animation.webp out/*.pngIn this case the -d sets the delay between frames (in milliseconds). Lossy compression gives us a smaller image size. For me, this created a 1.3MB image. The img2webp command doesn’t seem to have the option to resize the image, so this is a 400px animation. It’s larger than the 100×100 GIF image, but much smaller than the 400×400 GIF image.
If you want multiple resolutions of webp, you’ll need to resize the image frames beforehand. You can use the convert command to do this. For example, to convert all our images in the out directory to smaller scales, copying them into sub-directories, you can do the following:
$ cd out
$ mkdir -p 100 200
$ for f in *png
$ do
$   convert -scale 100x100 $f 100/$f
$   convert -scale 200x200 $f 200/$f
$ done
WEBP files can be used as character graphics in FoundryVTT, but they won’t be animated if used as a token. Like GIFs, they can just be dropped into a web page to display as an animated icon.
Animated WEBM
WEBM files are based on WEBP, but designed for video. For this, you will need ffmpeg:
$ ffmpeg -framerate 20 -i "out/%04d.png" animation.webmThis will generate an animation file which is only 238KB in size. This is the most efficient of the options, though you need to be aware that it is only 400x400px. Opening it in a video player may open it full screen by default, and it will look terrible due to upscaling.
WEBM files can’t be used as a character graphic in FoundryVTT, but can be used as animated tokens. For this reason, you need both WEBP and WEBM variants of the animation if you want both.
The End Result
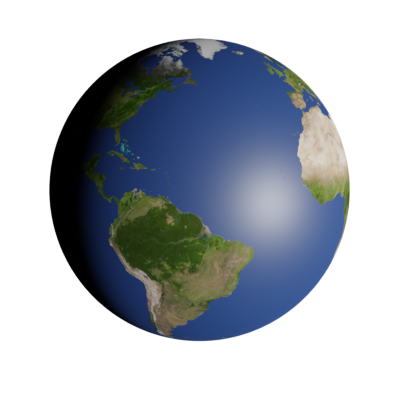
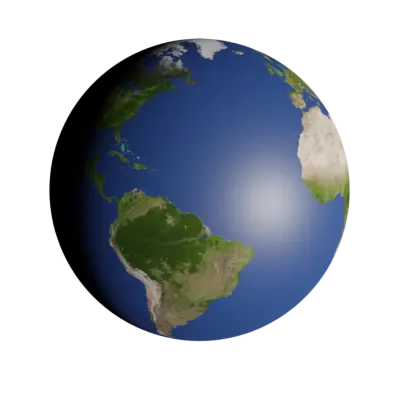
The following is the WEBP file from the above, rendered at 400px. It doesn’t have clouds or bump mapping, but these sort of things are left as an exercise to the reader. Even without these though, it’s a reasonable thing to stick into a player handout when they visit a new world.
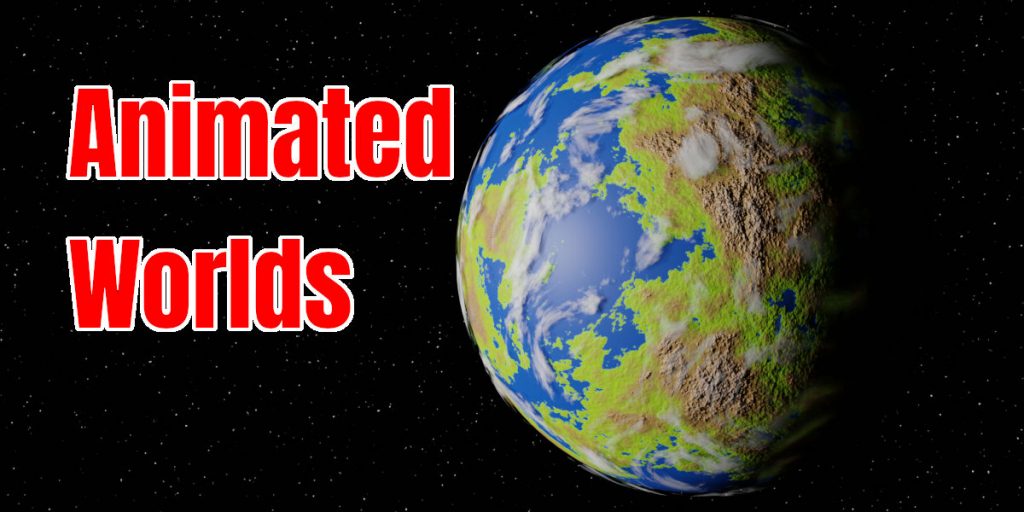
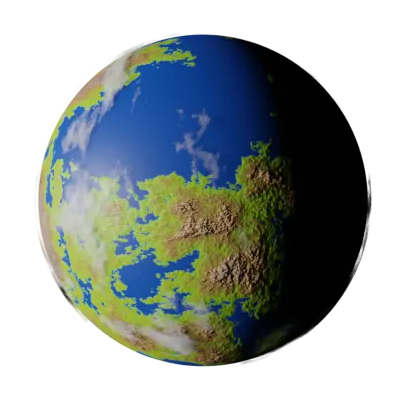
A more detailed example, created with my own software and with a bump map and some more complex nodes to give extra height textures to the mountains is below. In this case the clouds are being dynamically generated using a Noise Texture, with a frame based value being fed into the scale and distortion fields so that they change over time.
I’m actually tempted to put together a collection of these as a product, with world maps and animated tokens on DriveThruRPG. This would provide a large selection of worlds to choose from, with different packs for different types of worlds. Let me know if anyone thinks this is something they may want.
I would definitely purchase a world collection
Amazing.