Battle of Bodkin Marsh
After a delay of several weeks, we finally got our first chance to have a game of Saga: Age of Chivalry. This moves Saga into the Hundred Years War period of history. This is the 14th and 15th centuries, with knights in shining armour, English longbow men, pikes and gunpowder.
Most of my armies are more suited to earlier periods in history, but I have some I purchased for fantasy armies which make good substitutes for French and English forces. I did buy (and paint) some archers at the end of last year though, and have some new foot soldiers as well – not all of which got painted in time for this battle, so look a little pale.
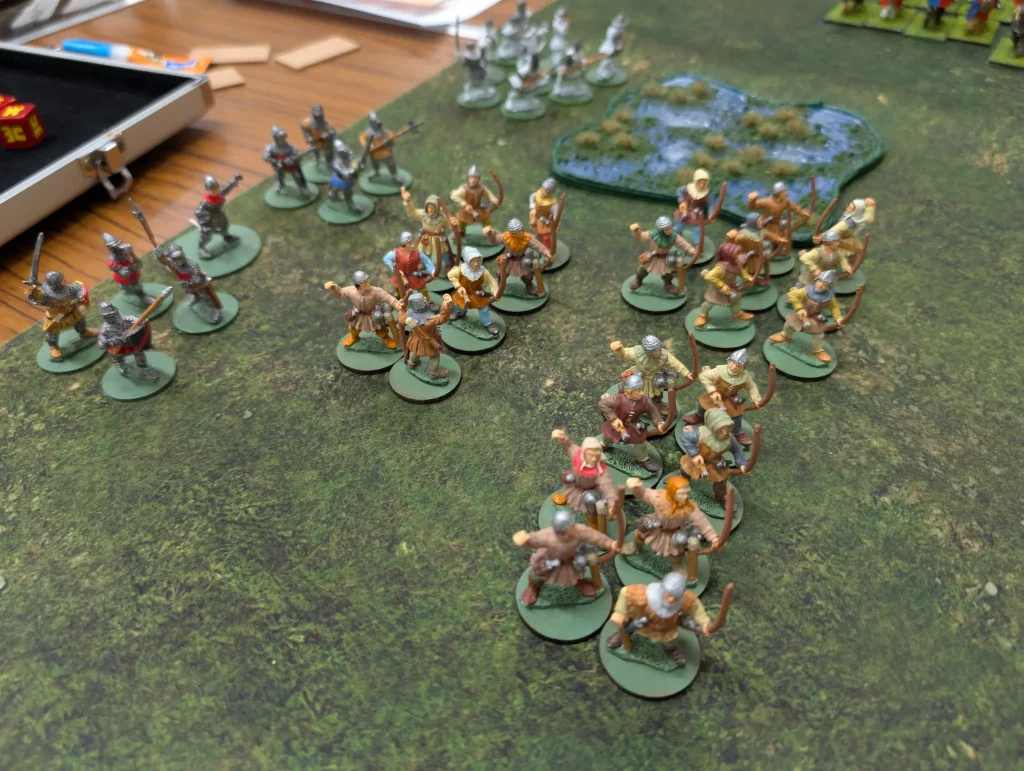
We decided to go for the stereotypical English v French, with me taking on the English. The English forces consisted of:
- Warlord
- Warrior Archers x3
- Warriors x1
- Hearthguard x2
I’d bought 24 archer figures, assuming that would do for two units of levee archers. But the English don’t have any levee options – all their units are Hearthguard or Warriors. They also have no cavalry. So my 24 archers became 3 units of warriors.
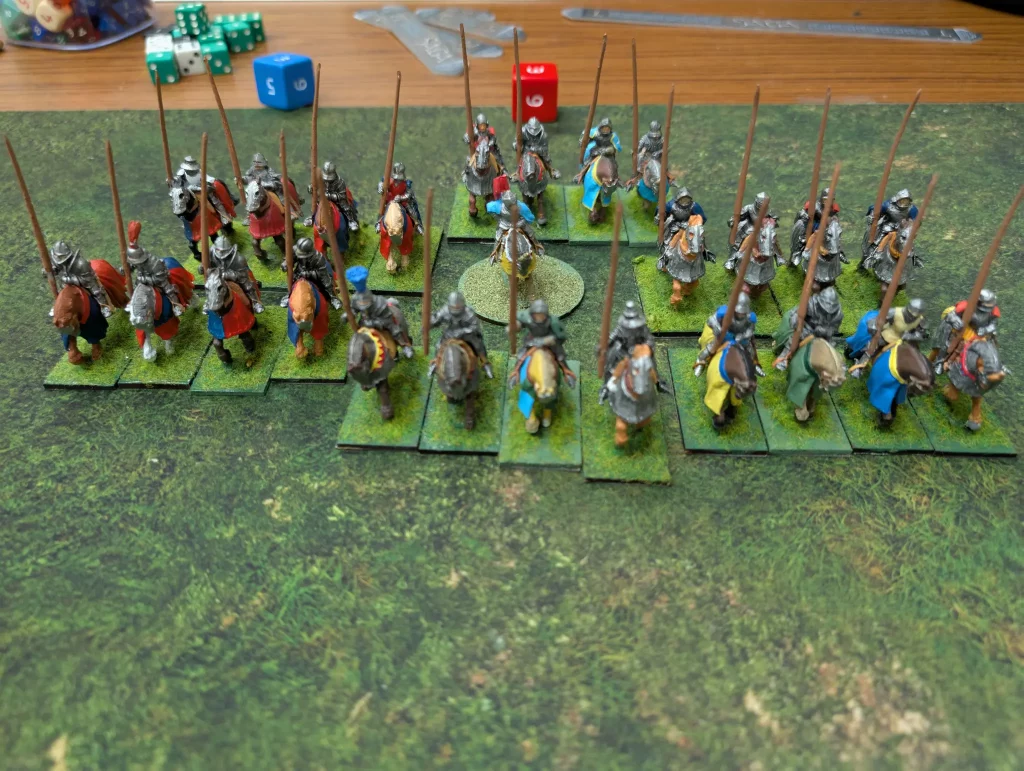
My opponent originally had the option of some crossbowmen and foot knights, but she eventually decided to go all-in on Hearthguards:
- Mounted Warlord
- Mounted Hearthguard x6
It was actually an option I’d be considering for the French, just to see how it played out. A long time ago I got a ‘horde’ pack from Wargames Foundry of medieval mounted knights, so I have 36 of them painted. Fielding a mere 24 for the 6 units wasn’t an issue.
We went for a random scenario from the Book of Battles, and came up with the following:
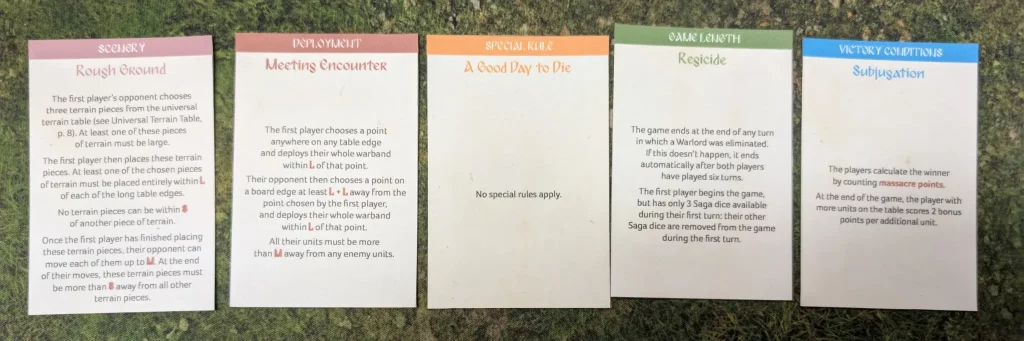
Scenery: Rough Ground. The French got to select three pieces of terrain, and I got to place them. I was given a hill and two marshes to arrange. Not the most useful terrain to hide archers in.
Deployment: Meeting Encounter. The English got to deploy around one point on a table edge, and the French then got to deploy around another point. They just had to be L away from my units – and they pushed that as much as they could.
Special Rules: None
Game Length: Regicide. The game ends when a Warlord dies or after 6 turns.
Victory Conditions: Subjugation. Winning is based on massacre points.
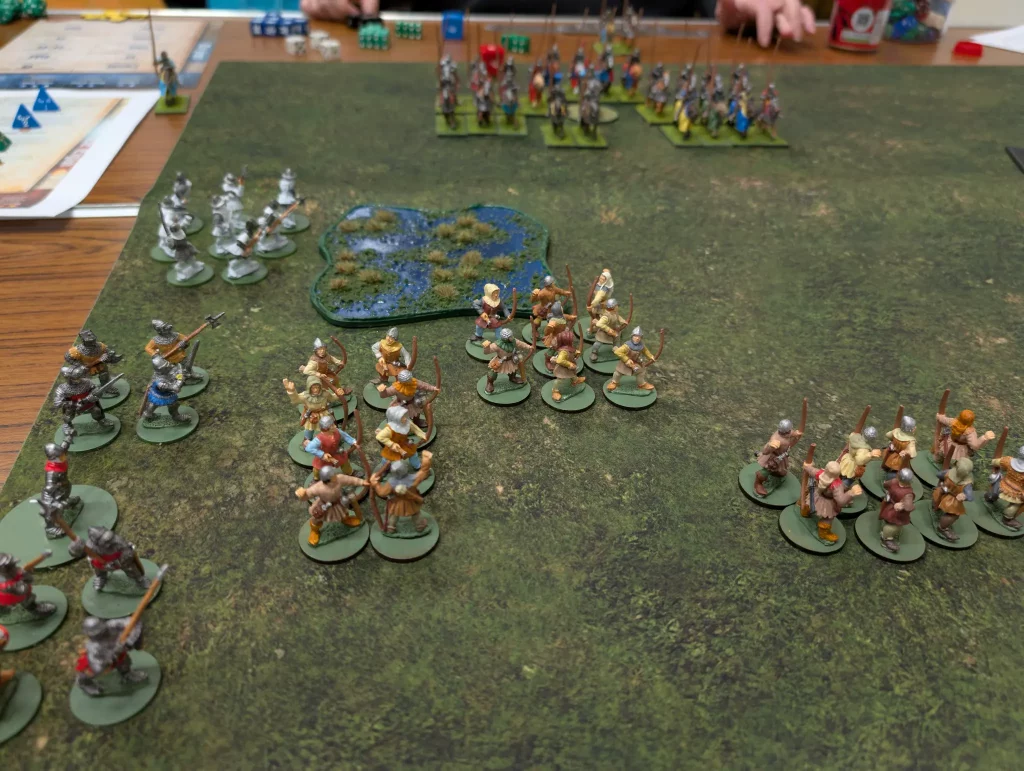
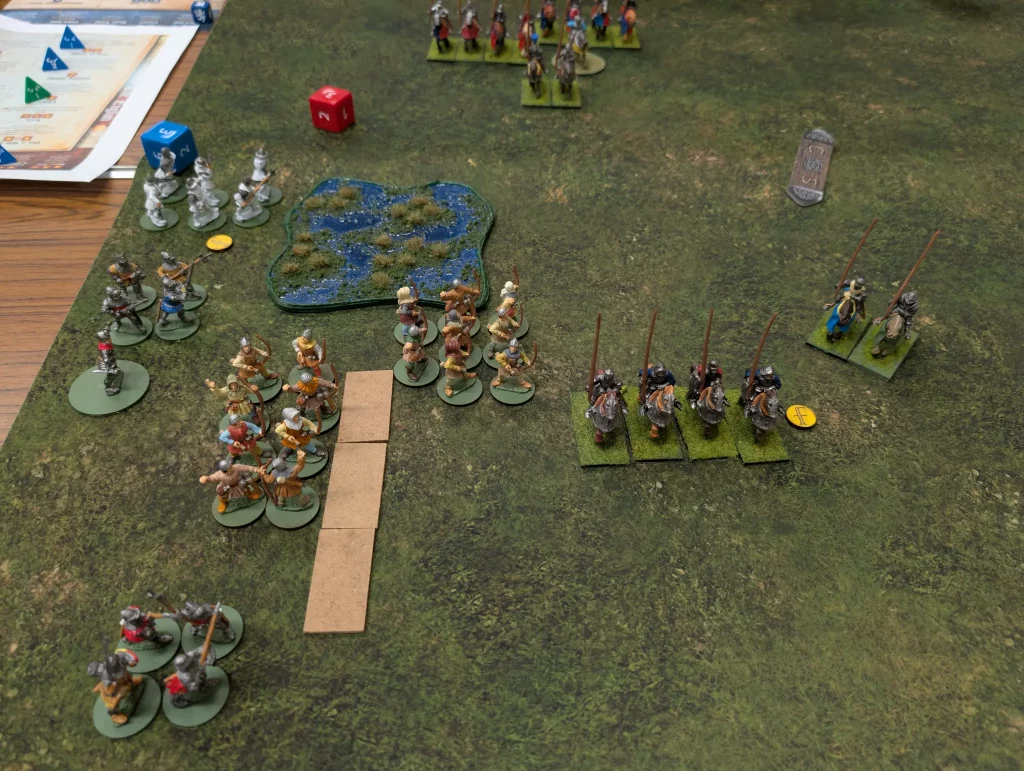
This was not a great starting arrangement for the English. I tried to use a mash for protection, but that single marsh was all I had. The French arranged themselves in lines ready to charge in and annihilate me as quickly as they could.
Turn 1
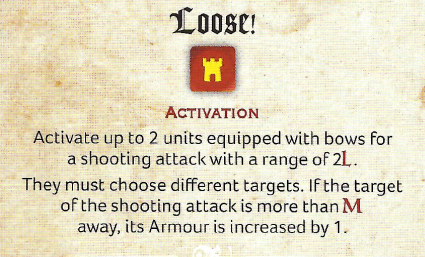
English. The English battleboard has some nice abilities. One of them is Loose! which allows two units of archers to shoot with a range of 2xL. However, they each have to shoot at a different unit, and the targets get a +1 to their armour if more than M away. I used this in my first turn, and rolled really well. 3 kills in total, two from their central cavalry unit.
I was also planning on putting down Gruelling Advance, but didn’t realise until it was too late that it was an Orders ability and I’d left it too late to play. I did move out one unit of archers to try and give them a clearer line of sight to the French.
French. In their turn, the French rolled forward. Their unit of 3 hearthguard moved forward and then charged by Warriors guarding the back way around the marsh. I decided to close ranks, and again rolled really well. The warriors held their ground and didn’t lose a man – the French took a casualty and fell back.
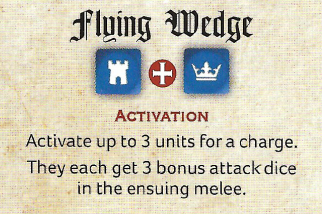
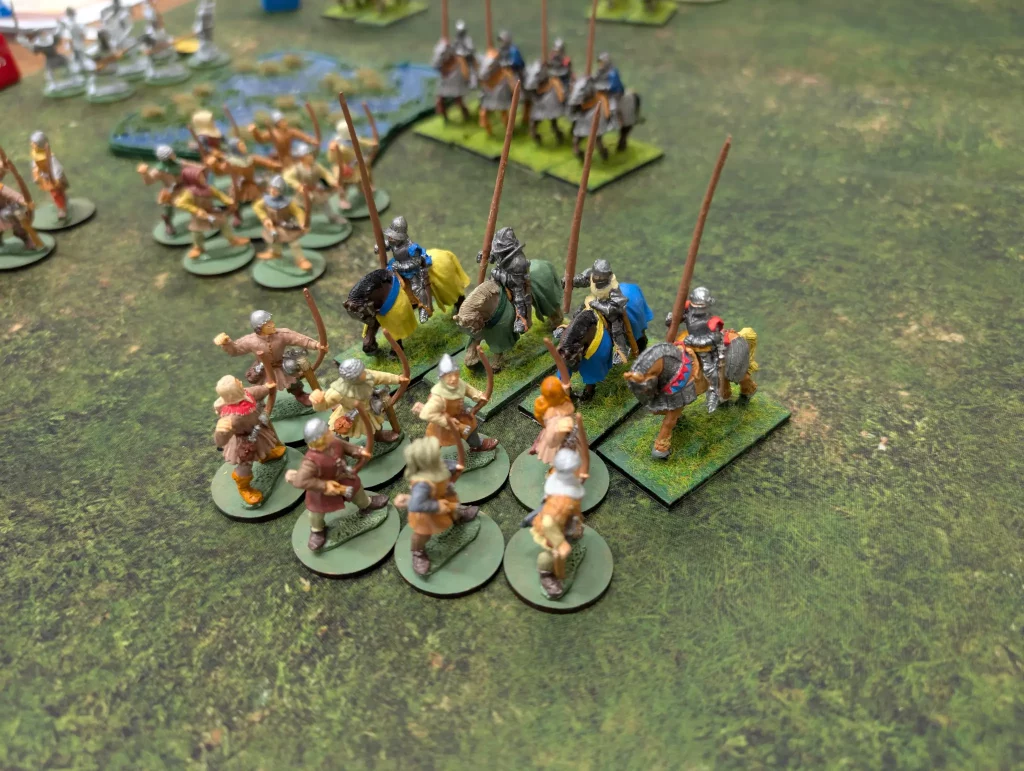
Then it was time for their Flying Wedge, which allows three units to charge, each getting 3 bonus attack dice. This was used to attack my archers, once against one unit and twice against a second unit. The English closed ranks, and used Herce to give themselves 5 bonus defence dice on the first melee.
Keen eyed observers would note that being Archers, my units shouldn’t have been able to close ranks – something that was noted by a passing Graham during the second melee. Nevertheless, I had rolled really well in both attack and defence, killing 3 French hearthguard. If I hadn’t closed ranks, I probably would have killed more but also taken more losses. We decided that my second unit would probably have been wiped out if they hadn’t closed ranks, so we removed it from the table.
Not sure why I forgot archers couldn’t close ranks. I think it’s because we so rarely use that option, that I got a bit carried away when I did use it for my foot knights.
Turn 2
English. It was only the second turn, but the English had been doing quite well. Mostly due to really good dice rolls. That was about to change. First off, I did remember to deploy some stakes using Gruelling Advance. This puts a marker down in front of a unit, which causes fatigue on anyone who moves or charges over it.
The French were now in close range, so I used both Wall of Arrows (a basic ability that activates two units to shoot) and Loose! again. I also used Rain of Arrows to give me bonuses to attack rolls. I only go a single kill though.
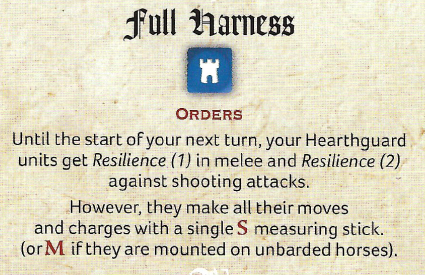
French. The French deployed Full Harness, which means they move slowly. However, they also get Resilience (2) against shooting attacks. This is a really powerful ability for the French to use, especially once they are in close range and only need an M movement.
Combined with Prowess, which gives all Hearthguard units a bonus M to their charging distance (but can’t be activated to move), it is solid. Of course, the French used both this turn.
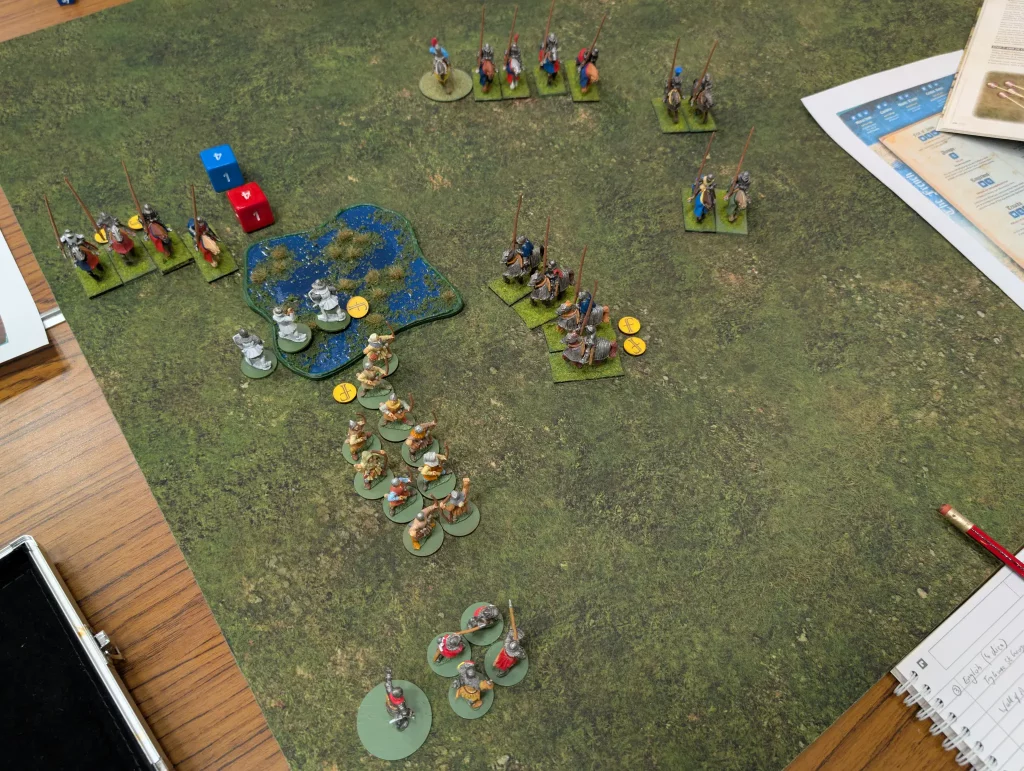
They attacked my warriors guarding the marsh again, and this time warriors were forced to call back. We got zero kills against the French, but lost another 3 men, taking us down to 3 and forcing us back into the marsh.

My unprotected archers were charged, and took 6 casualties, also falling back into the marsh. We killed no Frenchmen.
Turn 3
English. We were now down to 4 dice, but got enough to put something on St George! My remaining full Archer unit used Wall of Arrows and Rain of Arrows, getting only a single kill on the French cavalry, but they were now exhausted (due to using their new-found Resilience).
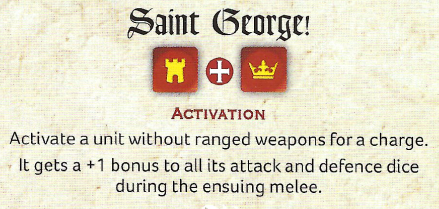
My Hearthguard had moved up, and charged up using Saint George! We got two hits, which were soaked with the Resilience of the French, exhausting another unit. However, my Hearthguard were wiped out.
Due to their ability to use Resilience, I hadn’t wanted to use the French unit’s fatigue to lower their armour. It’s always a big decision when fighting units (normally Heroes) with Resilience – do you weaken them (by reducing their armour) by using their Fatigue, or do you let them keep their Fatigue, and hope to max it out to exhaust them and then start causing casualties (Resilience allows you to cancel a casualty by taking a fatigue if they’re not exhausted)?
French. The French were tired of battle, so simply rested and moved this turn. However, they did put a die on Full Harness again.
Turn 4
English. We were down to 3 saga dice, and heavily behind in massacre points. We had about 16, the French were up in the high twenties at this point. I had one full unit each of archers and hearthguard, and two very battered units of warrior foot knights and archers.
The French had three full units of hearthguard, and two half units. They were still at five saga dice. I didn’t see any way of turning things around at this point, so surrendered the game.
The English have some really nice abilities on their battleboard, especially around shooting. However, the French have some abilities which pretty much cancel them out.
The French decision to go fully Hearthguard was a good one. I have no idea whether it works as a general tactic, or whether it just worked well this time. The English shooting abilities tend to force you to spread out your attacks, so you don’t completely wipe out a unit. Against Hearthguards, where you need to completely destroy them in order to drop them down a Saga dice, this isn’t great.
This was a good game, with some really good rolling at the start which made the English look stronger than they were. Once the French got into combat though, it was all over.
The lack of decent covering terrain really hampered the English. We really could have done with a big muddy field to slow the French advance. But we were in melee in turn 1, so the long range advantage of the English wasn’t used.
I do need to finish painting my foot knights, and decide which army I want to concentrate on in the longer term. The advantage of this period is that the figures are very similar across the different armies, so trying out different faction types is going to be a lot easier than in say, Age of Vikings.
One good thing that did come out of this, was that months ago I lost my Lords of the Wild battle board for Age of Magic. Fortunately, I had scanned and printed out a copy (it’s useful to have a copy of the opponent’s battleboard, plus I can access it online if not at home and thinking about upcoming games).
I did the scanning and printing of my Age of Chivalry board this morning, and found still sitting in the scanner was my Lords of the Wild board. Yay!
Nice report!