Bridge and Ford
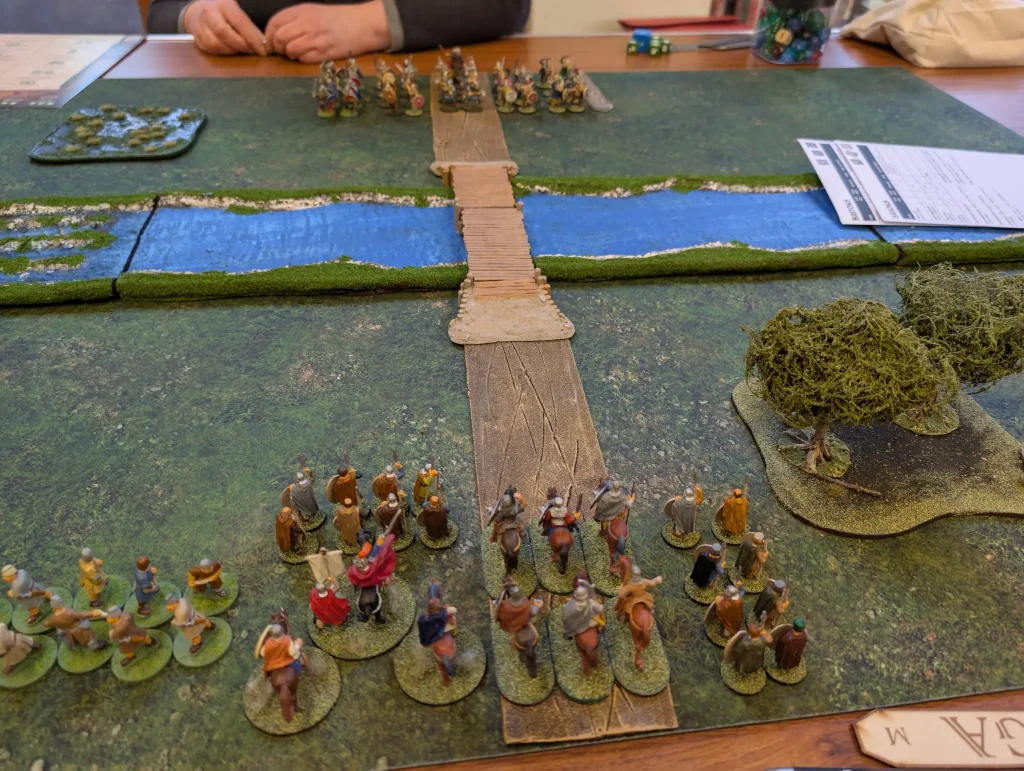
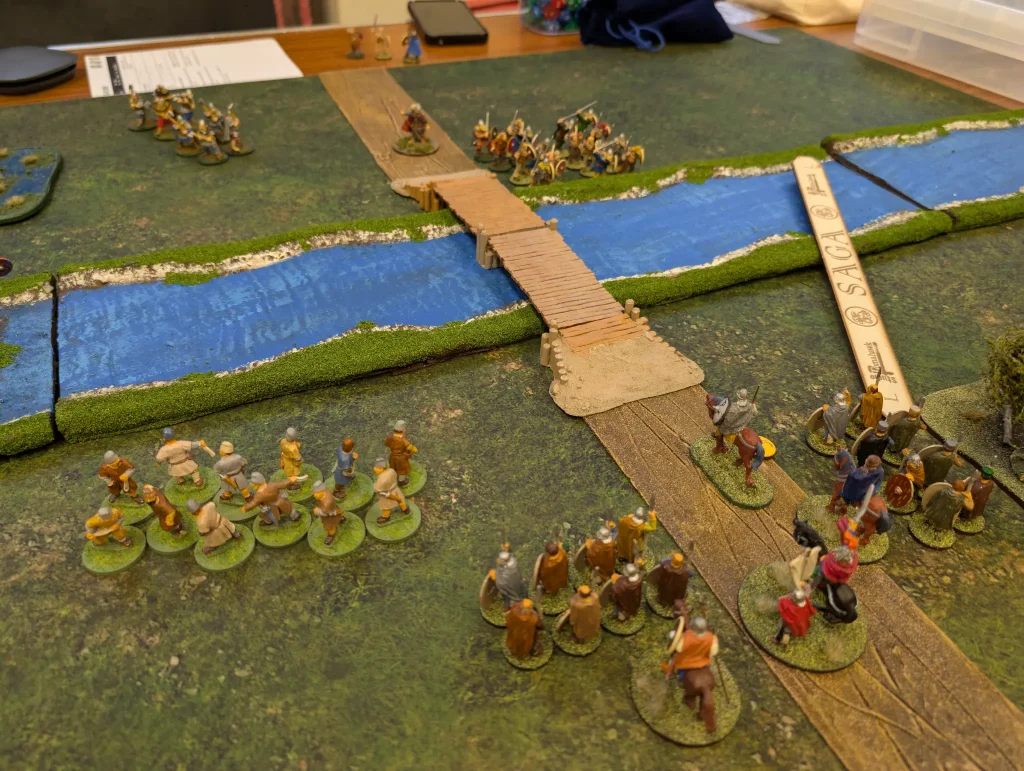
One of the things I picked up from Salute this year were some rivers from Battlezone Miniatures. These are actually a decent width, around 10cm, which is a lot more useful for 28mm than a lot of the rivers that I’ve been able to find which are usually about half that.
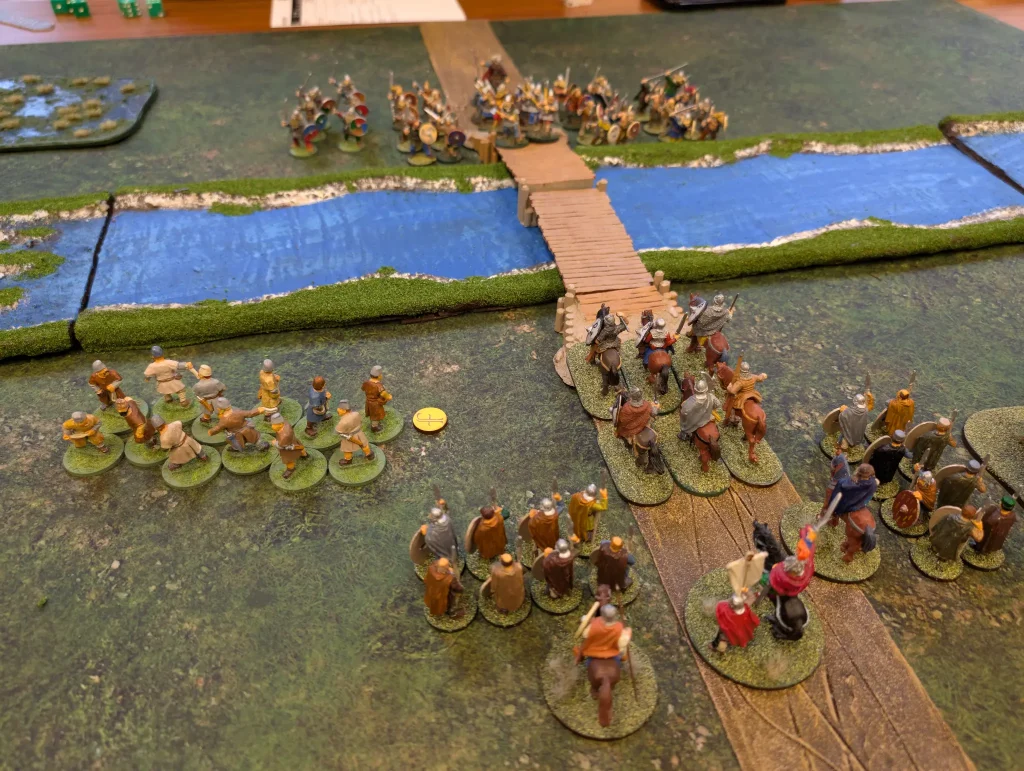
So our Saga game this week was going to involve a river to give it a try out. There would also be a bridge, and because I hadn’t brought both packs of straight river sections with me, there would be a ford as well. The two factions were Saxons and Britons, each trying to get across the river.
Since the Britons had horses, they would be aiming to use the bridge in order to avoid the river which was designated as dangerous terrain. The ford was simply uneven, but still not great for horses.
This would turn out to be a relatively quick game, since neither side wanted to get their feet wet, and the couple of combats we had were pretty decisive.
Though we had some fixed terrain already, we went for some random options, the important ones turning out to be Regicide (game ends after the death of a warlord or six turns) and Show of Force (survival points, and getting to the far edge of the table). We also had Dash of Nostalgia, which meant our warlords each generated 2 saga dice. However, we both forgot that.
The Britons came with a mounted warlord and two companions, which gave them a single unit of 6 hearthguard. They had a single unit of slingers, and the rest were warriors.
The Saxons two a unit of 8 hearthguard, and the rest were warriors. I’m mostly using my Anglo-Saxons as Saxons, though had started painting up some ‘proper’ Saxons. I currently plan on building a mostly Hearthguard based Saxon army, to take advantage of their battleboard abilities that like them having high armour.
Turn 1

The Saxons were first player, and they used manoeuvre to shuffle forward, but that was about it.
So the Britons went next, putting their dice on mostly defensive abilities and moving forward towards the bridge. I wanted to get my slingers close enough to the southern shore so that I could start pelting the Saxons on the far side.
Turn 2
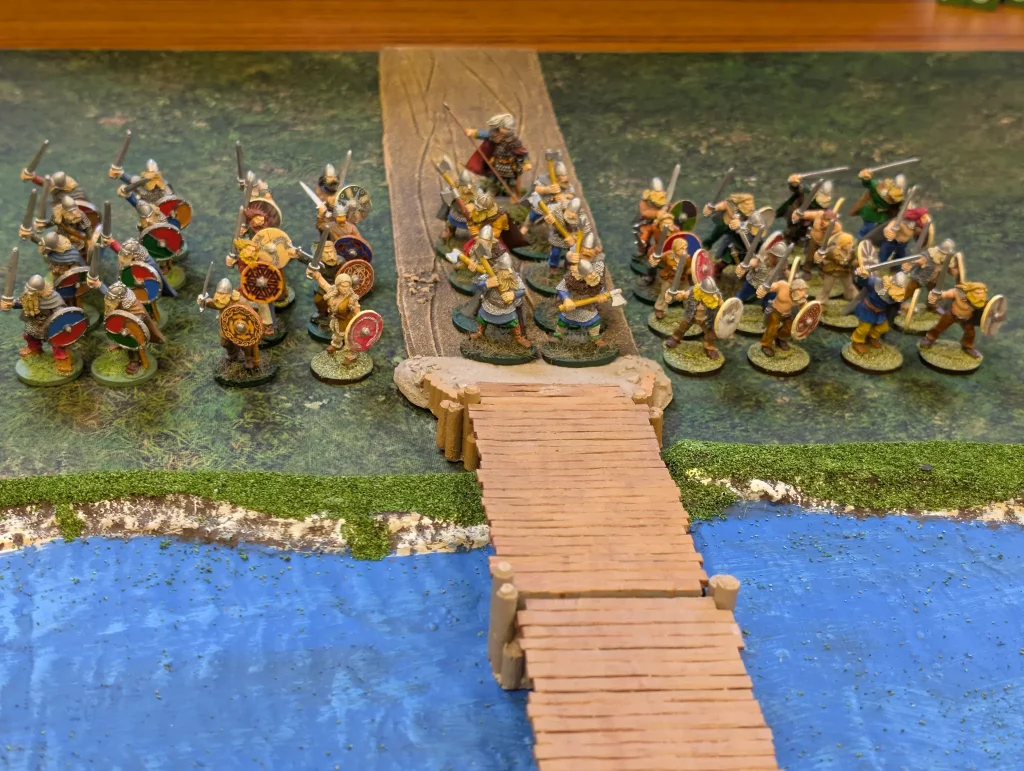
The Saxons remained tentative in their movements, moving up to the river bank and completely blocking the bridge. If I wanted to get my horses across, it would be through their hearthguard.
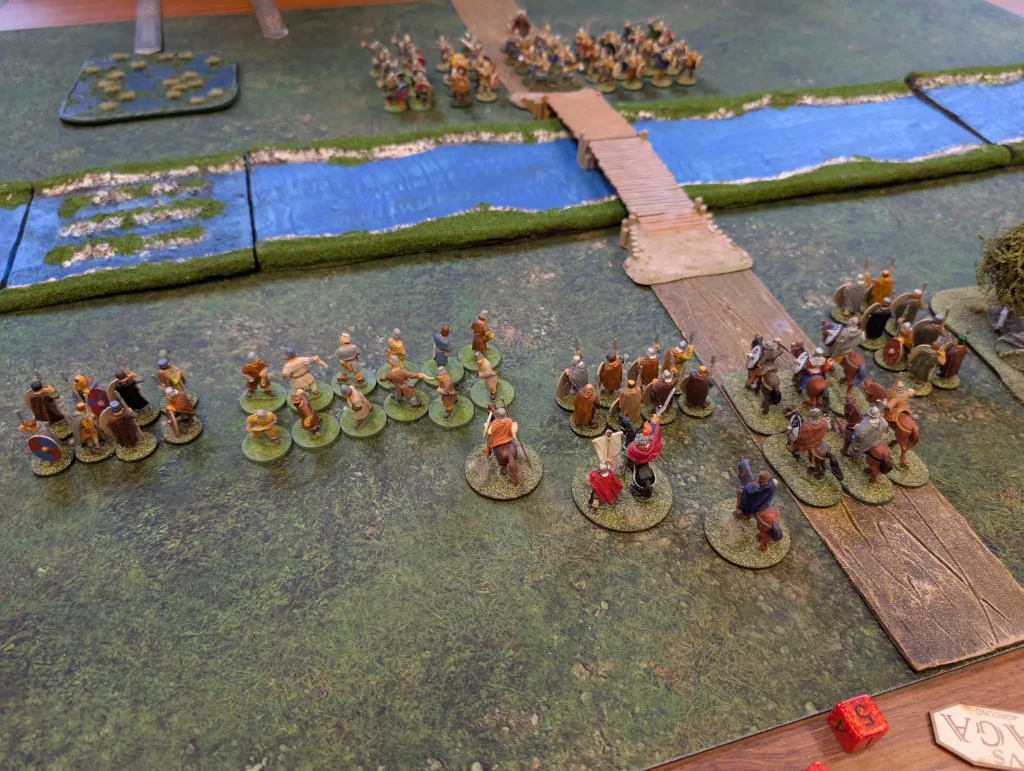
The Britons moved a unit of warriors up to the ford. My initial plan was to try and draw off some of the Saxons around the bridge, which ended working a little bit too well. My slingers moved forward to the river bank and took a fatigue to make a shooting attack. They got hits, but no kills.
Turn 3

The Saxons did nothing, waiting to see what the Britons would do. This was turning into a really quick game, with risk of us actually hitting the six turn limit.
The Britons moved their warriors across the ford, taking a couple of fatigue to do so. Except, the ford had been designated as uneven terrain, not dangerous, so they should only have taken a single fatigue for their second activation. Half way across the river I decided to change tactics. Rather than trying to draw off units of Saxons, I would make a rush for the far table edge. This would give me some bonus victory points as long as I got a unit of 4 figures there.
The slingers attacked again, and the Saxons used their fatigue against them along with Jeers. We got three hits on the Saxon warriors, and two kills. Because of Jeers, we took a fatigue.
I also moved my Hearthguard up to the bridge, so they were in charge range of the Saxon Hearthguard on the far side, and my Hero unit of Warlord and his companions moved around to back them up.
The big strength of the Britons seems to be their Galvanised ability, which grants extra bonuses if a unit is close to their warlord. The downside of the Britons, is that they need to stay close to their warlord to gain these bonuses, which tends to favour a more defensive play. Or at least, keeping everyone together as a single block. If I move a unit forward to charge, they go out of range of the Warlord and lose all their abilities when they resolve the melee.
Turn 4
The Saxons decide to react. Two of their warrior units made a move on my warriors who had crossed the ford. I’d tried to move to the side to keep as far away as possible, but since it was a last minute decision to avoid combat, they weren’t as far away as I’d hoped.
The Saxons played The Storm Breaks, activating both units for a charge without fatigue, allowing them to reach my warriors that turn. We both had a board full of abilities, and we both played most of them.
The Saxons used both my fatigue, taking my armour down to 2. Then, it was Death is Nothing (opponent takes hits if enemy causes hits), Shield and Seax (opponent re-rolls 6s), and Insignificant (gain attack dice if armour is greater).
The Britons used Pitiless (+1 bonus to attack dice) and Tenacious (gain 2 defence dice). I probably should have closed ranks, but I didn’t.
The Britons scored seven hits (which meant they got an extra three automatic hits back against themselves due to Death Is Nothing), and the Saxons got eight hits. Six Britons were killed, and three Saxons.
The remaining Britons fell back, but not quite far enough. There was some disagreement on the exact distance between the second Saxon unit and the Britons, so we rolled a die. The Saxons were in range, so charged getting another two kills and taking no casualties themselves.
This meant that my warriors were wiped out.
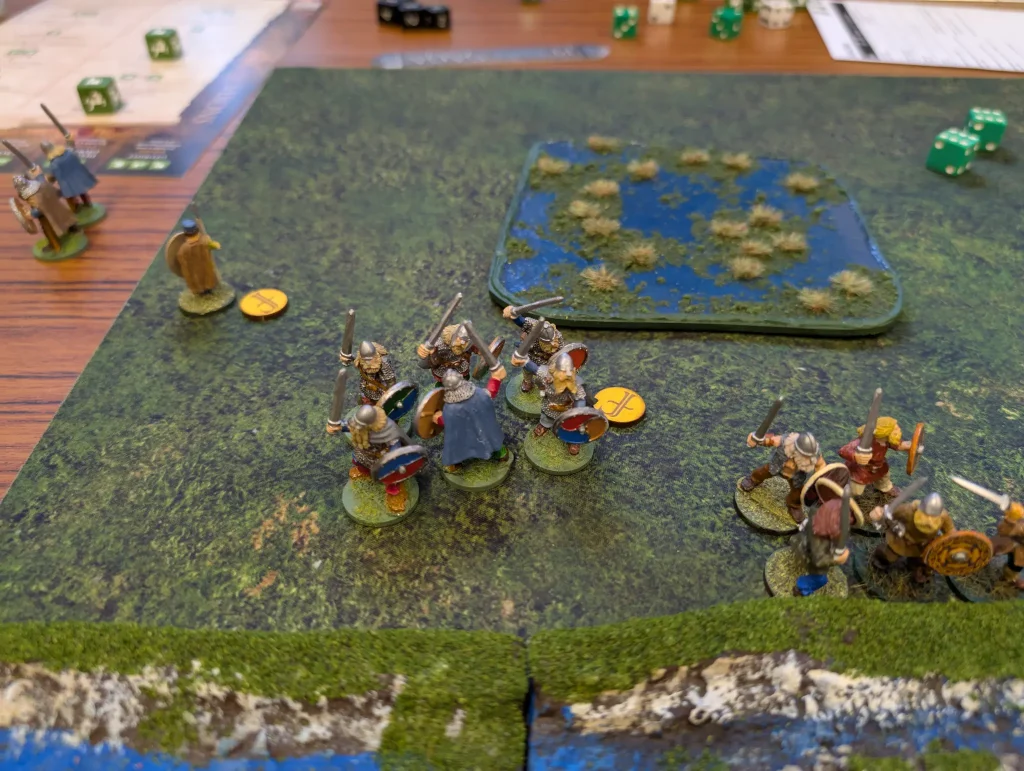
It was now the turn of the Britons. The Saxons had cleared much of the battle board at this point, and the Britons got to refresh theirs. With Britannia! my Hearthguard galloped across the bridge in a charge, and were able to keep their Galvanised status. With abilities such as Pitiless and Wall of Steel the Britons were up to 19 attack dice at +1 to hit.
The Saxons though had 22 attack dice. It was going to be messy…
The Britons rolled really well, getting 15 hits and 14 casualties (the Saxons rolled really poorly on defence). This completely wiped out the unit of 8 hearthguard. However, the Britons took 5 casualties themselves, taking them down to a single figure. I had a saga die still sitting on Comma-Nipulares and was able to activate them again to pull them back.
At this point the Saxons morale broke, and they decided to fall back, handing control of the bridge to the Britons, who declared themselves the victor.