The Duck Pond
It was time for another round of Saga: Age of Vikings. Once again, my Anglo-Saxons were going up against the Irish. This time was opponent was a bit more experienced though, and I wasn’t feeling that hopeful of victory.
In order to try something new, I decided to bring in some mercenaries – a unit of Vagrant Warriors. They get to do some cool stuff with fatigue, and I figured them might make for either a good way to syphon fatigue off other units, or as a hammer to throw at the enemy.
We rolled for a random Clash of Warlords, and again got something a bit odd.
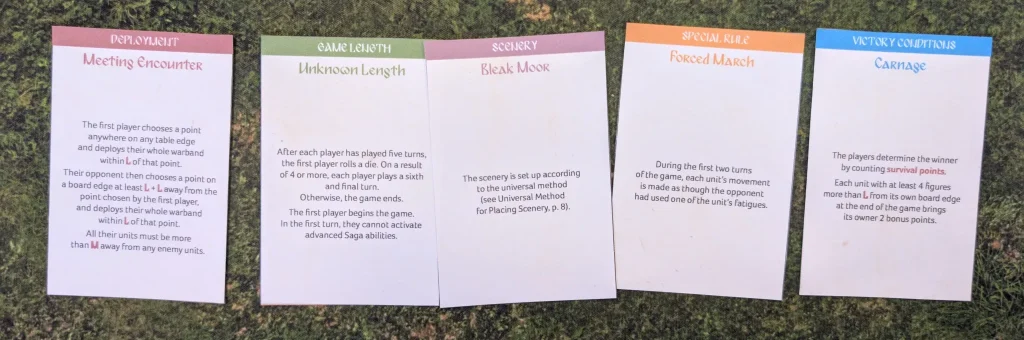
Deployment gave us a Meeting Encounter, so the Irish got to choose one point on the table edge, and then the Anglo-Saxons would deploy L+L from them. We also got Carnage as victory conditions, which meant we get Survival points plus extra points from ending up more than L away from our own table edge. The two mean that it’s possible to start the game well away from your own edge.
I’m not entirely certain how this rule should be interpreted. Technically, the Irish table edge is along the Northern edge (I always play assuming my edge is the South, which makes it easier to describe where things are), and the Anglo-Saxon is along the South. If a deployment like this occurs, are these two definitions still correct? Is the Anglo-Saxon table edge the edge where I as a player sit, or is it the edge from where my army deploys? I’ve always assumed the former, but in situations like this it gives some odd victory conditions.
We also had Forced March, which meant the first two turns would have us moving Short.
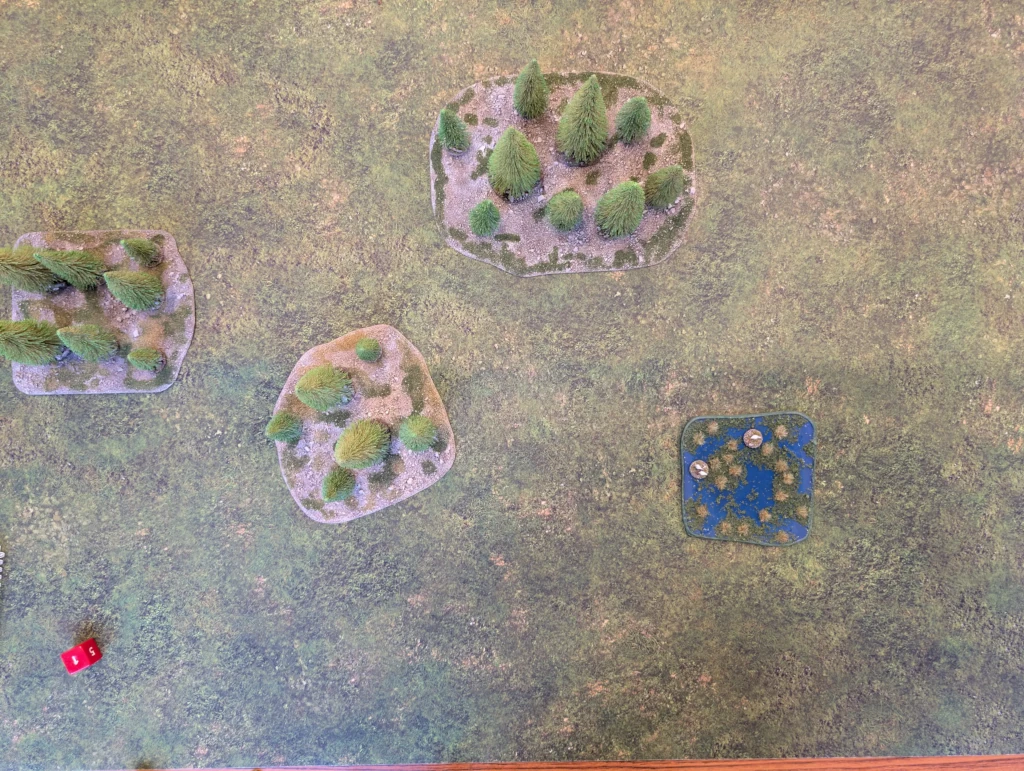
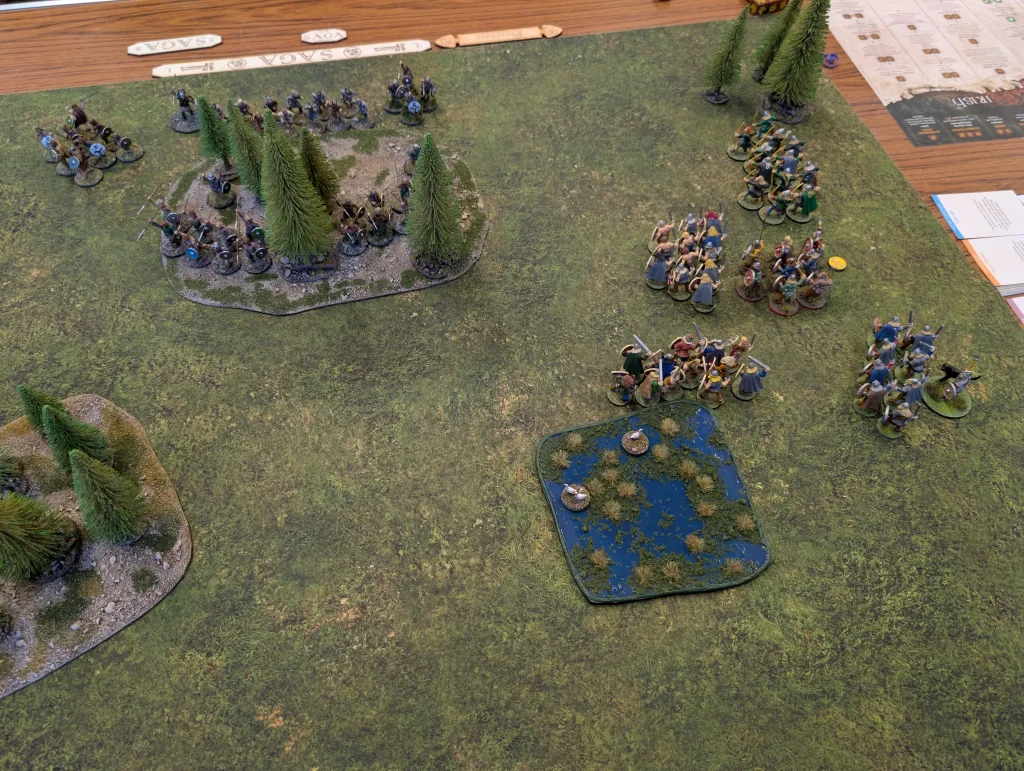
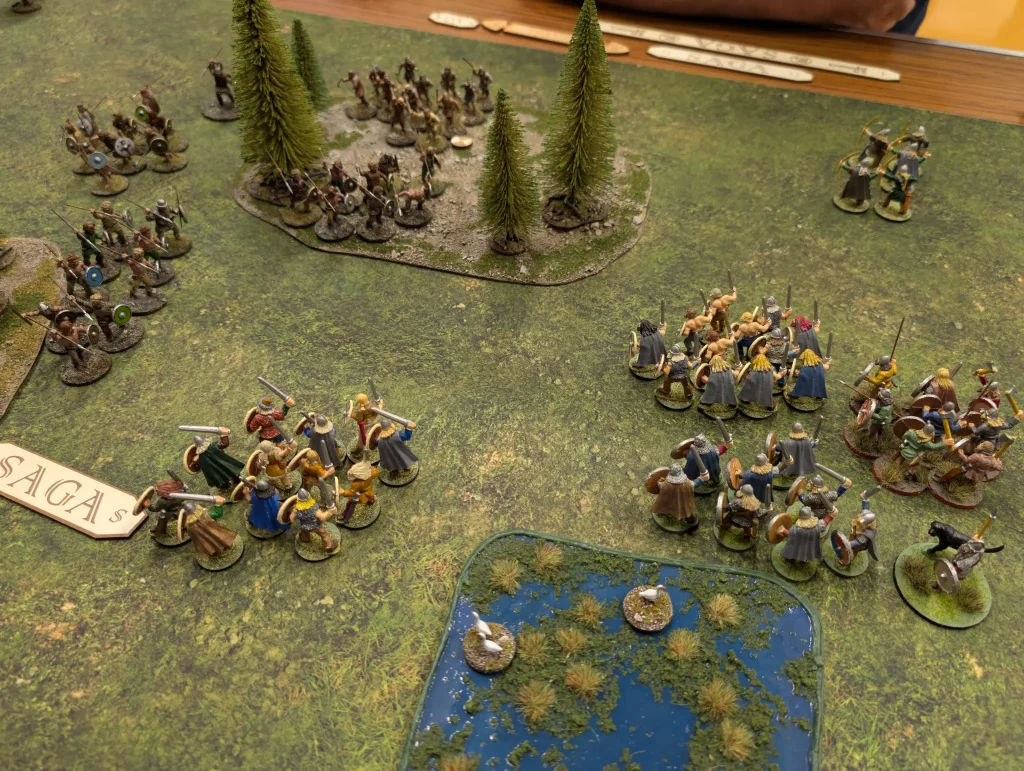
The terrain was laid out with three units of woods, and a marsh. The march was there to stop the Irish using Sons of Dana against me, though a hill would probably have been better.
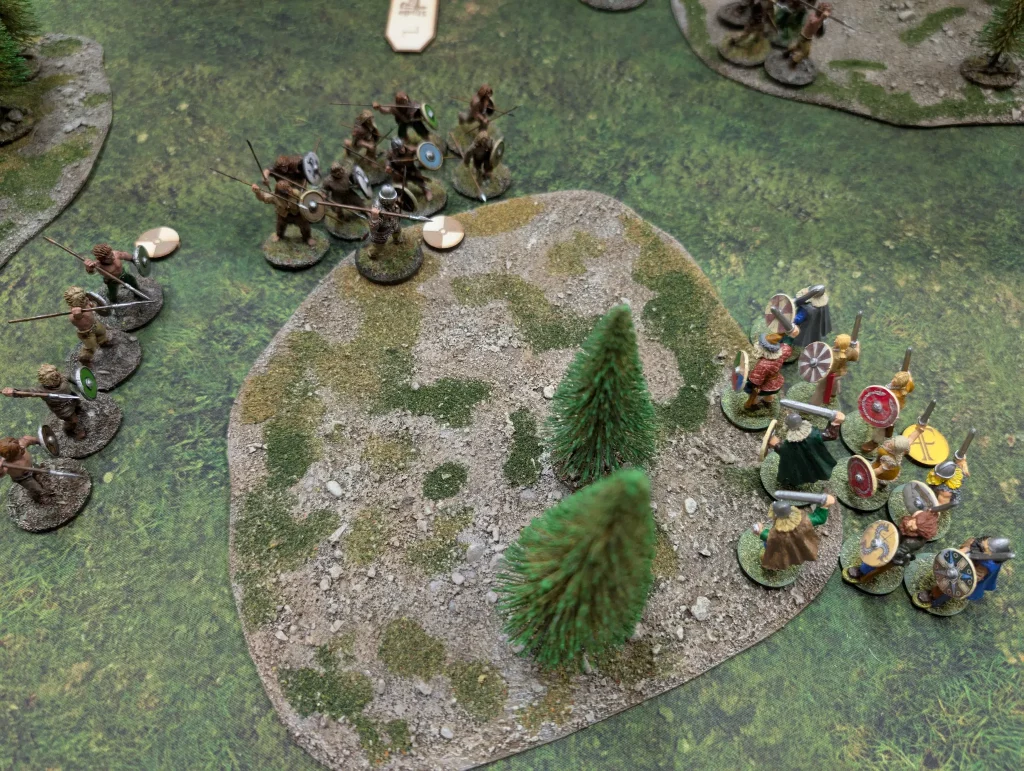
The Irish deployed around the central woods near the Northern (Irish) table edge, whilst the Anglo-Saxons deployed off the East. This meant the Anglo-Saxons were immediately getting the +2 points per unit for the victory conditions, though they’d need to stay away from the Southern edge to keep them at the end of the game.
Turn 1
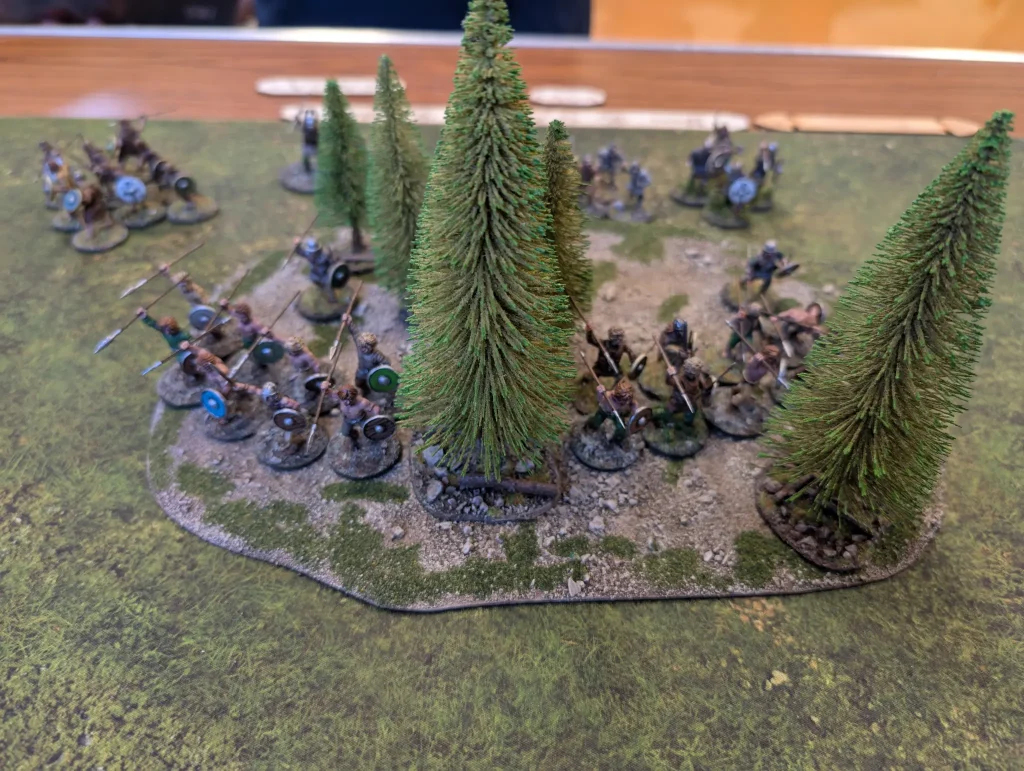
The Irish start the game my moving further into cover, but otherwise not doing much.
On the Anglo-Saxon turn, the Irish play Heirs of Mil as an Orders/Reaction, and then I use Unison to move two units. I move my Bow equipped Levies forward, and shoot at the Irish Hearthguard. I get some good rolls, and manage to get 4 hits and 2 kills. Things are looking up for the Anglo-Saxons.
Then I start moving my Hearthguards and Warlord. I’d placed my Vagrant Warriors near to my archers, so I could maybe help manage their fatigue. But I’d already decided that I wasn’t going to do this, and wanted to move everyone out ready for melee.
The Forced March special rule was going to make that hard to do though.
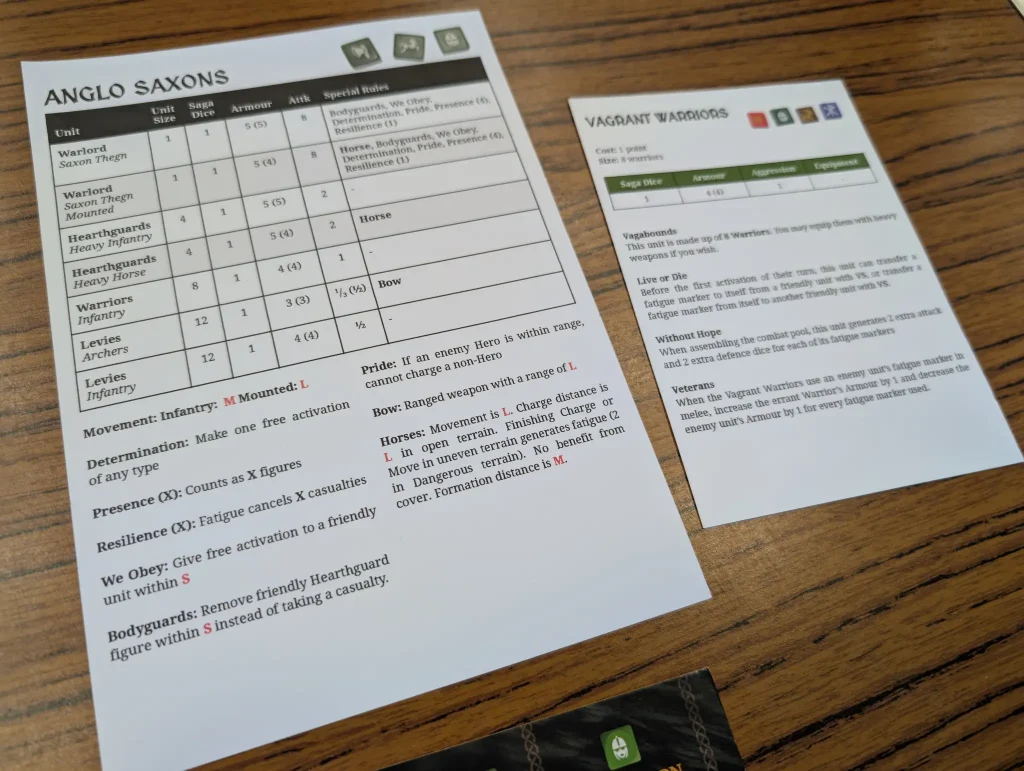
For this battle, as well as my usual A5 hint sheet for my main units, I’d printed off an A6 sheet to describe my mercenary unit. It makes it easy to pass to my opponent so that they can read the rules on the mercenary unit, without us having to dig through the main rules.
Turn 2
The Irish turn, and I start it by having the Anglo-Saxons play Truce to remove some fatigue. The Irish slingers in the woods take shots at my Archers, killing 2 of them. Then the Irish use The Old Way to activate three units. The slingers are activated again (with no fatigue) to kill another 2 archers.
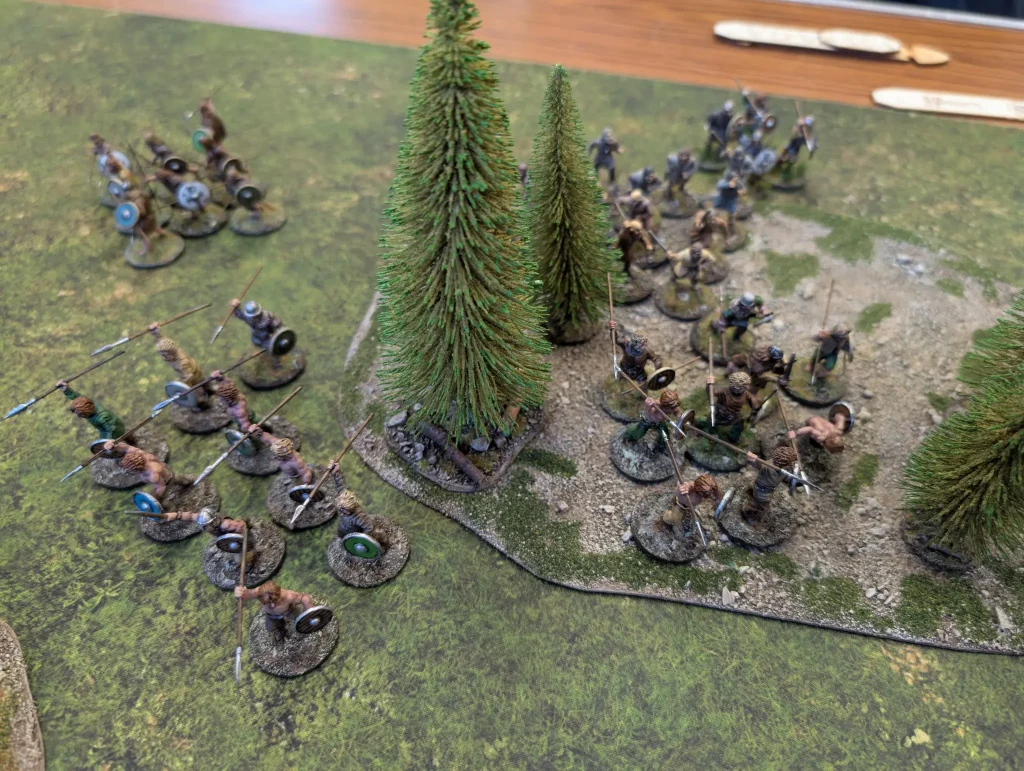
At this point I’m thinking of moving my archers back. They wouldn’t be able to do any good, but at least they’ll still generate a Saga die. Then the Irish Warlord uses his We Obey, and the Slingers shoot again – killing another 3 archers. This takes me below a unit size of 6, and I lose a Saga die.
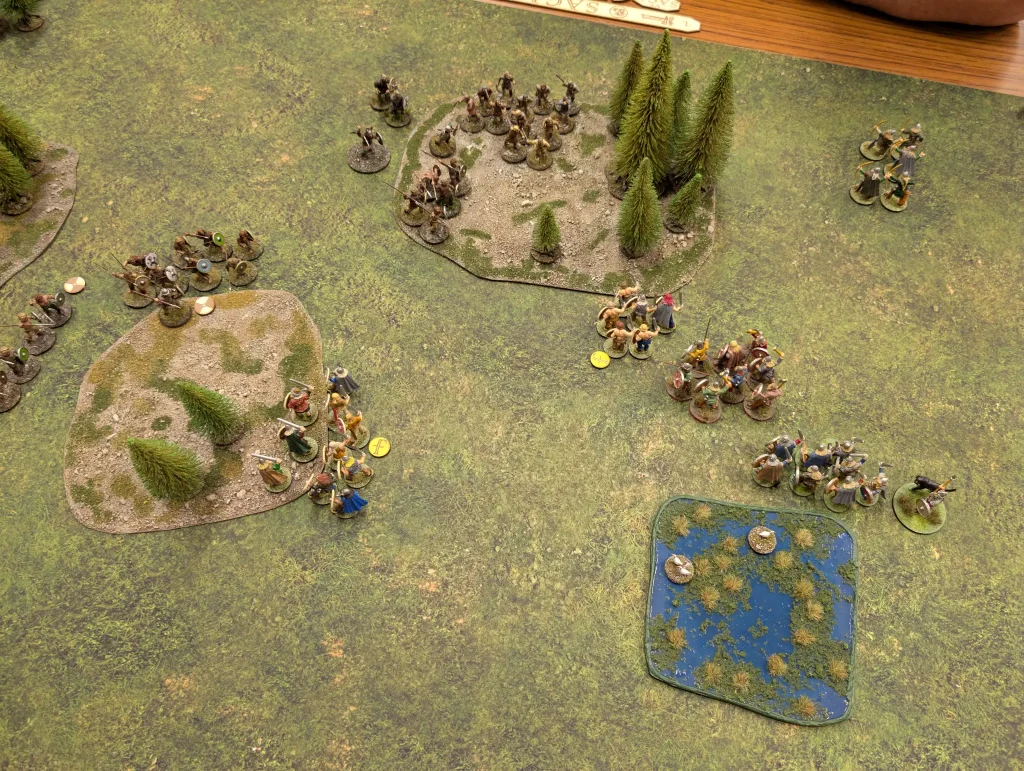
The Anglo-Saxons take their turn, and I continue to move units forward. I take a hit from Sons of Dana as I get close to the woods, but suffer no casualties. Being only able to move Short is making it hard to make progress.
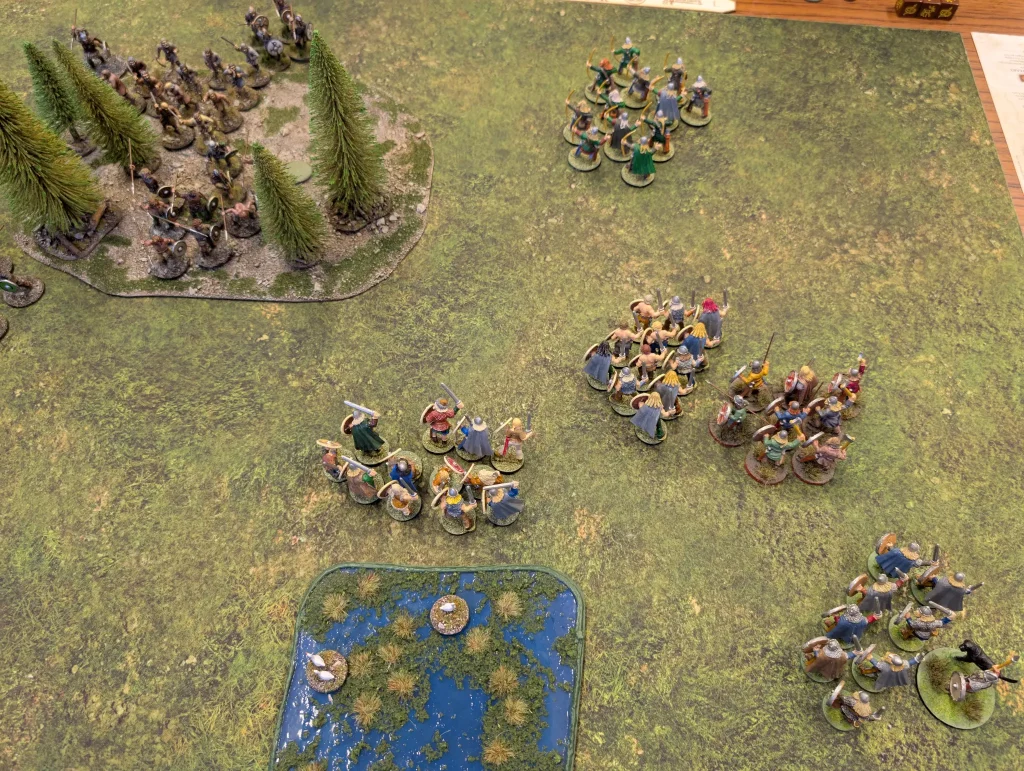
However, I manage to get a unit of Levee out beyond the pond to start threatening the Irish warriors who are making a break for my table edge.
Turn 3
We are now able to move normally, and it is the Irish to move. One of the Curaidh heroes throws a javelin at my levies, using Sidh to cancel any damage. However, any follow up attacks would gain +1. This is one of the abilities that is useless by itself, but really powerful if you line up other units to take advantage of it.
And the Irish did take advantage of it. Two units of javelin equipped warriors advanced and took shooting actions. The first used Firbolg to double hits on 6s, and I used Overlapping Shields to give myself some extra defence dice. Unfortunately for the Irish, they failed to roll any 6s, and though they got 2 hits, they didn’t manage to kill anyone. The second unit got 2 hits, and a single kill.
The Irish then used the Old Way for another round of activations. In my notes, I started writing down that my unit was being charged by two Irish units. With Javelins, they get +1 on their attack roles in a charge. I had nothing on the board to defend with, and my levies would count as boring levies with only ½ attack dice. I would be closing ranks for sure.
However, I was surprised when both sets of Irish warriors vanished into the nearby woods. Apparently they didn’t want a stand up fight. Even at two to one odds.
Now it was the Anglo-Saxons, and I played Valiant Hearts (to make my units effectively larger) and Call to Arms (to give my levies the aggression of warriors). I used Unison to move two units, but did them in the wrong order. I moved the southern unit (that had just been attacked) up to the woods where one Irish unit had fled to. This allowed them to play Sons of Dana, and I took a casualty.
I then moved the northerly unit of levies towards the Northern wood, where the second unit of Irish were hiding. This wasn’t my primary objective, and I should have moved this one first in order to attract the Sons of Dana onto this unit.
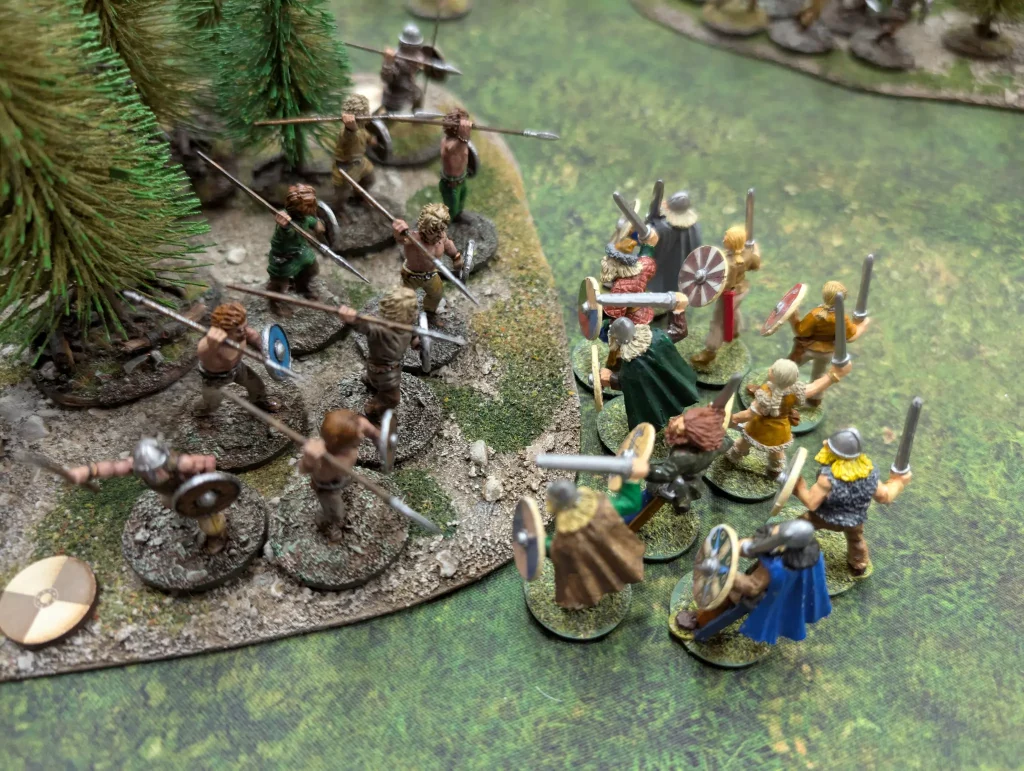
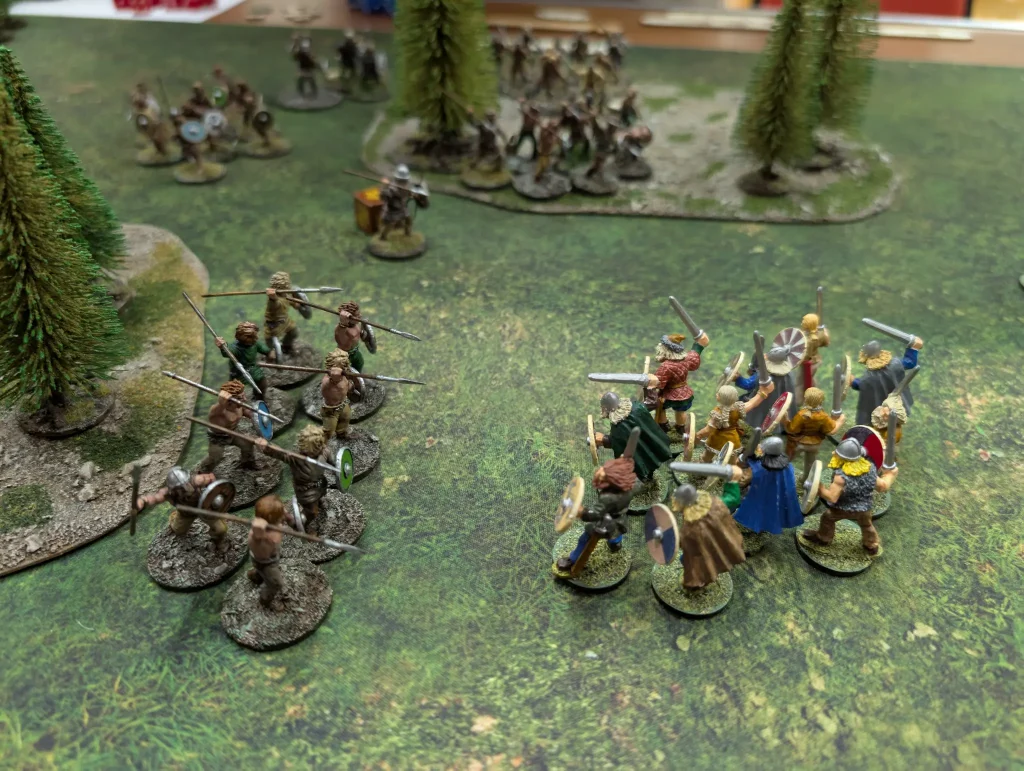
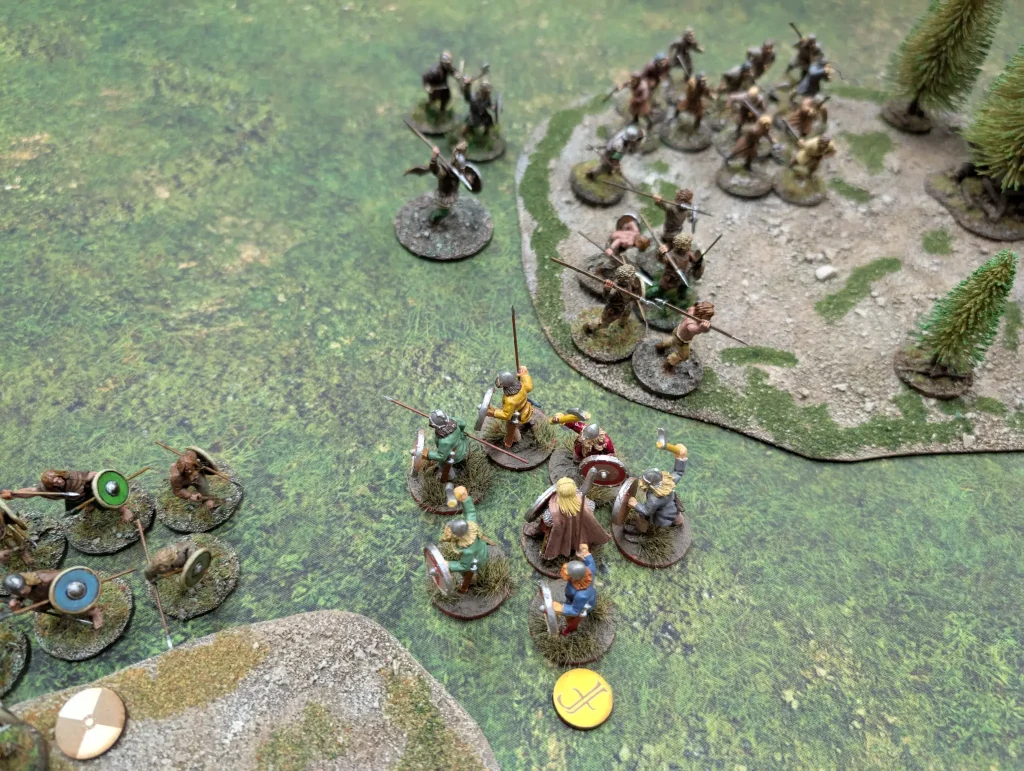
The first unit then charged. We had 11 attack dice (thanks to Call to Arms), and then I used Crash of Shields to reduce the Irish attack dice down to 1. They used Spirits of the Land to give themselves a bonus on their defence dice since they were in uneven terrain.
I got 8 hits, and 4 kills, forcing them back, and took no casualties myself.
My second unit charged in with no special abilities, and it was a straight 12 dice against 8 dice. I got 5 hits and 3 kills, they got 4 hits and 4 kills. So I fell back out of the woods, feeling somewhat battered.
Turn 4
The Irish started to move their warriors further out of range. A lot of shooting was performed, which was reducing the size of my units of levies. With my levies partially in the woods, the Irish could come around the other side of the woods and still shoot at them.
In all, the slingers shot twice, a group of warriors threw javelins, and a Curaidh threw javelins. It wasn’t doing anything fatal, but it was like being nibbled to death by cats.
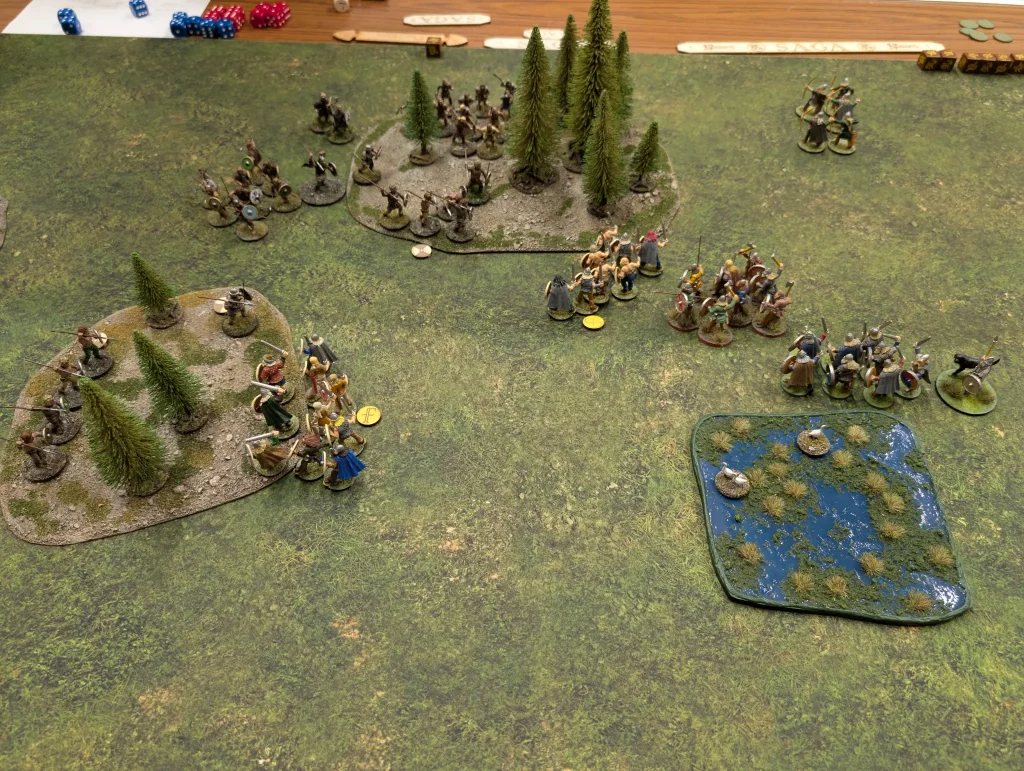
The Anglo-Saxons still had several units that it hadn’t managed to use though. My archers were standing out in the middle of nowhere, not doing anything. My mercenaries weren’t worth what I was paying them, and my Hearthguard and Warlord seemed to be having sitting by the duck pond drinking beer.
All the work so far had been done my the levies, who had suffered for it.
But then I saw an opening. I wasn’t sure whether I could pull it off, but it might just change the way the battle was going. It would require a lot of measuring, and some careful placement of Saga dice (including using Activation Pool to re-roll a rare). But, finally, the Mercenaries might earn their keep.

My levies were now too small to use Unison on two of them, and even Valiant hearts wouldn’t help. Since I couldn’t use advanced saga abilities on Mercenary units, the only battle board abilities that mattered was going to be some basic activations.
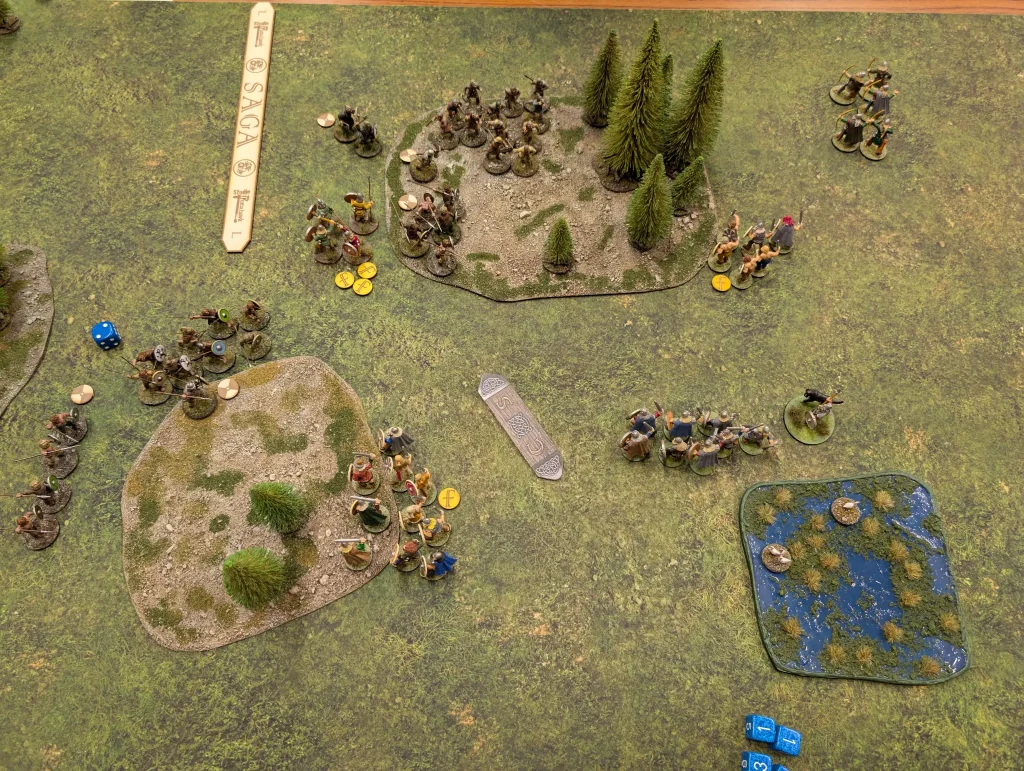
I used an activation dice to move my Hearthguard forward, but this was only to allow my Warlord to move in. Unison was then used to shunt my northern levies back out of the way, and my Warlord moved up alongside my Vagrant Warriors and told them to get moving.
I really should have reminded my opponent whether he wanted to use Sons of Dana on my levies, because instead he used them on my Vagrant Warriors as they rushed around the woods towards the unprotected Irish Warlord. They lost a single figure to random javelins coming out of the woods, but this wouldn’t stop their attack.
The Vagrant Warriors had two fatigues when they engaged the enemy Warlord. Which, due to their special abilities, gave then an extra 4 attack dice and 4 defence dice. The warlord graciously spent their fatigue to increase his armour to 6 (equipped with a javelin, he only had a melee armour of 4).
We had 11 attack dice, but got only a single hit, and a single casualty. The warlord took it on fatigue. He got 7 hits and 3 kills on my warriors, taking them down to four and forcing them back. We both got an extra fatigue from the melee.

But I had another activation left. I activated them for a second charge, which took them back up to two fatigue. So we had a Warlord on two fatigue, against four Vagrant Warriors on two fatigue.
The Warlord had two hearthguard behind him, which he could ‘spend’ as bodyguards if needed. We were both on armour 4. I could use a single Warlord fatigue to both raise my armour and lower his (another Vgrant Warrior special) – but I passed. Which left my opponent with a difficult decision of whether to spend my fatigue or not.
This is where the maths kicks in when playing Saga. For me, if I spend his fatigue, it lowers his armour but then it allows him to soak more hits on his fatigue. I think, he really should have used my fatigue to raise his armour, and therefore tempt me into spending his fatigue to raise my armour and lower his back down. But it’s not always obvious.
He passed. We both had 8 attack dice this time, and luck was on the side of the Anglo-Saxons this time. I got 5 hits – which he failed to save any of. So that was five ‘kills’. He took one on a final point of fatigue, and could take two more on his bodyguards, but he’d still be dead.
So the Irish warlord fell to some mercenaries, whilst his Hearthguard stood by and watched.
Turn 5
At this point, most other groups in the club had packed up and left, or were packing up. A quick mental count of the survival points we both had seemed to suggest that we were quite close on points. I’m not sure whether my Warlord counts as 4 figures for getting +2 points for being away from my table edge or not.
Even with the morale hit of losing their Warlord, I think the Irish could have pulled off a victory. But they were down a Saga die, down a We Obey, and down a Hero for The Old Way. Turn 5 could be the final turn, or there could be a sixth turn.
I offered my opponent a draw, and he took it.
It was a good game, with the Irish using their usual tactics of hiding in woods and refusing to stand and fight. This is really annoying for Vikings, but doesn’t help the Anglo-Saxons either. Against an army with mounted units, it would be even worse.
I’d only lost levies and mercenaries, so the Anglo-Saxons were happy that nobody important had died, plus they’d killed the Irish Warlord. The Irish could claim that they’d only taken a few casualties, and there was now promotion opportunities amongst their remaining hearthguard.
Except… I’ve just realised that there was a flaw in my plan. The thing about the Anglo-Saxon board, is that activations is based on unit size. At the time I started, I had 8 Vagrant Warriors. At the point that they took a casualty from Sons of Dana, they went down to 7. This meant that all my dice on Great Fyrd (activate a unit of at least 8 figures) couldn’t have been used to make the final two charges.
Definitely once they’d gone down to 4 figures, they couldn’t have charged a second time, unless I’d allowed for that and put dice into Fyrd also.
So with this in mind, I think I have to give the win to the Irish. The effects of changing unit sizes hasn’t come up before when chaining actions like this, but it’s definitely something we’re going to need to be aware of when playing the Anglo-Saxons.
I possibly could have done something very similar with my Hearthguard instead of the Vagrant Warriors. They would have gone in with 16 attack dice, and higher armour, so may have been even more effective, but they may not have been able to reach that turn.