Hostage
It was the first wargaming club meeting of the year, but as it turned out, we couldn’t get into the hall. This didn’t mean no gaming though – instead we headed back home and had our game there instead.
For the first session of the year I wanted to try something a little different. It was a game of Saga: Age of Invasions, but with a narrative scenario spread across multiple sessions. This was planned to be part one of two.
The scenario is loosely based on the Lion Rampant scenario “Fugitive“. It’s designed with the Briton and Saxon factions in mind, though could be used with other faction types (or even in other time periods).
The first part of the scenario begins after the Saxons have taken a British hero as hostage. Some Britons turn up to rescue him, but it turns out he’s already escaped and is hiding in one of the nearby woods. It is then a race for the Britons (to help him escape) and Saxons (to kill him) to find the hero. Part two of the scenario will be the race back to the Briton’s hill fort.
The original plan was to have a small settlement near one long edge, with the Saxons in the buildings and around the campfire. The Britons would deploy near here. With the Britons moving first, they would have the choice to attack the Saxons or run off and start searching the woods.
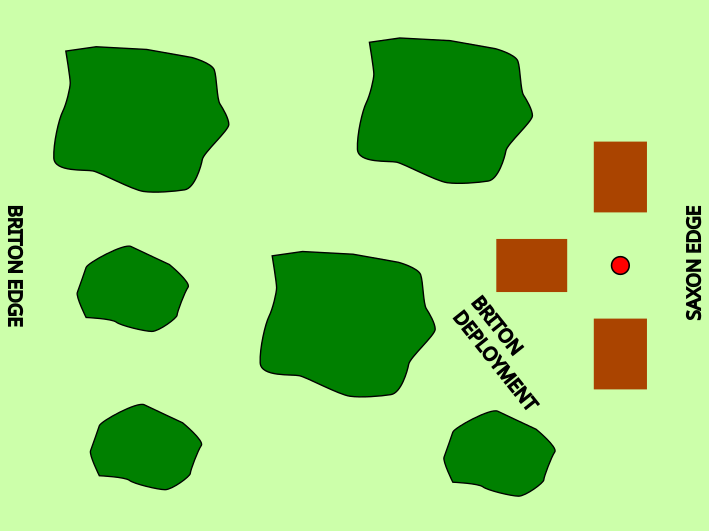
This raised a few points. Initially, with the Briton’s would be very close to the Saxons and able to attack in the first turn, before the Saxons had a chance to roll any Saga dice. Starting with only 3 saga dice, the Britons wouldn’t be able to do much. But would it be unfair?
The Britons would also be much better positioned to start searching the woods.
The other issue was that my original plan was for 6 woods (3 large, 3 small), but this was too much for the standard 90x120cm table size. So we shuffled things around a bit.
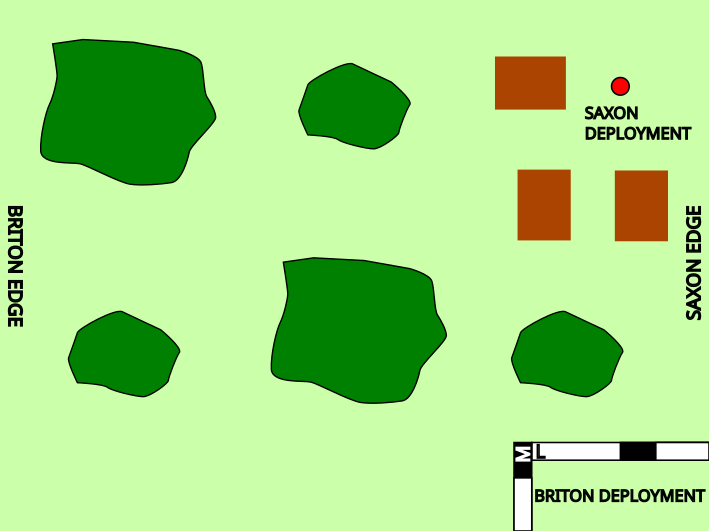
We cut the number of woods down to 5, and moved the buildings to one corner, with the Britons deploying on the other corner. This gave a bit of distance between the two forces, and hopefully made things a bit fairer.
Deployment
The Saxons get 4pts. They deploy a unit (of up to 8 figures, so Warriors or Hearthguards) into each of the three buildings. The remaining unit, plus their Warlord, deploys next to the camp fire.
The Britons also get 4pts, and deploy all their forces in one corner at the Saxon edge of the table, but opposite the Saxon settlement.
5 tokens (A-E) are then deployed randomly face down on each of the woods.
The game is played at night, so charge and shooting ranges are limited to M. The aim is for the Britons to get their hero off the Briton Edge of the table, along with as many of their units as possible.
The Saxon aim is to find and kill the hero, and also get as many units towards the Briton edge.
If a Briton unit is still on the table, but within L of the exit edge, then they still get to fight in the next battle (but start it with a fatigue).
If the Saxons are within L of the exit edge after six turns, they are well positioned for the next battle. If they are within 2xL of the edge, then they will also start the following battle with a fatigue.
Special Rules
When a unit enters a wood, they automatically get to turn over a token:
- A: The Hero is found in the centre of the wood. If the Britons find him, they can immediately activate him if they have dice. If the Saxons find him, he gets a free move activation.
- B: Bear. The bear will immediately charge and attack the unit that discovered it. It has aggression 4 and armour 4, with resilience (1). If it is killed, a fatigue may be placed on an enemy unit. If it survives, at the end of each player’s orders phase, the opposing player may activate it for a move or charge (if it is not fatigued).
- C: Crone. After consulting the friendly crone, the player can look at another face down token, then put it back. The token is removed after being revealed.
- D: Deer. The deer is placed in the centre of the wood. It has aggression 1 and armour 3. If killed, one friendly unit can have all their fatigues removed. If it is alive, at the end of each order phase, the current player can move the deer M. It is unaffected by woods for movement.
- Any other token: No result.
There were originally going to be 6 tokens, but on cutting the woods down to 5, we changed to 5 tokens. It might be more interesting to have 8 tokens (A-H). Token A is selected, plus 4 other random tokens. Then distribute the 5 throughout the woods. This means you are not guaranteed to get a Bear, Deer or Crone.
It is possible to burn down a building, as per the rules in the Book of Battles. If the Britons do this, then it reduces the Saxon chance of recovering losses before the next battle.
The Hero, once found, has aggression 4 and armour 3, with no special equipment. They count as a Hero, but generate no saga dice. They should probably get Determination, though we didn’t do this in our game.
End of the Game
At the end of the game, the Britons “win” if they get their Hero off their edge of the board. The Saxons win if they kill the hero. It’s a draw for other results. However, this is really just setting up the next part of the scenario.
For each Saxon figure that was a casualty, roll a D6. On a 6+ they come back in the next scenario. The Saxons get +1 to this roll for each building still standing. This is the reason why the Saxons might want to try and burn down the buildings.
For each British casualty (except for the Hero), roll a D6. The figure is available for the next part of the scenario on a 5+. They get no modifiers. For both Saxons and Britons, their Warlord gets to roll twice.
If the Hero is slain, or doesn’t make it the edge, then they are back in the next scenario but they start with 3 fatigues.
The Game
Turn 1
We deployed as above, and the Britons (under my control) went first. A had a warlord and hearthguard on horses, two units of warriors and a unit of javelin equipped levees. I only had horse because that’s the figures I have for my British faction.
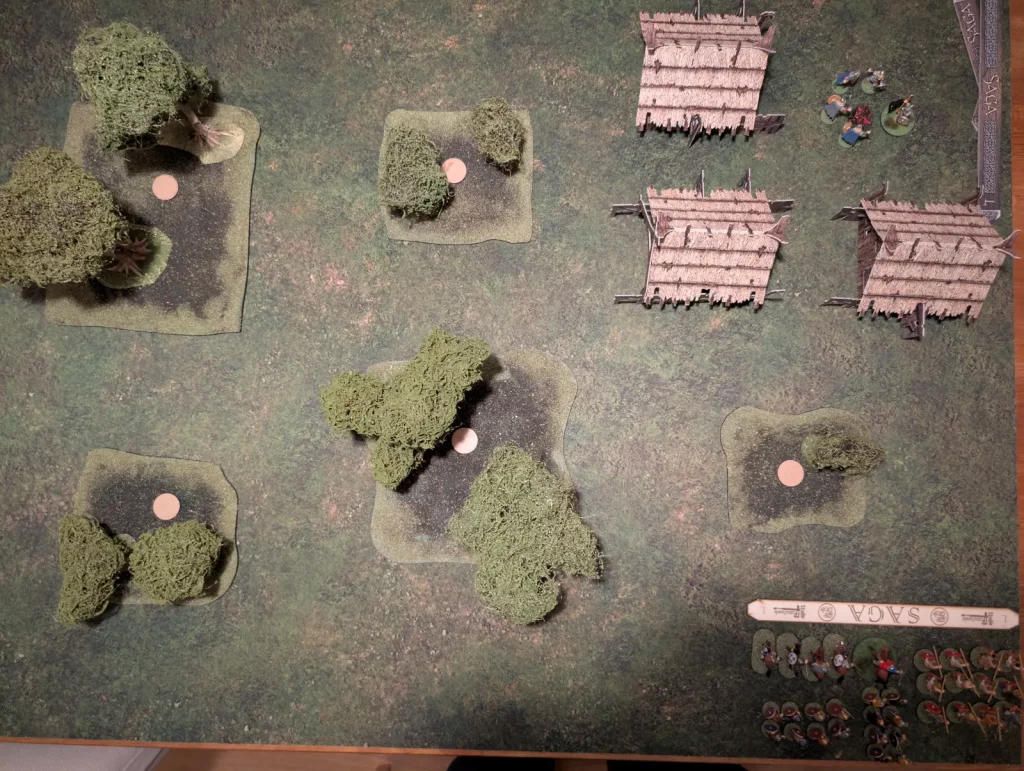
We didn’t do much more than move, with the Hearthguard and Levees moving up towards the buildings, and the rest setting off in search of the woods.
The Saxons deployed two units of heartguard and two units of warriors. One unit of heartguard ran out of a building and into some nearby woods. They find a Bear! I play the bear, and decide not to use the Saxon’s fatigue, and the Bear is killed without the Saxons taking any casualties. The Saxons decide to give a fatigue to the British hearthguard.
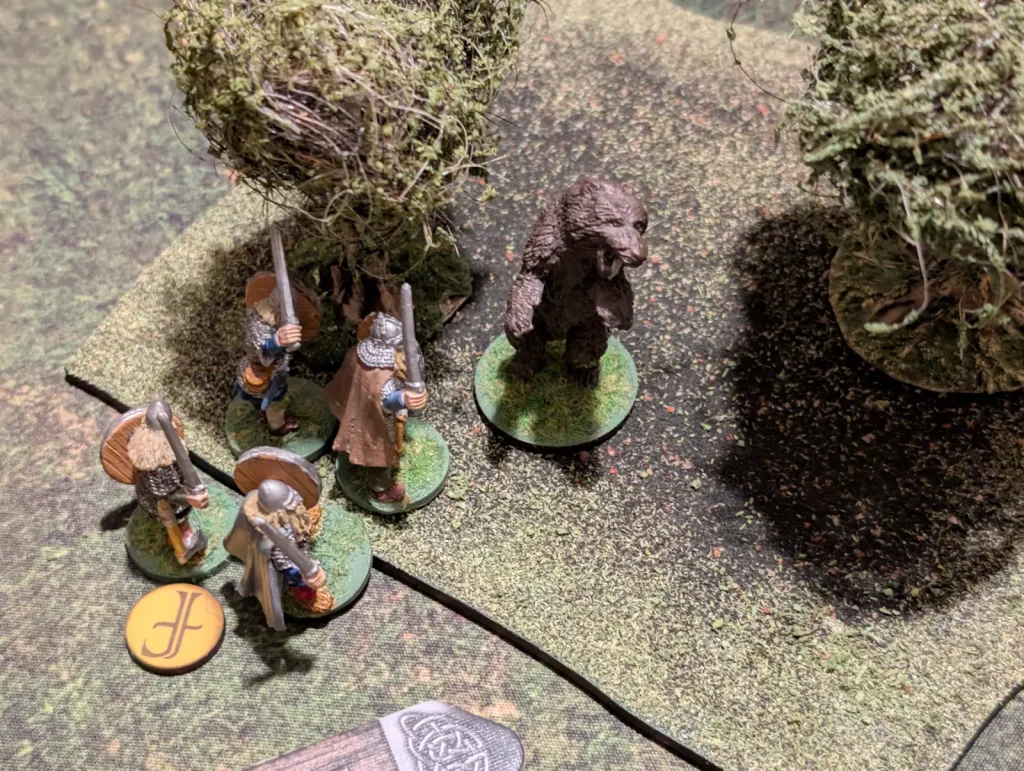
Their Warlord and Hearthguard run into the vacated building, and the Warlord uses We Obey to send the warriors in the next building out to another woods. Nothing is found there.
Turn 2
Other than Wall of Spears, I put all the British Saga Dice into basic activations. Before I can do anything, the Saxons play their Vivacity. They simply use this to move around.
My levee head into the woods, and find a deer. They use their free shoot activation to kill the deer, removing the fatigue from our hearthguard. I had planned to attack the building with my Hearthguard, but because they are mounted they can’t do that (I should have remembered that rule). So instead they head up the battlefield.
Horses can move quickly in this scenario, but using them to look into the woods is expensive since they gain fatigue every time they end their movement in uneven terrain. I send my warlord down along the southern edge of the battlefield by himself.
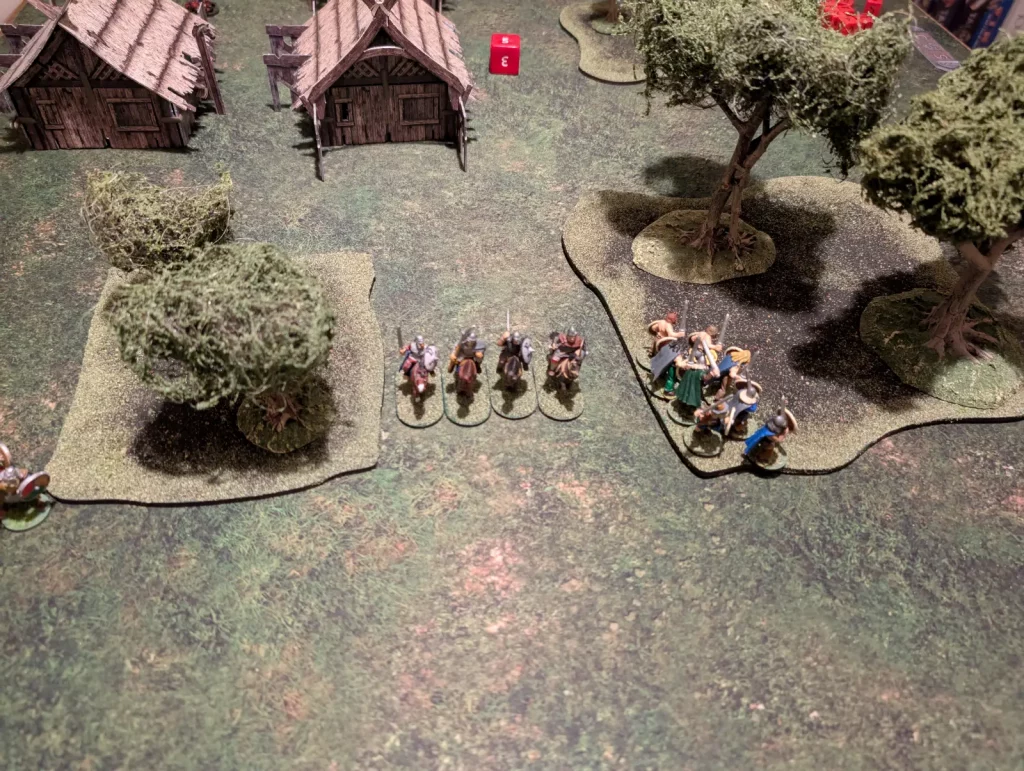
Note that this has split the Briton units, which is bad due to their Galvanised ability which gives them bonuses when close to their Warlord. It’s difficult to avoid, since they have to cover as much ground as possible.
The Saxons spend their turn resting.
Turn 3
The Britons put a dice on Pendragon. The Saxons once again use Vivacity to get movement actions during the British turn, taking a look in another wood and finding the Crone. Since there is only one more token to check, the Saxon player takes a look at that and presumably sees that it’s the hero.
Then the Britons move up to the last wood and find our Hero. We’ve still got our war band spread across the board though, with the Levee down near the buildings. A had planned to attack one of the empty buildings and burn it down, but miscalculated how many actions I needed to do that (one to get out of the woods they were still in, one to get within VS of the building, then one to burn it down). So instead they turned around and headed up the table.
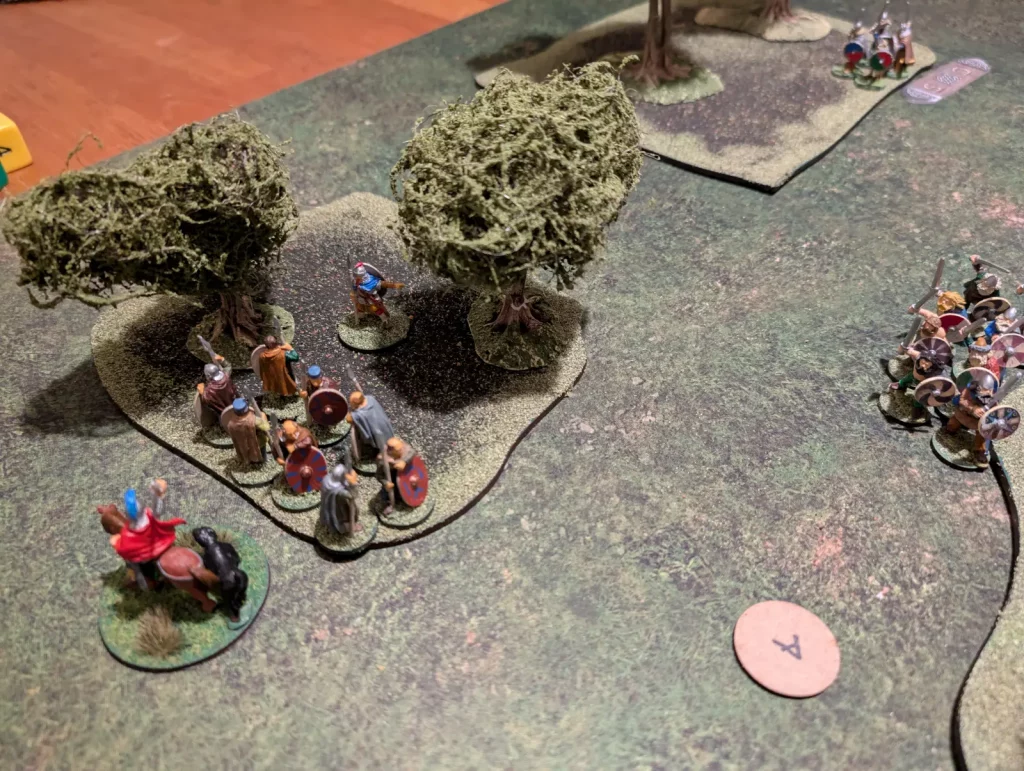
The Saxons do a bit of resting and moving, then use the Storm Breaks to attack my mounted hearthguard. They also have Death is Nothing, which means they cause hits based on the number of hits that I do to them. It’s a really nasty ability. Their warriors go first, and get 12 attack dice to my 11. I get 7 hits against them, which means they get a bonus 3 hits against me for a total of 9.
Despite some good defence rolls, my hearthguard are wiped out, and two saxon warriors remain. Their second unit doesn’t get to do anything since their target is no longer there.
Turn 4
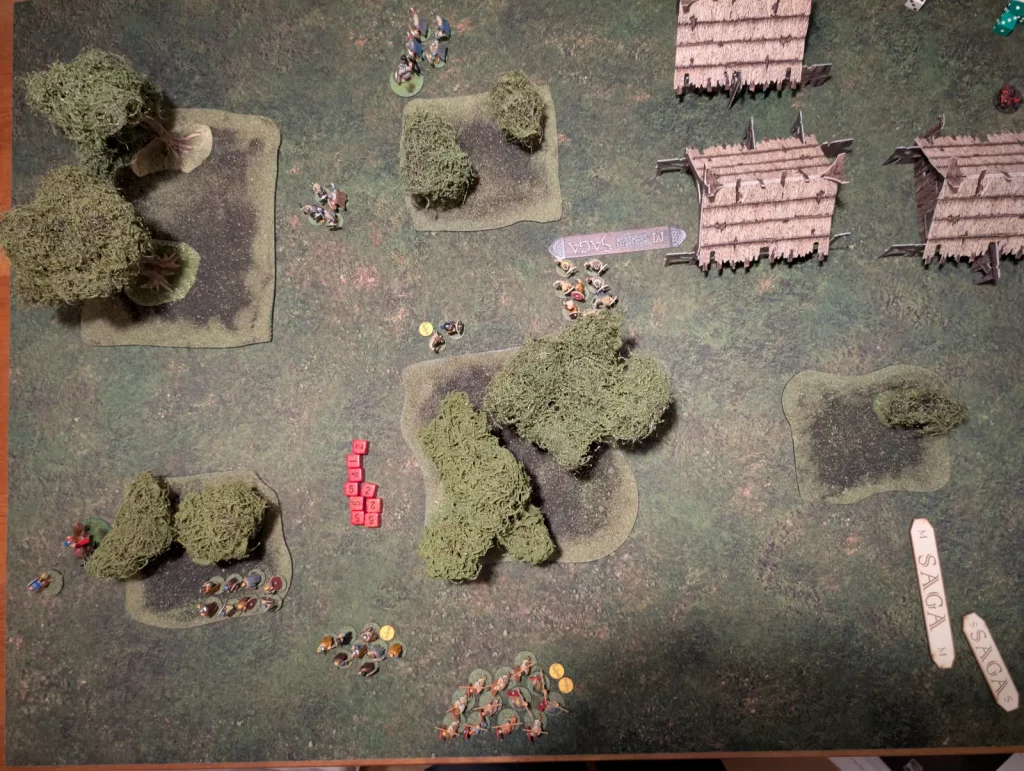
The Britons do a lot of running up the table, but I forgot (once again) to use manoeuvre. The Saxons also run, and I should have used their fatigue to slow them down but I didn’t remember until half way through. Using fatigue to cancel or reduce movement or charges isn’t something we take advantage of a lot. Mostly because we forget I think.
The Saxons once again uses The Storm Breaks, attacking my levees and killing half of them, for a cost of a single Saxon life. Their second unit tries to attack my warriors, but I remember Fatigue at this point and slow their movement so they can’t reach me.
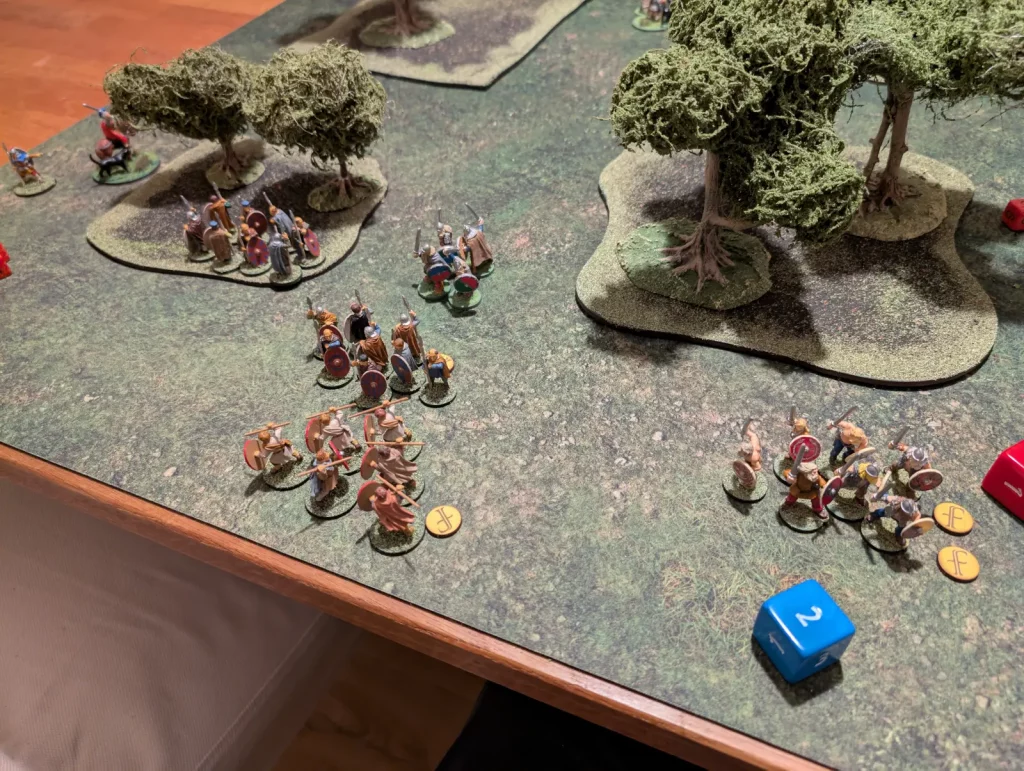
Turn 5
It is the Britons to act, but again the Saxons use their Vivacity. I cancel one of their movements by spending two of their fatigue. Saxons being able to move in both my turn and their own really allows them to move quickly without needing to gain fatigue, so I figured burning their fatigue to cancel a movement was probably worth doing.
We manage to get our hostage off the table, but I keep my Warlord around in order to make use of his saga die next turn.
Once again the Saxons use The Storm Breaks on their turn, as well as Insignificant and Implacable, and catch and wipe out my levees.
Turn 6
The Britons roll three dragon standards (I’m not sure what the die symbol is officially called), which means they can’t activate warriors to move. I only have a warlord and two warriors left on the table.
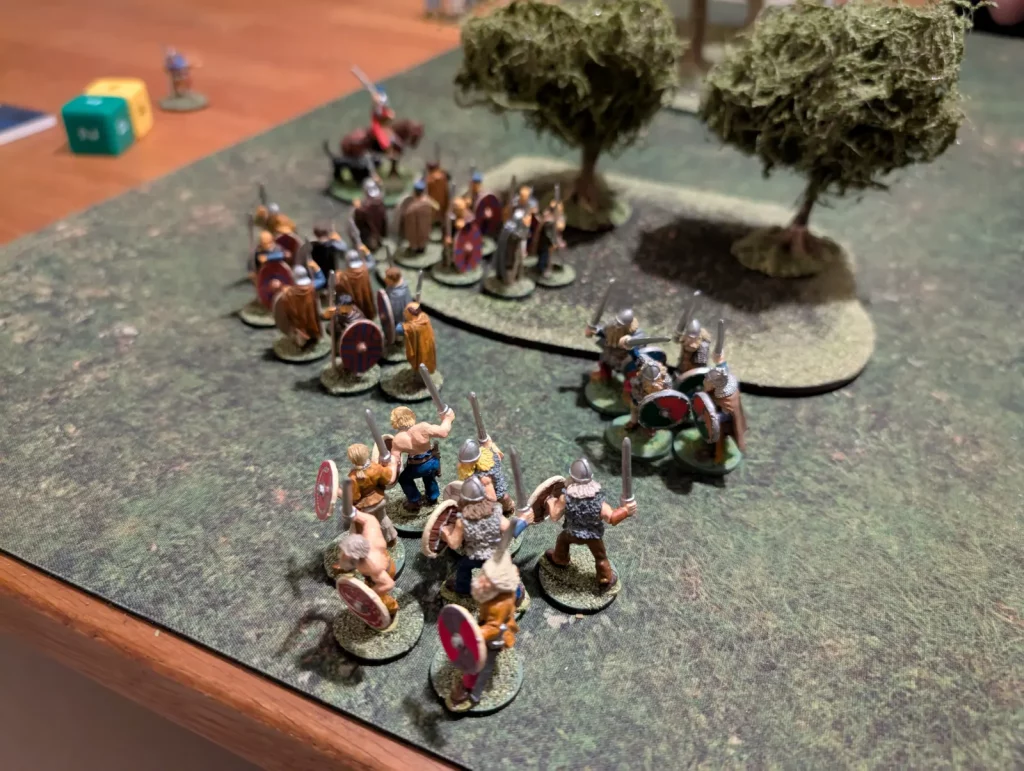
Fortunately I can use Call to Arms to active a unit to move with an extra +S distance, and also Britannia!to active another unit. So I just about manage to get everyone off the correct table edge, along with a We Obey from the Warlord.
The Saxons use Vivacity to get themselves within L of the table edge.
Game End
So the game ended, with everyone down the right end (or off) the table. The Britons lost 12 levee and 4 hearthguard. The Saxons lost 7 warriors.
6 turns was a very tight time frame to run the game in, and both sides only just managed to get where they needed to be by the end of the game. Often we know the winner by turn 5 or even 4, but in this case it was a lot closer. Partly this is because there’s going to be a second phase to the game, and every figure and unit counts for going into the next phase.
The Britons never got to attack the buildings, which puts the Saxons in a strong position in terms of recovering losses before the next game. It may have been better to leave my levees behind. This would have either given me a clear run at the buildings, or forced the Saxons to leave a unit behind to defend them.
Splitting my hearthguard off was a mistake, but I didn’t know where the Hero was going to turn up, and I wanted them nearby in case they were needed to provide support. If the Hero had turned up in one of the other woods, having the hearthguards there may have been the right choice.
Overall, it was a fun game, with decisions being important right up until the end. It might be interesting to see how it plays out with different tactics at the start. What if the Britons had been more aggressive and attacked the buildings? What if the Hero had been found early on?
Next week I hope to play out the second part of the scenario, which will involve trying to get the Britons to a fort. The fort will have defences, and so it will be up to the Britons to survive and put a stop to the Saxon advance.
We’ll roll to see which casualties actually survived as well.
I’ve got some similar scenarios sketched out as well – two to three session games using Saga or possibly Lion/Dragon Rampant. The nice beach terrain map I got partly to do Viking coastal invasions (invade the beach, then move further inland), starting with a large force and seeing how much of it survives over the course of two or three battles. I now have a nice ruined monastery as well, which might make for a good end goal for such a game.
We’ll see what things I learn from this scenario once it is complete.
3 Responses
-
Pingback: Getting Home – Gaming Chronicles
Looks like a good little campaign. Seems like the Britons have it quite tough to burn down two buildings to get resurrection role parity and at the same time having to search the woods.
My original idea was that the Britons started next to the buildings, so they would have a chance to attack in turn one. It was decided being able to attack before the Saxons got to roll any Saga dice was unfair. But changing it has the side effect that it’s now a lot harder to attack the buildings.