The Bloody Scots

Wargaming this week was another game of Saga: Age of Vikings, this time it was my Anglo-Danes against the Scots. Looking back through my previous posts, it appears that I have played the Anglo-Danes before, though I have no memory of doing so. As such, I wasn’t entirely sure about the best way to use the battle board for this war band.
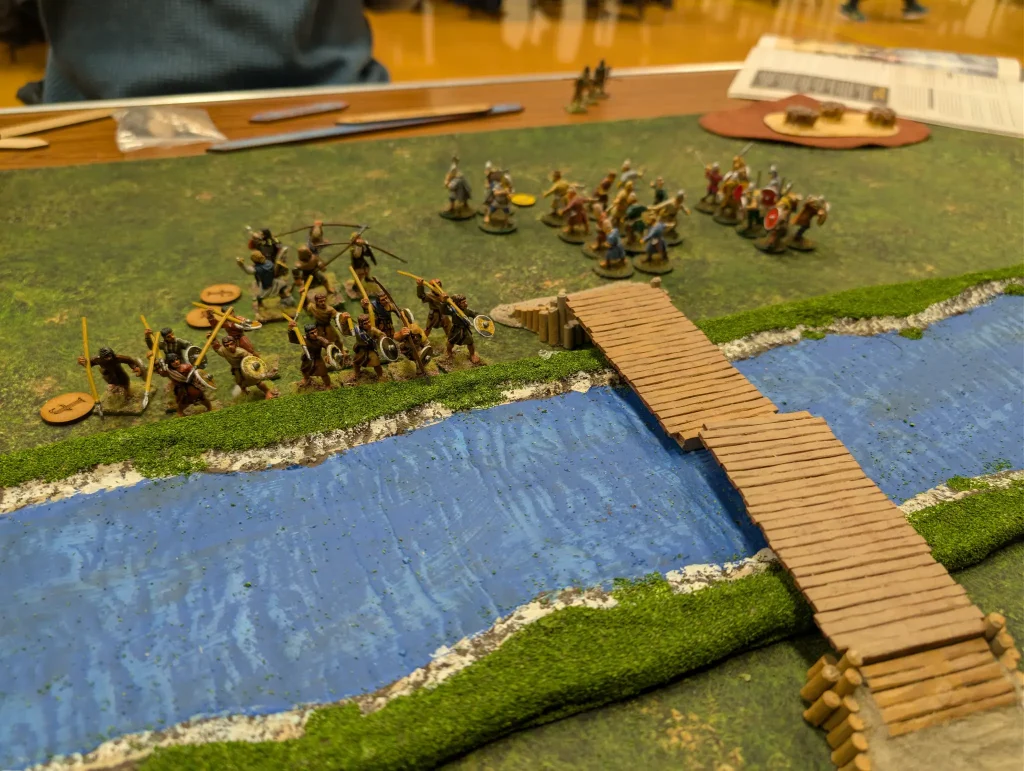
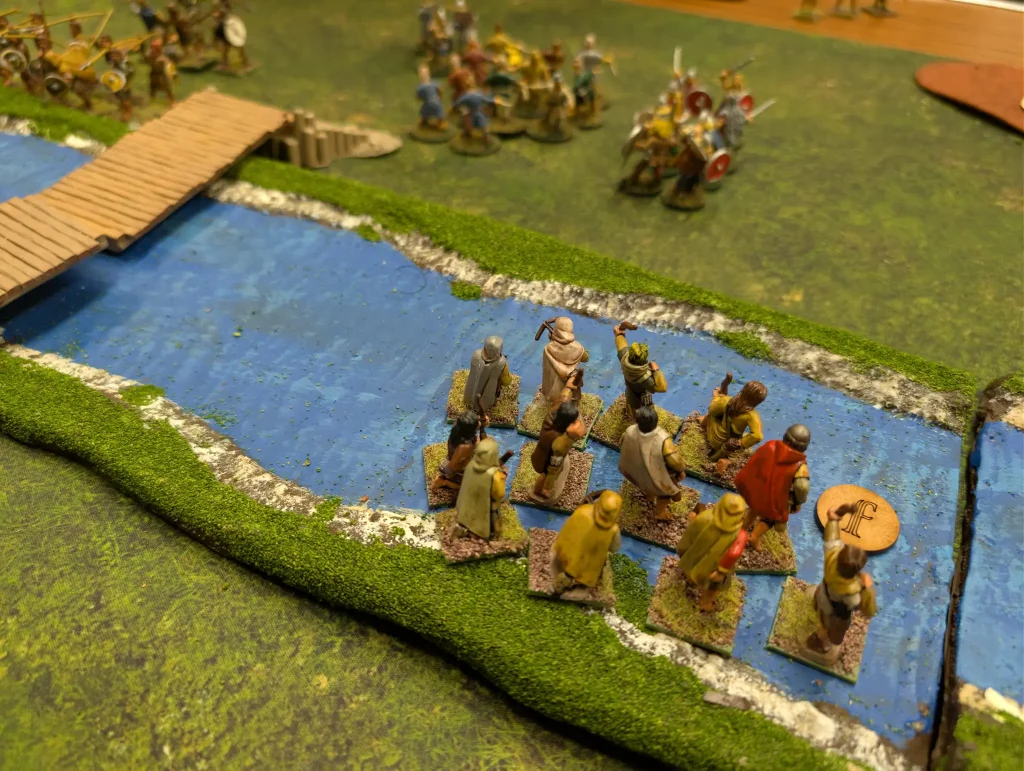
I have neither used nor played against the Scots before, so this was definitely going to be a new experience. The battle was an engagement at a river, where both factions were split across the river and were trying to join their forces together. Whilst killing each other of course.
Since history isn’t my strong point, something that I hadn’t been aware of is that the Anglo-Danes represent the very late Anglo-Saxons. So the Saxons that fought at Hastings are represented in Saga as Anglo-Danes, not Anglo-Saxons. Which explains why the Anglo-Saxons don’t get Dane axes, even though they were used extensively at Hastings.
I had assumed that the ‘Anglo-Danes’ were the Northumbrian/Dane Law part of England. So the Anglo-Saxons are the ‘middle’ Saxons, from the end of the ‘early Saxon’ period (represented in Age of Invasions) up until the end of the first millennium. I really should have read the faction fluff in the rule book more closely.
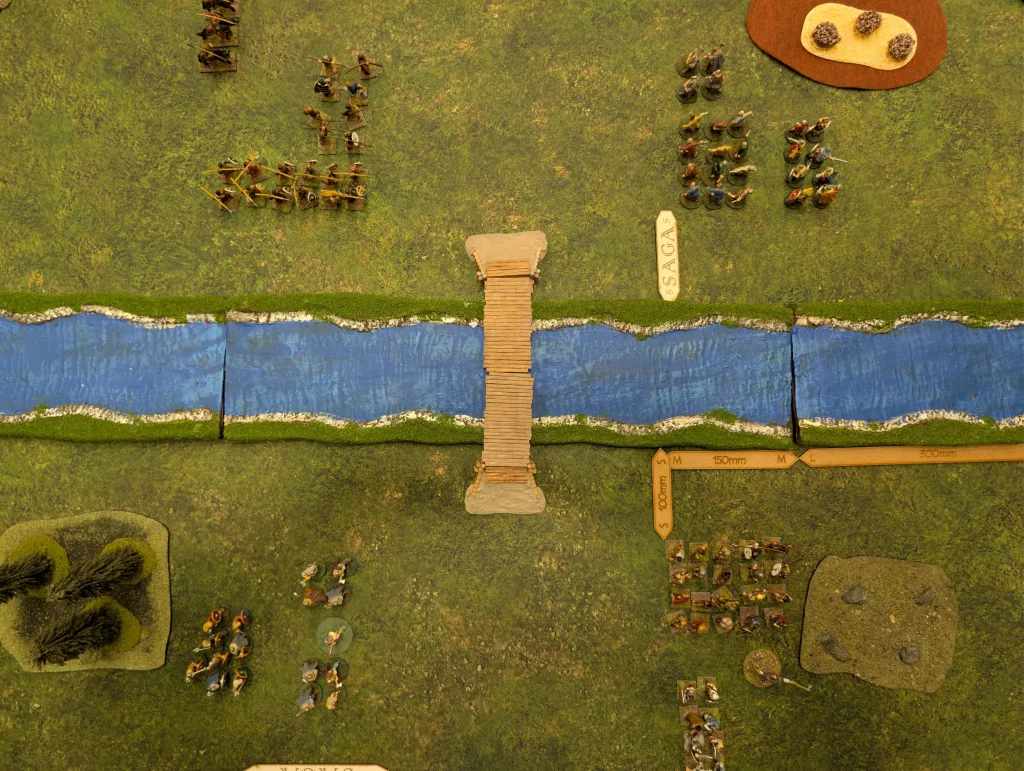
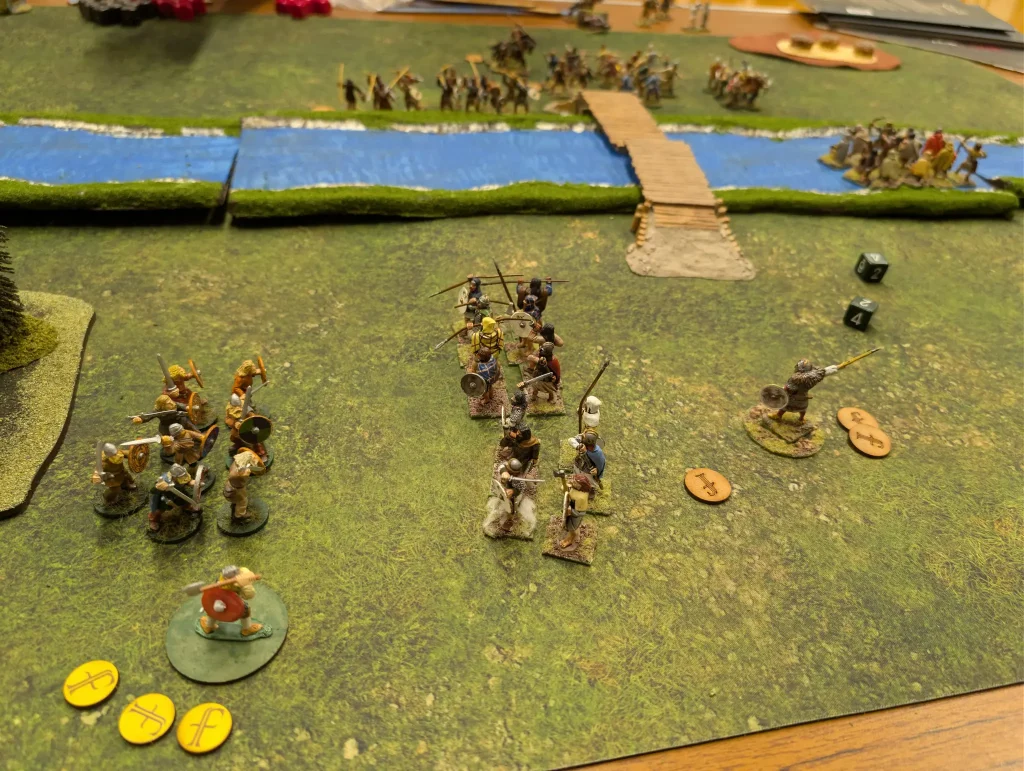
We played The Crossing scenario from the Book of Battles. The Scots were the first players, and took the NW and SE corners. My Anglo-Danes then had the SW (with the small woods) and NE corner of the table. A single bridge spanned the river, and the river counted as uneven terrain on both sides of the bridge.
Turn 1
The Scots had only three Saga dice in the first turn, but managed to move their Eastern levee towards the bridge with a We Obey, and shot at my hearthguard. They got a hit, but no casualties.
The Danes had a full set of dice. The Scots played No Respite as an Order/Reaction, which allowed them to put three dice on their battleboard, and I played Exhaustion, putting a fatigue marker down on three Scottish units.
I moved my levees into shooting range on the north bank of the river, and took some shots at the javelin equipped warriors, but failed to get any kills.
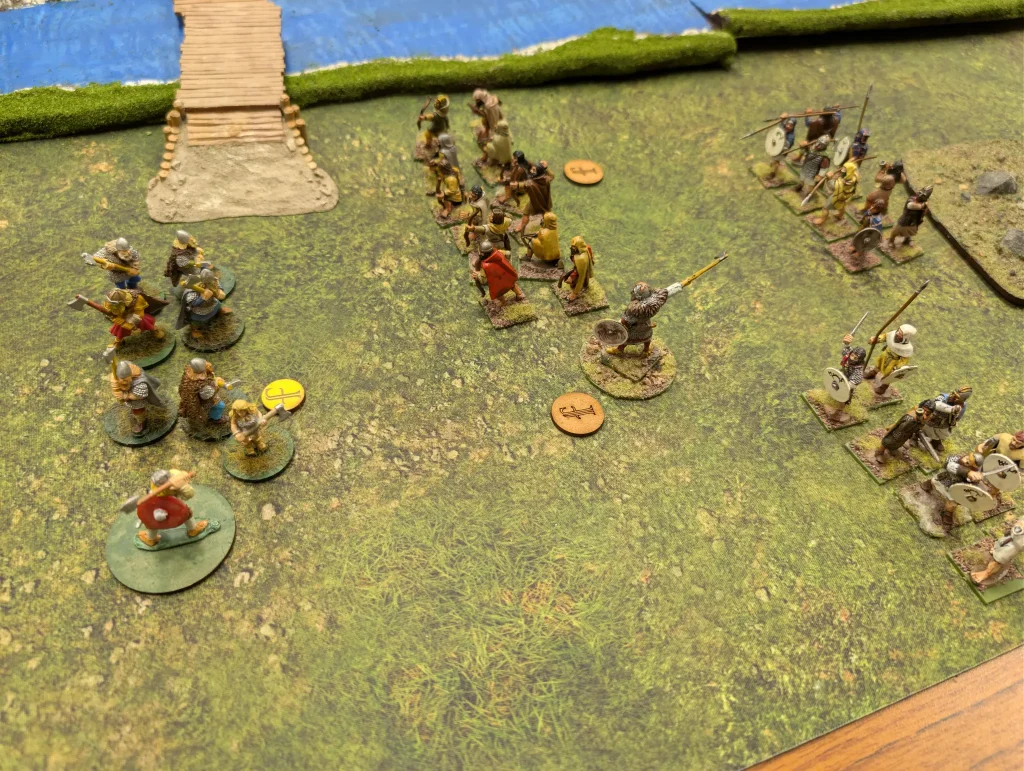
Then my hearthguard in the south went on the move. I had my warlord flanked by two units of 4 hearthguard, and they were all out in the open. This was a bit risky, but I decided I wanted to be aggressive and try and hurt the Scots early on. So I charged in against the levee bowmen with my hearthguard. They already had two fatigues, and as levee only had 4 attack dice to my 8.
They played Hold at Bay, which gave them 3 extra defence dice. I got 4 hits, but they defended against all of them. They got two hits on me, and a single kill. So my Hearthguard were driven back, having achieved absolutely nothing against some pathetic Scottish levee.
Since I was equipped with heavy weapons, by melee armour was lower than it would be normally, but I’d raised it to 6 using the levee fatigues. I also had +1 to my attack rolls. However… I completely forgot about this second feature of heavy weapons. In fact, it wouldn’t be until the end of turn 3 that I’d actually remember this. I’m not sure how badly this affected things, but it definitely wouldn’t have helped.
Turn 2
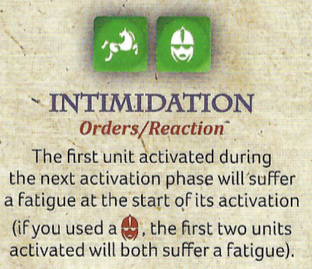
It was the Scots turn to go, and the Danes played Intimidation, forcing their first activated unit to take a fatigue. The levee south of the bridge took the hit, shooting at the Danish hearthguards and killing two of them. Then they fell back out of charge range.
The warriors to the north then moved up close to my slingers, and the Scots played Reach, which seems to be a pretty powerful ability. Which is why it costs two dice.
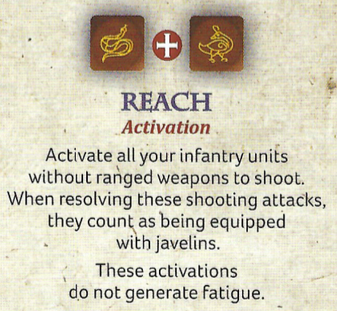
Each of their warrior units got to take a shooting attack as if they had javelins. In this instance, they were able to activate three units. However, the attacks weren’t hugely effective this time around, and I lost a single slinger.
The Danes responded by moving their hearthguards up on the northern bank, and shooting with the slingers, killing one of the warriors. I then had a cunning plan, which I cocked up.
My hearthguard charged into the warriors, planning to chain Unforgiving and Crush the Weak together to lower their armour and then gaining attack dice due to them having low armour. However, though Unforgiving gives a unit fatigue, I can’t then use the fatigue in that melee. So my attack wasn’t as effective as I’d wanted. I got two kills, to their one, so the Scots were at least driven back.
Turn 3
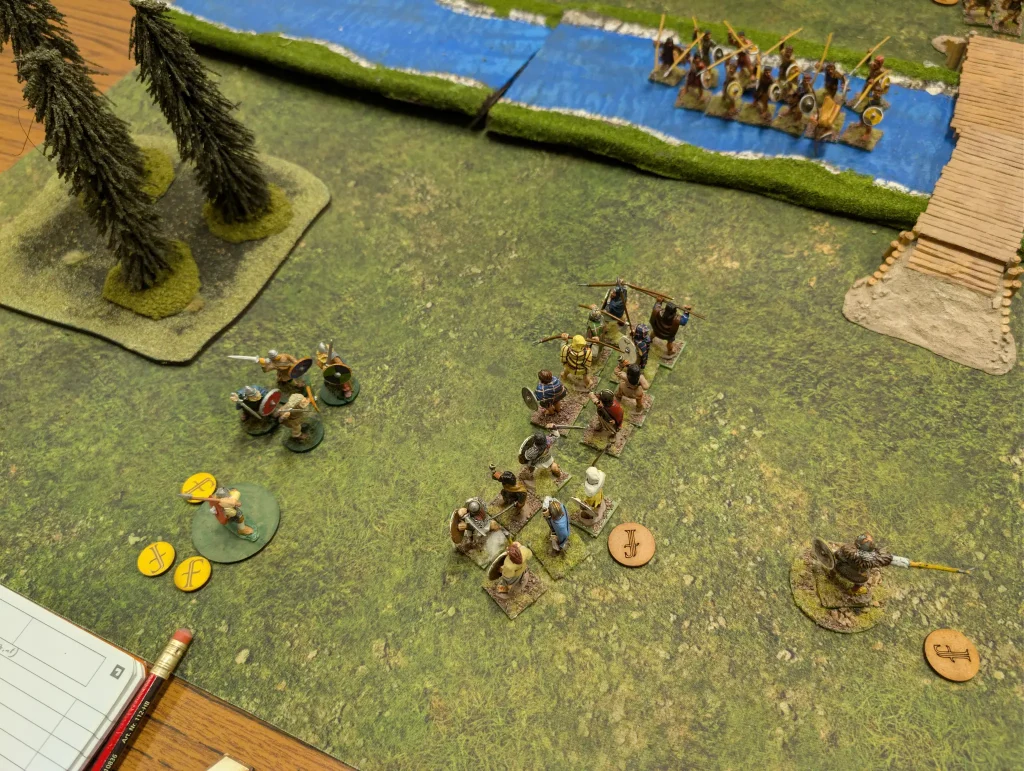
The Scots started with some shooting, getting five hits against my warriors. However, I managed to save all of the hits. Then it was time for Reach again. I was lucky again, and lot only a single hearthguard to three different shooting attacks. My bodyguards near by warlord though where starting to look rather weak.
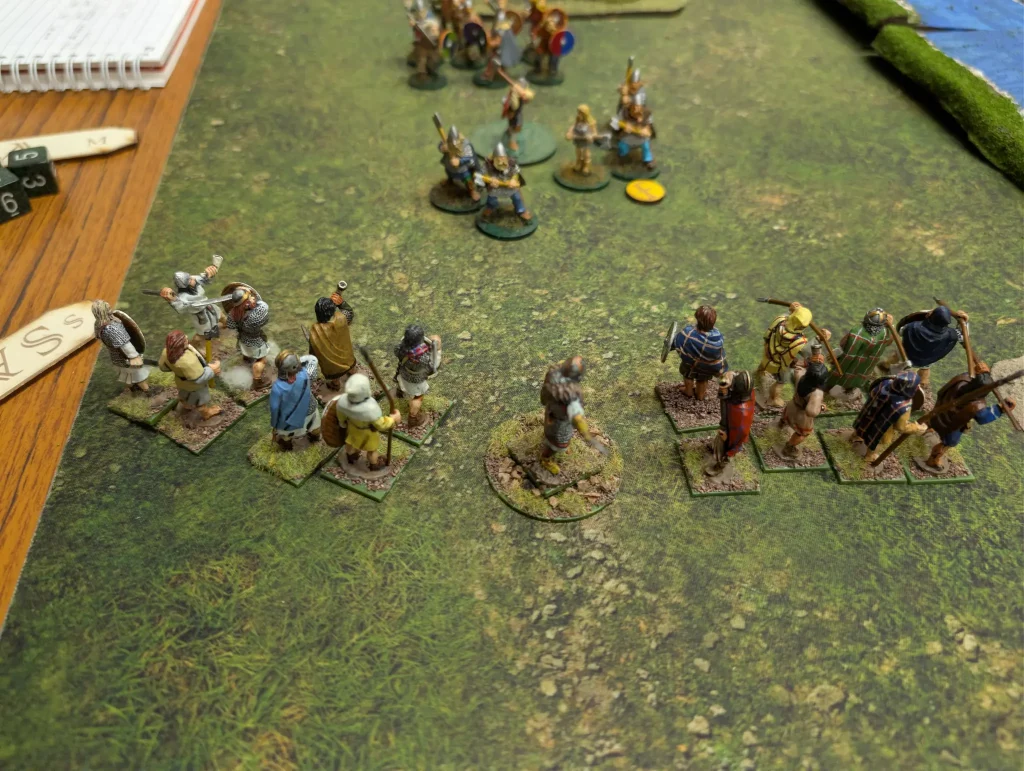
The mounted Scottish hearthguard charged in against my hearthguard, getting a total of 7 hits due to my armour being dropped to 2. Though my unit was wiped out, I at least killed two of the Scots.
The Danes were not in great shape, and I had decided that I’d lost the battle by this point. What I did want to do though was to try and take out the Scottish warlord, whatever the cost. My plan was to use my two hearthguard units to weaken the warlord, and then my own warlord would finish the job.
I expected both my hearthguard units to either be wiped out or forced back, so the Scottish warlord would remain where he was, and my hearthguard wouldn’t block the charge from my warlord.
My first unit, now down to a single hearthguard, charged in. He got a single hit, and caused a casualty, so the Warlord was forced to use resilience and take a fatigue, and got a second fatigue at the end of the melee. My unit was wiped out.
My second unit charged in, but they had a single fatigue, and the Scots used that to shorten the charge distance. I failed to make the charge, so I had to use a second activation die to try charging again. At this point I finally remembered that I should be getting +1 on my attack rolls due to having heavy weapons.
This gave me a single hit, and my unit was wiped out. The Scottish warlord was now exhausted. However, this second unit of slightly larger hearthguards were in S of my warlord, so my warlord took a fatigue. I was out of activation dice, and down to a single Determination ability.
I activated to charge, and it was shortened due to my fatigue, so I was unable to go in and finish the job.
I had two abilities stored up for this – Shieldwall and Like Rocks, to try and ensure my warlord survived. I was now unable to use them. I possibly should have used one of them for the second unit, to prevent it being wiped out. But I hadn’t considered the possibly of taking fatigue on my warlord.
Turn 4
With the Scots crossing the river, they began shooting at my warriors on the northern bank, killing two of them. The warriors near their warlord moved forward, protecting him and getting them within M of my units. Then Reach was used again, getting another kill across three shooting attacks.
The Danes used their Determination to rest their Warlord, and charged against a unit of warriors. We each got two kills, so I fell back, exhausted.
Turn 5
The Scots continued to push their shooting attacks, using Diversionary Volley, which at this point was really just a way to activate levee with a serpent die, because I had no way of generating defence dice. Two more of my warriors went down.
Then it was Reach, and three attacks killed 4 of my warriors.
The Danes were in no position to continue the fight, so fled the battlefield.
From the very first turn, the game had gone against the Anglo-Danes. As I said, I wasn’t quite sure how to play the Dane battle board, and even now I’m not certain what the best tactics are for Danes.
They don’t have any strong melee abilities, and they don’t have any great movement abilities. They can add fatigue to an enemy, and slow them down, but don’t have as many abilities to make use of this as the Goths do. They have some expensive defensive abilities, but if they’re wanting to go on the attack, they won’t have many activation dice left over after selecting the two dice advanced abilities.
So I think that they’re good as a defensive force, but I’m not sure how good they are at being aggressive. Annoying the other side by putting fatigue on them, and preventing them from doing anything might be a tactic, though would lead to a slow game. Lord of War looks very powerful, but requires an activation, and if a unit is exhausted it can only be activated to rest. So my reading of it, is that it’s useless if your warlord is already exhausted – which is when you’d want to use it most. Though it doesn’t say that you need to activate your Warlord – but the ability explanation in the book doesn’t help in clarifying this.
One issue I do have with the Saga rules, is that the ‘in-character’ ability clarifications for each faction often don’t clarify the bits of the abilities that need clarifying, and instead try to focus on making people look stupid for wanting things clarified. Which is a really annoying writing style.
The Scots seemed to have a lot of good attack and defence abilities, and in this game they were definitely used far more effectively than the Danes used their abilities.
It was an interesting game, and good to go up against a faction I’ve never encountered before. At some point I’ll need to do a rematch, hopefully after figuring out how to use the Anglo-Danes.
I also need to do something about the tables that we use. Since we use two tables pushed together, there is always a ridge running across the centre of the battlefield. This means that terrain elements (such as a river) that are put across the centre end up being unbalanced. Which also meant the bridge didn’t quite fit either.